Changing headlight housings

Disclaimer: Links on this page pointing to Amazon, eBay and other sites may include affiliate code. If you click them and make a purchase, we may earn a small commission.

Ristin

Full Access Members
Joined
Oct 16, 2014
Posts
116
Reaction score
16
Location
Idaho
Old housings were yellowing and look dated. They don't look as bad in these pictures as they do in person.

attachment.php


In this picture the light seems bright but it's not. Night driving is not fun.

attachment.php


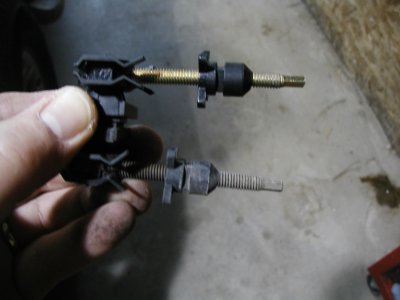
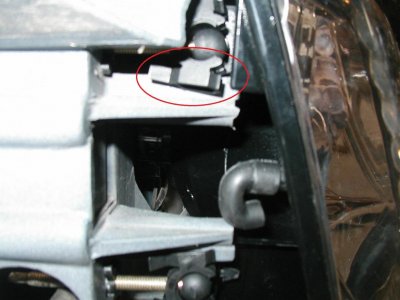
Open the hood and look for these tabs

attachment.php


They pull up about an inch to release the alignment pins. You may have to push towards the firewall a bit as you pull up. There is a locking tang to keep them from coming up on their own. My passenger side slid right up, but I had to push the drivers side tab back while pulling up.
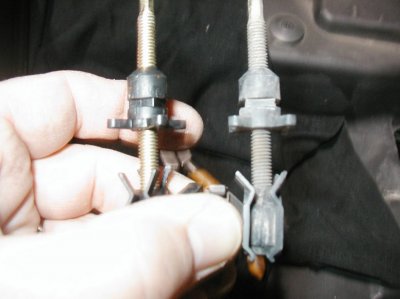
This is how they look when lifted up.

attachment.php


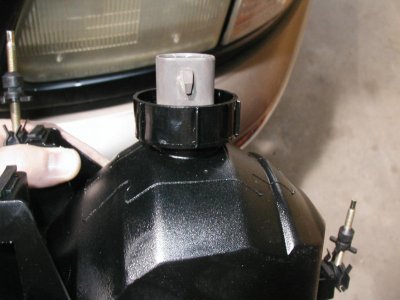
Once released the headlight housing slides out quite easily.

attachment.php


P1010005.jpg

P1010006.jpg

P1010007marked.jpg

P1010008.jpg

P1010010.jpg
 
Last edited:
OP
OP
Ristin

Ristin

Full Access Members
Joined
Oct 16, 2014
Posts
116
Reaction score
16
Location
Idaho
I unplugged the harness from the old light but left the bulb in the old housing until I was ready to install the new housings. The new housings came with locking rings for the bulbs. Here's the new housing with bulb installed. Be careful not to touch the bulb surface as oils from your fingers will cause the bulb to fail earlier.

attachment.php


Another member posted they swapped the old adjusters to the new housings because adjusting the headlights is difficult. I was unable to do that as my after market housings clip holes were much smaller than the OEM units. I removed them and matched them up hoping the alignment will be close enough.

attachment.php


attachment.php


After setting the alignment screws and installing the bulbs the housings are ready to install. I had trouble with the passenger side. The tabs kept binding up or not sliding on.

attachment.php


I removed the turn signal housing and that made the job easier. There is one 8mm bolt and the signal housing slides right out.
 

Attachments

  • P1010012.jpg
    P1010012.jpg
    87.9 KB · Views: 98
  • P1010013.jpg
    P1010013.jpg
    92.1 KB · Views: 100
  • P1010014.jpg
    P1010014.jpg
    92.6 KB · Views: 109
  • P1010015marked.jpg
    P1010015marked.jpg
    89 KB · Views: 98
OP
OP
Ristin

Ristin

Full Access Members
Joined
Oct 16, 2014
Posts
116
Reaction score
16
Location
Idaho
Making sure the alignment pins all slide on their respective posts, push the housing in until it seats all the way. Once the housing is seated all the way in you will be able to see the groove the locking tabs slide over. Push the locking tabs down, reconnect the harness if you haven't all ready and stand back to enjoy.

attachment.php


attachment.php


I chose the Spyder Chrome Euro style. These are a basic upgrade but look good. I didn't get the matching turn signal housings but I might at a later date.

P1010016.jpg

P1010017.jpg
 
OP
OP
Ristin

Ristin

Full Access Members
Joined
Oct 16, 2014
Posts
116
Reaction score
16
Location
Idaho
Finally got around to driving Expy at night. The light from these new housings is much better but the adjustment is way off. I had adjusted the new housings to match the old but in retrospect these are a different brand and lens type from OEM so the chances of the adjustment being the same was unlikely.
 
Top