My 2000 5.4l Eddie Bauer 4x4

Disclaimer: Links on this page pointing to Amazon, eBay and other sites may include affiliate code. If you click them and make a purchase, we may earn a small commission.

OP
OP
ExplorerTom

ExplorerTom

Full Access Members
Joined
Apr 2, 2015
Posts
2,245
Reaction score
991
Location
Colorado
Pics of this most recent mod would be great. I've been following this thread since you first started it. Keep up the great work.

Honestly, there's not much to take a picture of. Imagine a bunch of 12 and 10 gauge wires and a couple relays.
 
OP
OP
ExplorerTom

ExplorerTom

Full Access Members
Joined
Apr 2, 2015
Posts
2,245
Reaction score
991
Location
Colorado
I finally got around to adding some cargo tie downs in the cargo area.

I ordered 2 sets of these:
http://www.uscargocontrol.com/Ratch...stems/Anchor-Point-Tie-Down-Kit-8pc-w-2-Track

I was originally going to go with a couple 4 foot tracks. And while the adjustability of the track would be nice, the extra cost just wasn't worth it.

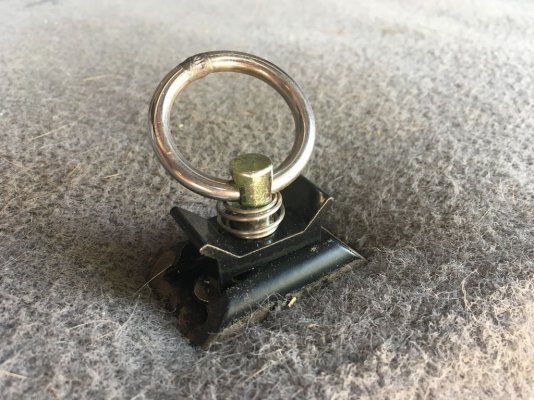
I added the 8 L-track tie downs and 4 2nd gen Explorer tie downs.
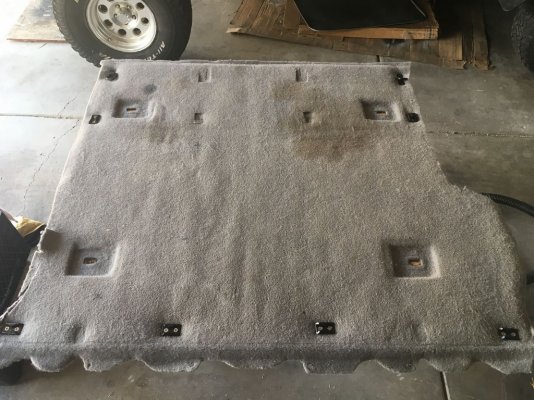
197FEB3D-27A9-40CB-A804-34A96523627B.jpg

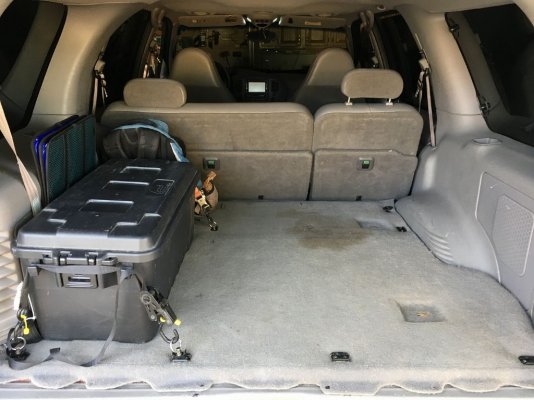
I hid 2 L-tracks and 2 Explorer tie downs under the carpet:
949F7B98-3214-4FA3-9FC9-98BD3482A365.jpg

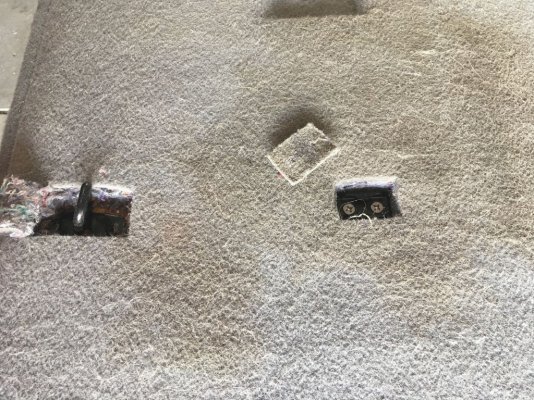
The extra length of each screw was ground down:
1156395F-D4C6-438D-A886-0F30D251ED6B.jpg

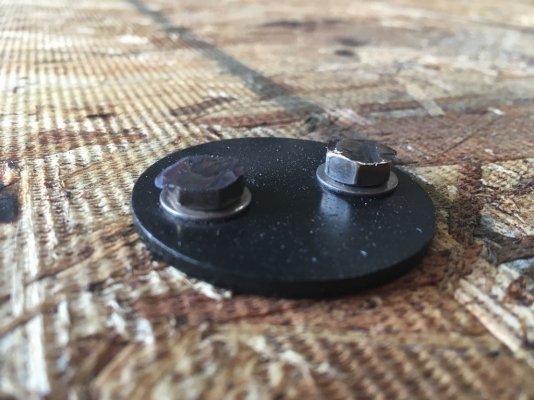
These clips are removeable when I don't need them:
6A30CB44-7EB5-4D33-8335-CE5E2D228558.jpg

I used to have my junk in some milk crates pushed up against the back seats. Now I have it secured and still accessible from the open tailgate:
FA6D7159-CE65-43E9-9D86-20327813276C.jpg
 

hartsemperfi

Well-Known Member
Joined
Nov 30, 2015
Posts
47
Reaction score
2
Location
md
I just finished up the Daniel Stern headlight rewire.
http://www.danielsternlighting.com/tech/relays/relays.html

It works! It's not dark enough to try them out. I know someone that also did it and says his lights are really bright. I'm glad all the wiring is hidden underneath that removeable plastic piece above the radiator.

I bought the relay kit back in October and finally got around to doing it.


I just skimmed through this but lemme ask your still using the original headlight switch for switching purposes or are you running a new switch?
 
OP
OP
ExplorerTom

ExplorerTom

Full Access Members
Joined
Apr 2, 2015
Posts
2,245
Reaction score
991
Location
Colorado
I just skimmed through this but lemme ask your still using the original headlight switch for switching purposes or are you running a new switch?

Factory switch. All the switch does now is turn the relay on. The point of doing the rewire is to run thick gauge wire for all the high power stuff.
 
OP
OP
ExplorerTom

ExplorerTom

Full Access Members
Joined
Apr 2, 2015
Posts
2,245
Reaction score
991
Location
Colorado
Lately I've been noticing a popping noise from the left front. Tonight I finally jacked up that wheel and I put my pick-ax under the tire (makes a great fulcrum). There's a ton of play in the lower ball joint. Ordered a new lower control arm. I know I could get the ball joint itself for significantly less than the whole control arm- but the new control arm come with new frame bushings as well (which could be bought for significantly less as well.....). But now it's a simple remove and replace. No fighting with 209,000 mile stuck bushings, no ball joint presses. All I need is a torsion bar unloading tool.

Passenger side is still nice and tight.
 
OP
OP
ExplorerTom

ExplorerTom

Full Access Members
Joined
Apr 2, 2015
Posts
2,245
Reaction score
991
Location
Colorado
I did the ball joint test the other day (jack up the control arm and lift just the tire with something) and saw a ton of play in the lower ball joint. I bought a new lower control arm, which may or may not have been a great idea........

With the old ball joint still installed, it was tough to see just how bad it was. But with it off and the boot removed....... Yowzers!
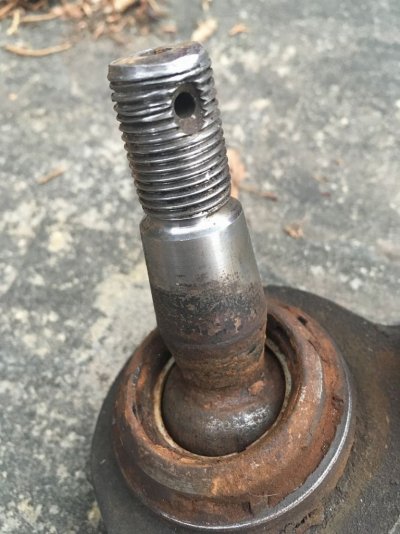
1180B5E6-283F-465C-A0DF-5E74DED3FA37.jpg

It was dry. The grease zerk on top had come off (or was never installed?) and I could look down into the joint. And lots of play up and down even by hand.

Getting the arm out. That was a chore. I was able to separate the torsion bar from the torsion key, but it did not want to come out of the control arm. And the sway bar link was frozen and had to be cut off. But the arm actually came out fairly easy- with the torsion bar still attached.

I spent some time torching the control arm but I figured there's so much metal, it's tough to actually get any meaningful heat into it with the torch I have. Lots of PB Blaster was sprayed on it. I used an old socket held with a pair of channel locks on the end of the torsion bar and hit it with my BFH. Nothing. I decided that since this arm was trash anyway, I'd take the Sawzall and see if I could cut into the arm at the hex and relieve that clamping force. I didn't get all the way through it, but I got close.
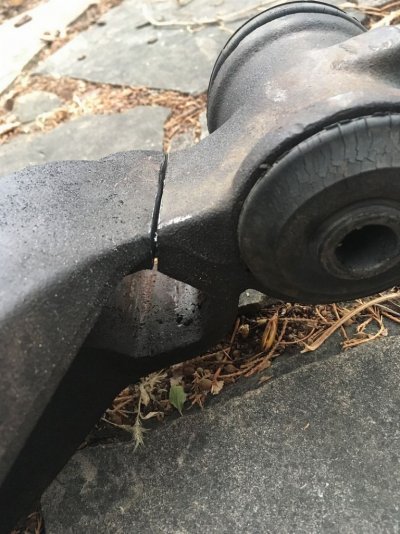
0421F910-38A5-4A90-866B-3226E47AA172.jpg

I went back to the BFH method and started seeing progress. Eventually it popped out.

The old arm:
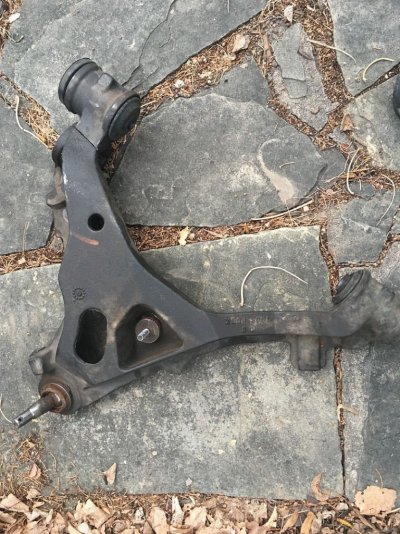
BCCF4544-5535-4B51-9D7A-BC7CE7E8F483.jpg

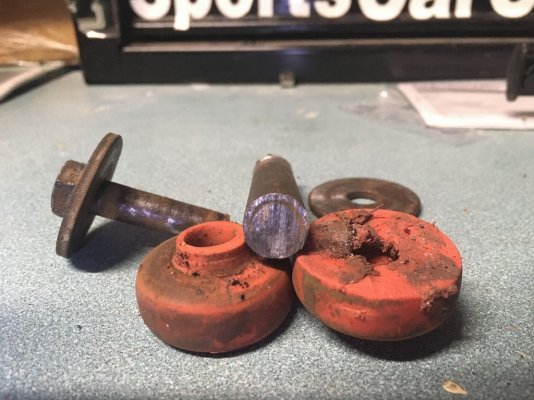
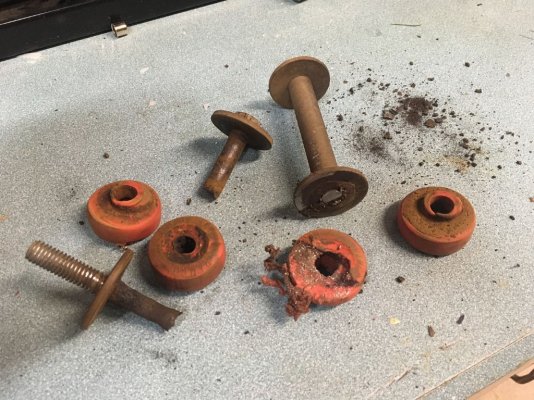
The sway bar end link:
919A0F94-5C41-472A-8D94-38D8EF42A754.jpg
You can see how the outer sleeve has become one with the inner bolt.

Reinstalling was fairly straight forward. But I did need to clearance the sides of the bump stop and bottom of the shock attachment to fit the new control arm. My grinder made pretty easy work of it. I used anti-seize on the torsion bar ends just in case I'm ever back in there doing this again.

The bushings at the frame pivot point were still good shape. Buying the whole arm probably was not the best choice financially. Oh well.

I've still got a fair amount of torsion bar adjuster bolt sticking out. I don't think I'll need new keys for the amount of lift I want to do.

On road impressions are great. I never thought the front end felt bad when hitting bumps, but now it feels very solid. Even driving around with a half connected sway bar is barely noticeable.
 
OP
OP
ExplorerTom

ExplorerTom

Full Access Members
Joined
Apr 2, 2015
Posts
2,245
Reaction score
991
Location
Colorado
So after a week of driving around with no sway bar connected, the ride honestly wasn't too bad. "Supple" is about the best way to describe it. It wasn't quite as responsive though and I think it rolled pretty good.

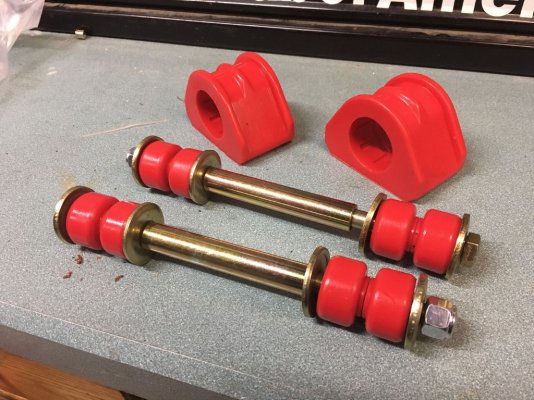
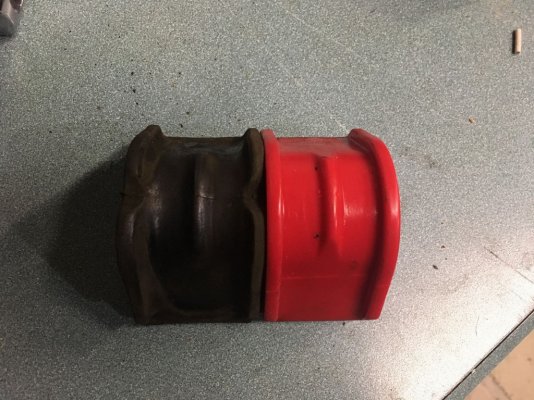
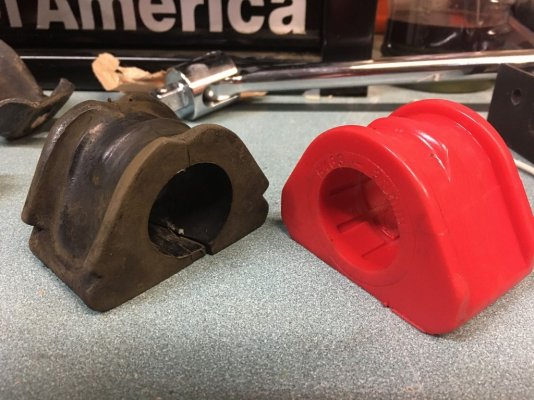
I ordered some Energy Suspension replacements that also included the sway bar bushings.
3A193304-EC30-4018-873A-D6EE52189FB3.jpg

I had to cut out the passenger side link as well:
8F0C87EC-6CD3-47D2-86D9-3E6C7BD06A02.jpg

The sway bar bushings came out easy and are the same size as the old bushings.
BE29A474-F168-4222-86BD-C81CC68BFA76.jpg
A1E23928-4B77-4AC5-BF66-B03F22975713.jpg

The result is pretty amazing. Now the steering is really responsive. And going over bumps at an angle seems tighter than before.

Not bad for about $35.
 
OP
OP
ExplorerTom

ExplorerTom

Full Access Members
Joined
Apr 2, 2015
Posts
2,245
Reaction score
991
Location
Colorado
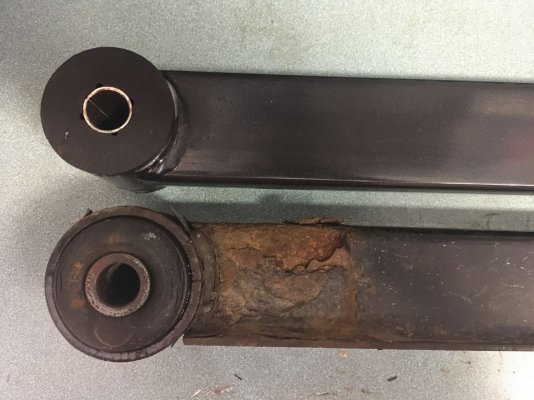
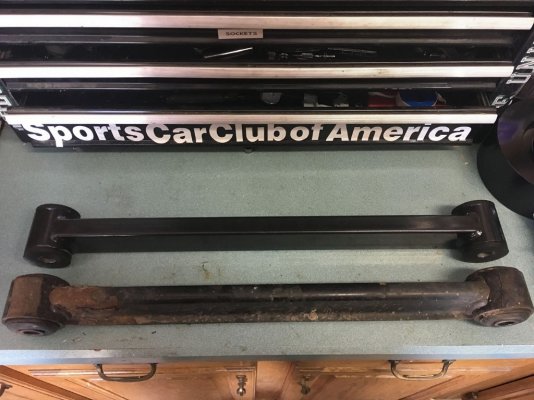
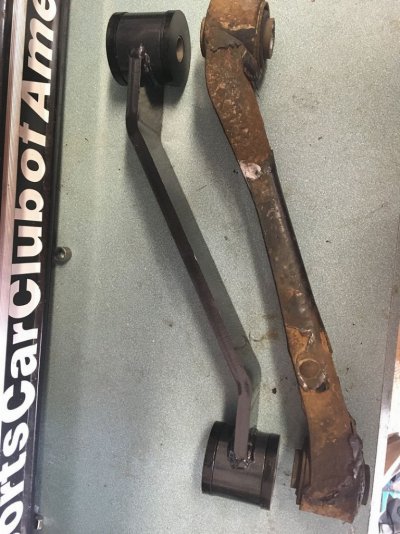
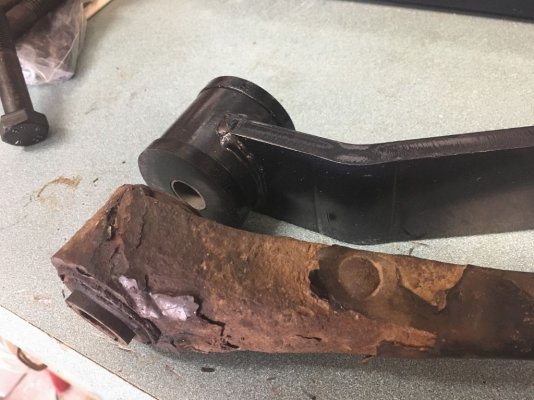
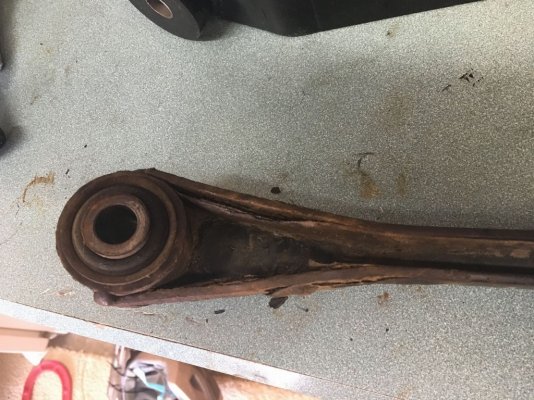
I know my trailing arms aren't nearly as bad as some that I've seen, but I figured if I was offroad, I didn't want my sorta rusty arms to fail at the wrong time.

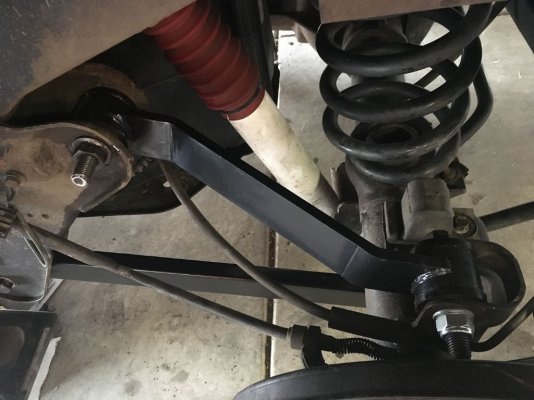
I ordered new arm from Supreme Suspension. Their prices are more reasonable compared to PMT.

The overall project........ while not "hard" some of the bolts were much more of a PITA than others. The left upper bolt needs to be cut off because the gas tank is in the way. I think my impact gun needs to be replaced.

Factory on the bottom:
A5FC126C-EB68-4511-AFD0-49ADF6C245B6.jpg
F3C08D6C-6B4E-414F-A386-51429792A99F.jpg

Factory on the right:
A4FFF2E0-FEF9-42B7-8547-18A798F7F995.jpg
AACF4596-6C1A-4C82-AD8C-F58635EFFB08.jpg
BB11E405-3F85-4380-A4F0-7B2C0CAD77DC.jpg

Getting the new links lined up took a little bit of creative rigging. The right side went in pretty easy but the left side I needed to use the factory tire jack to push the axle back enough to line the bolt holes up.

BF9D7679-5913-4E8D-9CBE-C7F3A0789EFE.jpg

The initial test drive is favorable. It's not a night and day difference but it seems tight and responsive. And the piece of mind of not having those rusty pieces back there is nice.
 

poorboy1964

Full Access Members
Joined
Oct 10, 2016
Posts
122
Reaction score
26
Location
Riverton Utah
Nice I have looked at the supreme stuff lift blocks and keys these look well made.
Did they come with new bolts?
 
OP
OP
ExplorerTom

ExplorerTom

Full Access Members
Joined
Apr 2, 2015
Posts
2,245
Reaction score
991
Location
Colorado
They did but i reused the stock hardware. The stuff they sent was grade 8.8 and the stock stuff is 10.9.

The stuff is pretty well made.
 
Top