03 Expedition Solid Axle Swap

Disclaimer: Links on this page pointing to Amazon, eBay and other sites may include affiliate code. If you click them and make a purchase, we may earn a small commission.

Russell Lewis

Full Access Members
Joined
Oct 1, 2017
Posts
83
Reaction score
13
Location
Kentucky
Ok, to be 100% honest: this project is an ambitious desire.

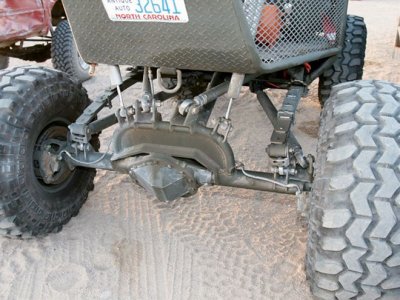
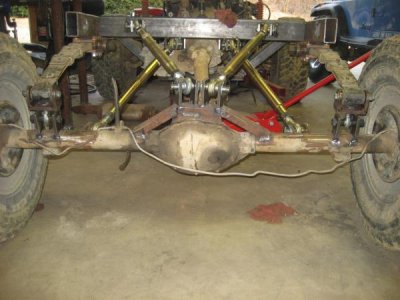
But, if you want to do straight axle swaps front and rear here is what I recommend (better be handy with a welder and be able to fabricate some parts):

Leaf springs front and rear; by far the easiest.
Realistically any matched set of axles (same gearing) can be made to work. I recommended the CUCV axles (from military GM vehicles from mid 70s-late 80s) because they fit the stipulations you made earlier (4.56 gears, possible lockers) from the factory. That and they are basically THE coveted factory built readily available off road axle sets. Tried and true, tough and reliable. Only “downfall” is they are 8lug (I say grab some HMMWV rims and tires, bolt right on and gives you 37-12.50 tires). There are several varieties for the rear: full floating/semi-full floating, drum brake, disc brake; but all are built off of the basic 14 bolt platform.

Springs: easiest thing to do is figure out your required amount of lift to clear the tire size you want use, then buy some readily available off-the shelf springs. 80s Chevy lift springs tend to be pretty affordable and easy to find. Once you know what the springs you plan to use are, then you can make your spring mounts for the frame and spring perches for the axles. The spring mounts are typically very simple. Another bonus to leaf springs is that they don’t have to be a perfect 90 degrees to the axle. For example the frame rail is not perfectly straight on the front end, this results in the springs being on angle like this: / \ which is OK and simplifies your install a bit. Obviously you can’t mount the springs at a 45, but not being 90 is ok.

Brakes: i highly recommend a hydraboost brake booster. Utilizes power steering pump pressure to run the brakes. Consistent power especially if you end up on the brakes a lot and you will never run out of vacuum.

Steering: you have a variety of options for steering, you will need to choose one. At a minimum you will have to do some trial and error (or in-depth research over on Pirate) to establish correct pitman arm length, then steering geometry. Basically a bar that goes from the pitman arm to the drivers side steering knuckle. This should be as perpendicular to the axle as possible. You can go to a hydraulic ram style steering, but that will require additional fabrication, parts and plumbing.

Driveshafts: connecting the t-case to each axle requires a driveshaft. Your stock driveshafts are no longer the correct length and cannot be used. Upgrade them while you are building. Since the CUCV driveshaft u-joints are 1350, I recommend just having shafts built with 1350 joints, that way you only have to carry 1 size of u-joint for a spare. There are adapter u-joints that CAN be used, but they are a gamble.

Ensuring all your fabrication, spring mounts and perches are square/plumb/level is THE most important thing. You need to make precise measurements for drilling holes, welding on tabs, etc. because 1/8” off at the frame compounds significantly at the wheel. 1/8” difference is spring mount from d side to p side can result in 1.5” difference at the actual wheel when it comes time to aligning. Nothing will drive you more crazy than having a death wobble of consistent pulling/pushing to one side because of a poorly laid out spring mount.

Most of the 37 from the military are timed out due to age not wear. Here’s how to check

For tires manufactured in the year 2000 – present
The date of manufacture is the last four digits of the DOT code. The first two digits are the week of manufacture, and the last two digits are the year. For example, if the last four digits of the DOT code are 0203, that means that the tire was manufactured during the second week of the year 2003. Pretty simple, right? However…if your tires were made before 2000, it gets a bit more complicated.

For tires manufactured before the year 2000
The date of manufacture is the last three digits of the code. The first two digits refer to the week within that year. For example, if the last 3 digits are 022, it means that the tire was manufactured in the second week of the year, and the year is the second year of the decade. This is where it gets confusing -- there's no universal identifier that signifies which decade, so in this example the tire could have been manufactured in 1982 or 1992. Some tires do have a small triangle following the DOT code to indicate the 1990s.
 

USMCBuckWild

Full Access Members
Joined
Oct 21, 2016
Posts
495
Reaction score
178
Location
Camp LeJeune, NC
Most of the 37 from the military are timed out due to age not wear. Here’s how to check

For tires manufactured in the year 2000 – present
The date of manufacture is the last four digits of the DOT code. The first two digits are the week of manufacture, and the last two digits are the year. For example, if the last four digits of the DOT code are 0203, that means that the tire was manufactured during the second week of the year 2003. Pretty simple, right? However…if your tires were made before 2000, it gets a bit more complicated.

For tires manufactured before the year 2000
The date of manufacture is the last three digits of the code. The first two digits refer to the week within that year. For example, if the last 3 digits are 022, it means that the tire was manufactured in the second week of the year, and the year is the second year of the decade. This is where it gets confusing -- there's no universal identifier that signifies which decade, so in this example the tire could have been manufactured in 1982 or 1992. Some tires do have a small triangle following the DOT code to indicate the 1990s.


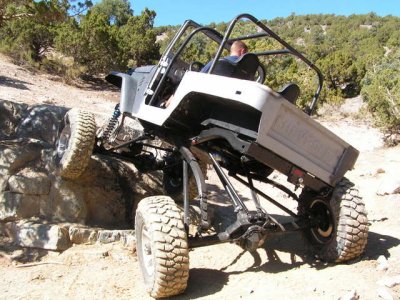
Government Liquidation sites have wheels tires that are less than 7 years old at very good prices. I have bought and sold several sets without issue. The oxymoronic thing about the military is the high waste of money. If a unit orders 20 rim/tires but are only authorized to maintain an on-hand quantity of 10, the other 10 (already bought and paid for) have to be removed from on-hand and sent to DRMO. If another unit does not pick them up, they are auctioned off. So, it is possible to purchase a brand new set of tires and rims that are less than a year old and have ZERO miles for pennies on the dollar (think less than $80 for a set of 4).

The one recommendation I DO have is removing the run-flat insert and balancing them. The run-flat adds 12 or 18lbs to each rin/tire.
 
OP
OP
scoot0073

scoot0073

Full Access Members
Joined
Dec 30, 2016
Posts
519
Reaction score
185
Location
Georgia

USMCBuckWild

Full Access Members
Joined
Oct 21, 2016
Posts
495
Reaction score
178
Location
Camp LeJeune, NC
9129F3D3-338D-4C5D-967B-0DB210E0A9D7.jpeg 5F5F4C97-7844-4558-9CE2-5E3DFF41CCD8.jpeg
Thanks for the find.
Man that thing is a Tru Beast.
Granted I'm not going that extreme as I want to have my to be a daily driver but
I see by going to the leaf springs front and back will be cheaper on me to do the SAS but I wouldn't get the articulation but I would get the 8" lift..
Which the 3 and 4 link I could always do at a later time .


Sent from my Nexus 6P using Tapatalk

You can change out in the future to a 3l/4l later on if you please as the ground work had been done.

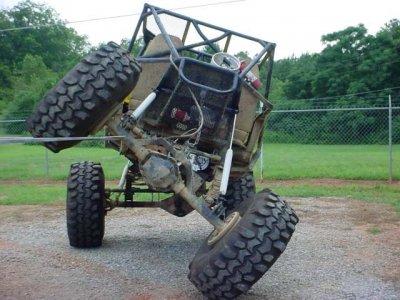
You will be surprised at the amount of flex you can get from properly set-up leaf springs. Most people have 5-6 leaf spring packs forheight which makesthem VERY stiff. By using proper springs, you get lift and articulation.

I did an 87 Toyota with a reverse mount rear leaf set-up. Leaf springs were designed to be used like a U. But, if you mount it upside down with a single rigid mount on the frame, the spring lies along the frame and curves down to a single rigid eyelet mount on the axle tube. This with a good 3 point location mount made for ridiculous articulation. Was definately NOT awesome for driving on the road.
 
Last edited:

USMCBuckWild

Full Access Members
Joined
Oct 21, 2016
Posts
495
Reaction score
178
Location
Camp LeJeune, NC
Negative, Ghost Rider.

In 1978 all F150 were coil spring front end. Unless you want to do a coil spring front suspension; this will be a Dana 44 (3.54 gearing) wedge front with a (most likely) Ford 9” rear. The 9“ is an awesome rear, no doubt, and most likely 3.50 gears. Should be the tapered bearing rear end with 31 spline axles, very stout.

Not ‘bomb proof’ but will work.
 

USMCBuckWild

Full Access Members
Joined
Oct 21, 2016
Posts
495
Reaction score
178
Location
Camp LeJeune, NC
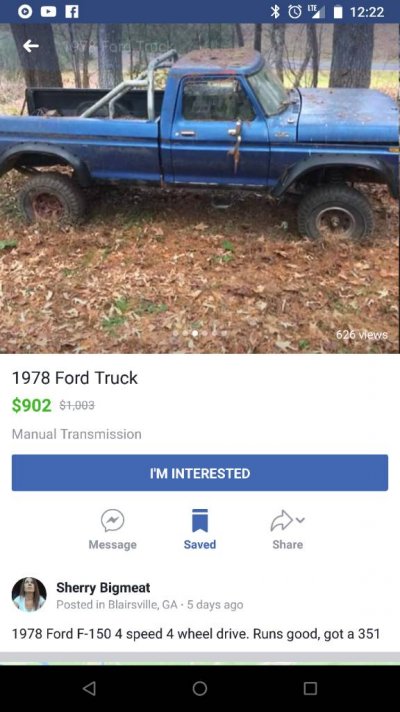
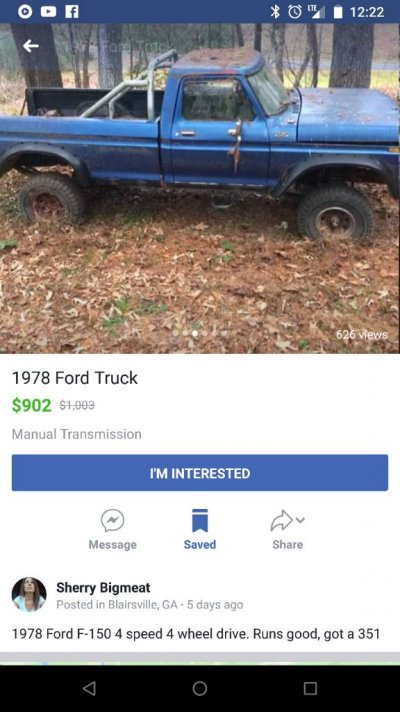
Found this today for a good price I haven't called him yet but it's 4x4 and should have the axles that I need and probably use the leaf springs and probably other stuff.
What u think??210c255c8fa3f0360701357864713a3e.jpg

Sent from my Nexus 6P using Tapatalk


You should really hitup “Sherry Bigmeat” and find out if she is a size queen.......
 

SnuffThePunkz

Full Access Members
Joined
Feb 7, 2015
Posts
342
Reaction score
170
Location
BC, Canada
That is an awesome plan, I dig it. I was about to start a SAS build, but a 4" f150 lift fell into my lap for $200. My wife and wallet are relieved. I will have to live vicariously through you.

So... get to it!
 
Top