New owner, new member, first problem

Disclaimer: Links on this page pointing to Amazon, eBay and other sites may include affiliate code. If you click them and make a purchase, we may earn a small commission.

SmokeEater829

Member
Joined
May 20, 2018
Posts
6
Reaction score
2
Location
Louisiana
First problem with the new to me Expedition.
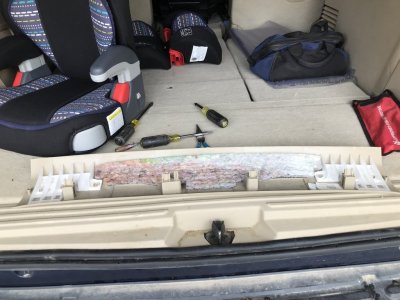
Found out today when using the rear washer, instead of spraying on the rear window, it leaks into the cabin. Found the rear washer hose is disconnected. Problem is, I can’t get to where it is supposed to connect. I need to remove the rear trim piece over the rear door opening. But I can’t figure out how to get it off. I’m thinking that it’s just snapped in, but I don’t want to break it.
Anyone removed this piece before? Or had the washer fluid leak into the cabin? Should I try to fix it myself, or just bring it to the dealership? We bought it last Friday (used) and have factory warranty plus an extended warranty, but my dealership is over an hour away.


Sent from my iPhone using Tapatalk
 

Muddy Bean

Full Access Members
Joined
Oct 19, 2017
Posts
818
Reaction score
508
Location
Michigan
I agree if it’s under warranty go that route. If not, you pop off the trim. I know the lower section come off with the squeeze clips. They are hard to pop off without damaging them but I did manage to do it.


Sent from my iPhone using Tapatalk Pro
 

1955moose

Full Access Members
Joined
Nov 23, 2014
Posts
5,981
Reaction score
1,338
Why pay for the warranty and get dirty! That just doesn't make sense. Pick a day, drop it off, get a cheap rental, have a nice lunch, maybe take in a movie, let them wrestle with it. Their will be plenty of things you can tackle after the warranty expires.

Sent from my N9131 using Tapatalk
 
OP
OP
S

SmokeEater829

Member
Joined
May 20, 2018
Posts
6
Reaction score
2
Location
Louisiana
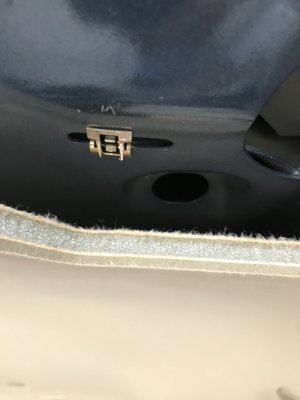
Only reason I wanted to tackle it myself is for convenience. The dealership is over an hour away. The wife can’t take my truck to work(won’t fit into parking garage). So I’d have to bring her to work, drive to dealership, then either wait for it, or get a rental. Then make it back in time to pick her up. Or, I pop this piece off, reconnect the hose and put the trim back on. I just don’t want to break the trim piece.


Sent from my iPhone using Tapatalk
 

jkayca

Full Access Members
Joined
Jul 25, 2017
Posts
173
Reaction score
58
Location
Ottawa, On
My dealer gives free loaners if requested since they don't have a shuttle service. OP might want to check around other Ford dealers to see if they do something similar.
 

Flexpedition

Full Access Members
Joined
May 26, 2015
Posts
1,339
Reaction score
662
Location
midwest
Grasp the piece of trim with both hands and pull it strait down. The clips are strong and will make some noise, but its super easy. I've removed mine a dozens of times to accommodate a dog travel kennel that is slightly taller than the hatch opening.
 

DASAGT

Member
Joined
Apr 20, 2018
Posts
24
Reaction score
2
Location
Killeen TX
Grasp the piece of trim with both hands and pull it strait down. The clips are strong and will make some noise, but its super easy. I've removed mine a dozens of times to accommodate a dog travel kennel that is slightly taller than the hatch opening.

this is the procedure but you paid for the warranty and a lot of pay for it and never use it. I would make the trip worth the while and do a full maintenance check like (2404) for those who understand and then go in with your list.
 

Thomas Hester

New Member
Joined
Dec 10, 2020
Posts
1
Reaction score
1
Location
62466
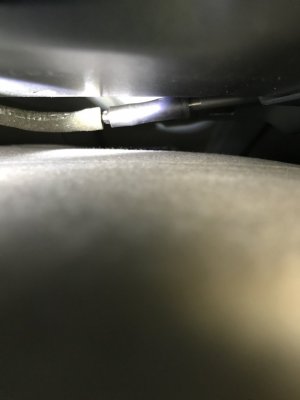
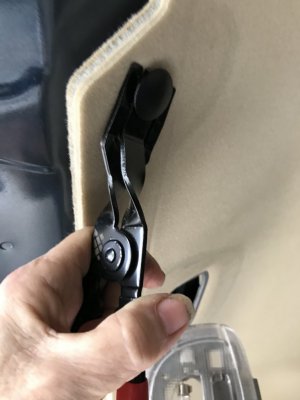
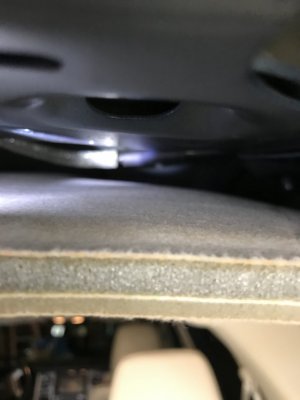
If you choose to repair it yourself. With the back door open. Pry down the back trim about 3/4’ at one end. While separating the rubber trim out of the way to view the (4) clips holding the trim.start on one end put a straight screwdriver under the plastic clip and push up on the screw driver releasing the clip x 4. Than you have 2 fasteners to remove on the headliner corners.please use proper tool to prevent damage. Now you can see above headliner on passenger side you will see where the hose has come apart.just re-attach hose. There are 4 metal clips that held the plastic trim up that can be removed by needle nose pliers and reattached to plastic trim and than snapped back in..E2A2C4E9-DBE8-4EB2-BE05-FF1C0066D734.jpeg4370524C-F98C-4955-8D05-36C6FC191354.jpeg09B5B5B6-627A-4373-B35B-7FC9A8F88B89.jpeg19DB2803-5B12-4463-923F-F9B42600EE21.jpeg35289D89-A9AC-464F-8CCE-D37E44F6F185.jpegE2A2C4E9-DBE8-4EB2-BE05-FF1C0066D734.jpeg4370524C-F98C-4955-8D05-36C6FC191354.jpeg09B5B5B6-627A-4373-B35B-7FC9A8F88B89.jpeg19DB2803-5B12-4463-923F-F9B42600EE21.jpeg35289D89-A9AC-464F-8CCE-D37E44F6F185.jpegE2A2C4E9-DBE8-4EB2-BE05-FF1C0066D734.jpeg4370524C-F98C-4955-8D05-36C6FC191354.jpeg09B5B5B6-627A-4373-B35B-7FC9A8F88B89.jpeg19DB2803-5B12-4463-923F-F9B42600EE21.jpegE2A2C4E9-DBE8-4EB2-BE05-FF1C0066D734.jpeg4370524C-F98C-4955-8D05-36C6FC191354.jpeg09B5B5B6-627A-4373-B35B-7FC9A8F88B89.jpeg19DB2803-5B12-4463-923F-F9B42600EE21.jpeg35289D89-A9AC-464F-8CCE-D37E44F6F185.jpegE2A2C4E9-DBE8-4EB2-BE05-FF1C0066D734.jpeg4370524C-F98C-4955-8D05-36C6FC191354.jpeg09B5B5B6-627A-4373-B35B-7FC9A8F88B89.jpeg35289D89-A9AC-464F-8CCE-D37E44F6F185.jpeg
 
Top