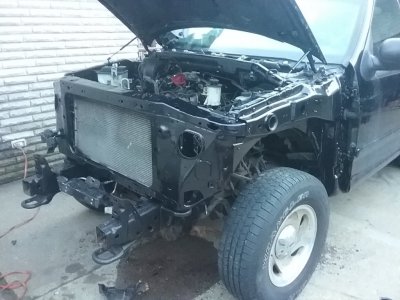
1997-2002 Expedition Radiator Support Replacement

Disclaimer: Links on this page pointing to Amazon, eBay and other sites may include affiliate code. If you click them and make a purchase, we may earn a small commission.

OP
OP
MikeA

MikeA

Full Access Members
Joined
Feb 28, 2017
Posts
133
Reaction score
29
Location
Michigan
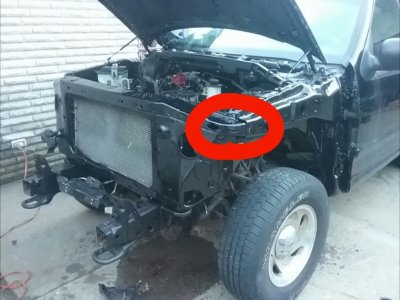
When you have your vehicle tore down this far, might as well take advantage of the easier access of everything.

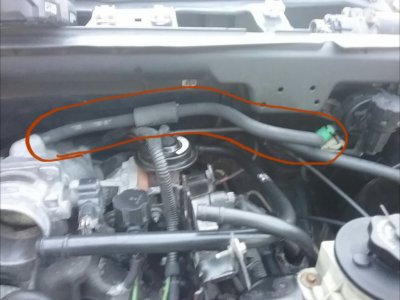
I checked my wiring, connectors, hoses,etc, found a couple of deteriorating hoses and a leaking elbow.

First one is the vacuum line to the evap
2017-03-10 19.46.12.jpg

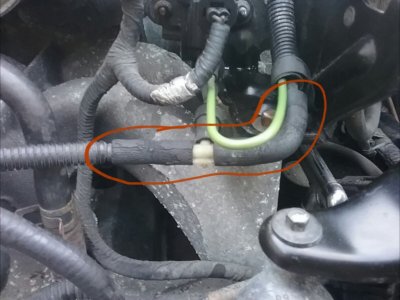
Second is this short line and elbow deteriorating.
2017-03-10 19.47.05.jpg

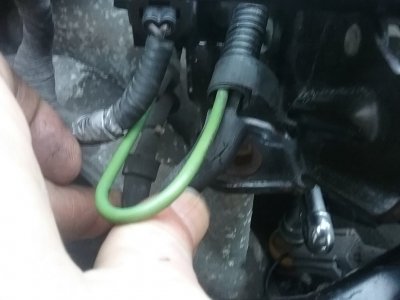
You may see me say, physically grab , squeeze and bend vacuum lines, here is a good example as to why.
20170310_181431.jpg

If i did not physically grab and bend the vacuum line up, I would not have seen that split in the elbow.
 
OP
OP
MikeA

MikeA

Full Access Members
Joined
Feb 28, 2017
Posts
133
Reaction score
29
Location
Michigan
Been pretty busy here, time to get caught up.

Since I had the front end off, I took advantage and replaced my valve cover gaskets, spark plugs, water pump and straightened out the bumper brackets that are welded on the frame.

When installing the new radiator support, I positioned it in place, then using a long pry bar, with help, lifted the support high enough to slide in support bushing to frame. Tighten the bushing bolt, then snug support nut.

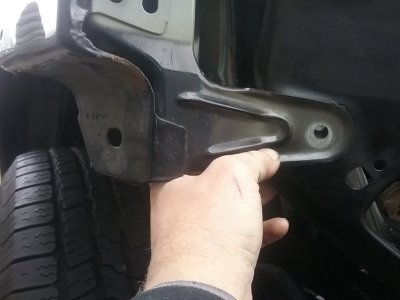
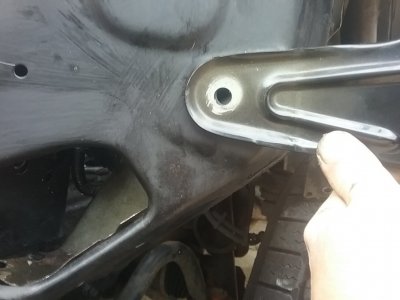
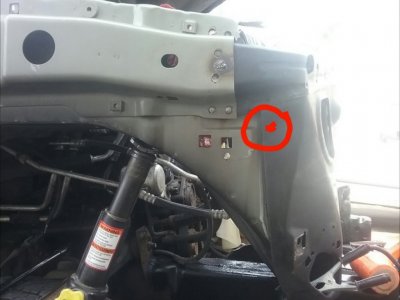
Next I put both fenders on loosely, this will help to preset the fender bolt hole to the attachment hole in the support, image shows hole off.I was lifting the fender arm and not even close to lining up.

20170324_113257.jpg

This means the inner fender/apron needs to be lifted to get the holes to line up, if you try to force the holes to line up, more then not, the fenders will bow out of shape and the grill assembly won't fit right.

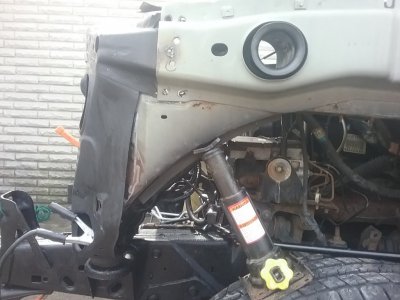
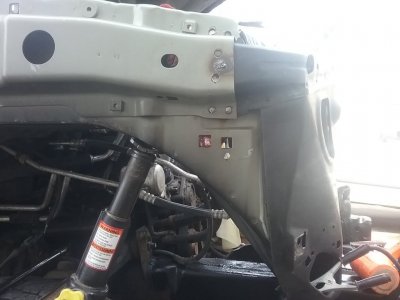
So to correct this problem , I used the jack from the expedition to lift the inner fender/apron and a small pry bar to get the holes to line up, allowing everything to fit correctly when reassembling the rest of the front end.
Removed the fender then did only one spot weld, repeated on the other side.
20170324_122247.jpg
20170324_113331.jpg
20170324_131048.jpg

I like to double check fit before I begin welding it all up, so I reinstalled the fenders and this time I held in place the grill assembly to make sure everything lines up correctly .

From here just welded all the spots on top half then drilled the holes down the sides and welded them up, that's pretty much it, from here just reinstall everything else until finished.

20170324_194655.jpg

I will post the finished project when I get there.
 
OP
OP
MikeA

MikeA

Full Access Members
Joined
Feb 28, 2017
Posts
133
Reaction score
29
Location
Michigan
Any question , please feel free to ask.

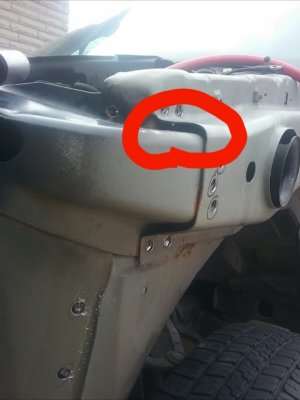
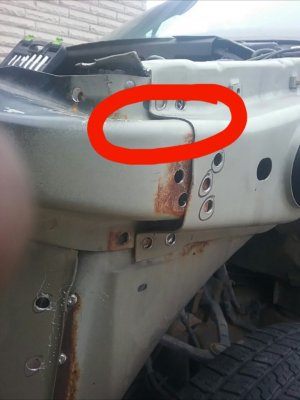
Here is the short story on why you must lift the inner fender/apron to align fender hole up with support, next images look at gaps circled in red.

Drilling spot welds
2017-03-24 23.31.15.jpg

Started removing the support free
2017-03-24 23.32.25.jpg

Notice the inner fender/apron dropped.

When installing support into position
2017-03-24 23.36.38.jpg

Lifted inner fender/apron to align fender holes, to get the correct alignment
2017-03-24 23.37.07.jpg

That is the short story on why you must set fenders on to align the holes for correct fit.


One little tip to help welding the sides.
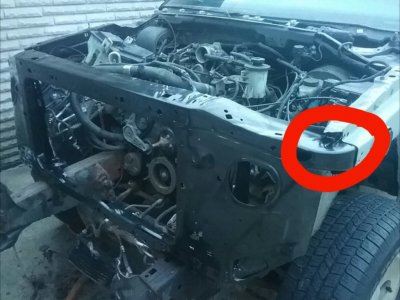
You will notice on the sides , you may not be able to use clamps to close the gaps for welding, on the image below in the red circle, that will be the widest gap, at that spot, drill a small hole through both panels and use a bolt, nut and washers to tighten the gap , below the bolt , drill small holes in support to spot weld and weld
2017-03-25 08.17.58.jpg

To plug weld the hole you made for the bolt, hold brass behind the hole and weld closed, weld will not stick to brass.

Just take your time, double check fit of fenders and grill assembly. If something seems off, you will have one small spot weld to remove to correct.
 
OP
OP
MikeA

MikeA

Full Access Members
Joined
Feb 28, 2017
Posts
133
Reaction score
29
Location
Michigan
Made enough progress last couple of days.

Engine compartment back together.

Need to pick up new upper radiator hose and starter this weekend and repair my battery ground wire where it was cut.

20170328_115338.jpg

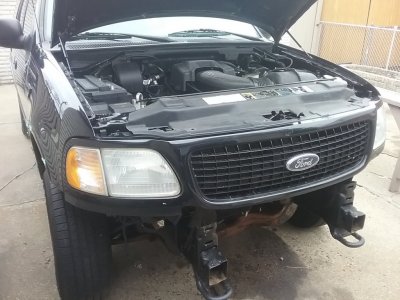
Got the front end back together, ordered new hood bumpers online, probably get them next tuesday, then I can final tweak my alignment and call it finished.

20170328_144019.jpg

Got lucky at the salvage yard, there where 2 black Expeditions there, saved alot of money not having to paint hood and grill assembly, but I had to paint the bumper, all I could find was chrome ones in really good shape, all the painted ones where rusted bad.

Overall the job was easy enough, except the 3 cuss words and a middle finger, due to the aftermarket radiator support needed tweaking to fit correctly, everything else was falling into place.

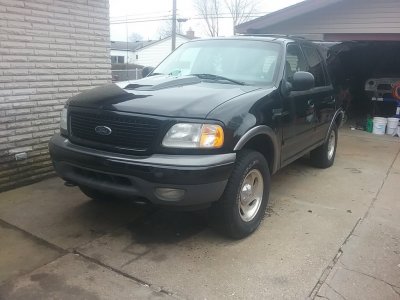
She's "Back in Black"
 

reece146

Supporting Member
Supporting Member
Joined
Apr 22, 2012
Posts
272
Reaction score
21
Location
ON, Canada
Great stuff. I'm hoping to get back to completing mine now that the weather has started to get warmer here.
 
OP
OP
MikeA

MikeA

Full Access Members
Joined
Feb 28, 2017
Posts
133
Reaction score
29
Location
Michigan
As long as you align those fender holes up to the radiator support like I did, you should have no problem with getting frontend aligned.

Post some pics of your work, I like to see how others DIY repairs.
 
OP
OP
MikeA

MikeA

Full Access Members
Joined
Feb 28, 2017
Posts
133
Reaction score
29
Location
Michigan
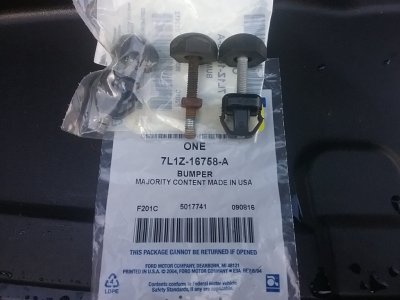
Got my hood bumpers in, OEM, perfect fit

I can not remember the last time I seen , made in the U.S.A

20170401_090311.jpg
 
Joined
Jun 10, 2016
Posts
10
Reaction score
0
Location
PA
Just had mine done after it failed state inspection due to rust at the right front body mount. $2000.
 
Top