Lifted Expeditions of EF.com (picture post)

Disclaimer: Links on this page pointing to Amazon, eBay and other sites may include affiliate code. If you click them and make a purchase, we may earn a small commission.

Texpedition45

Full Access Members
Joined
Apr 6, 2015
Posts
128
Reaction score
30
Location
Texas
More details/pictures!

20170929_162552.jpg 20171002_172356.jpg 20171012_190427.jpg 20171002_180056.jpg

Best ones I have on my phone. Basically:

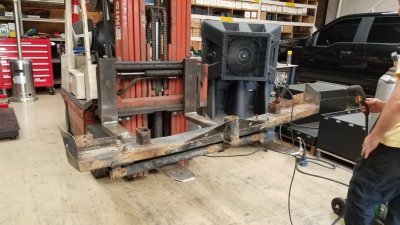
The fist pic shows how it was when I bought it. It's a 2x4 to which everything else was attached. All we did is cut the original mounting points, cut the ends, and weld the passenger side attachment on as the bolts that were used originally would not allow the bumper to sit flat with the part of the frame where the original bumper attached to.

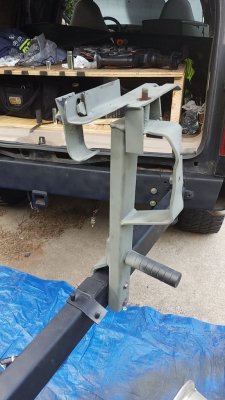
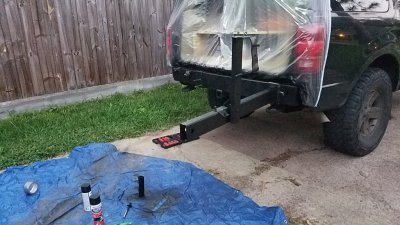
The rest is just how it looks like open and what the tire carrier bracket looks like.

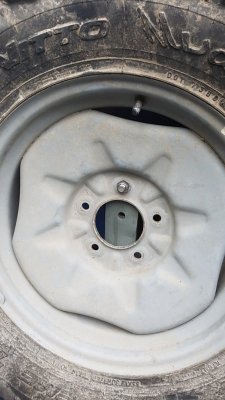
The last pic: it has a bolt with an unknown thread pattern. The hole in the middle is for a second bolt that is supposed to have a piece of bar stock that helps hold the tire in place ( it appears to be more of a friction fit). The piece was missing. What we did is just cut some squared tube to fit and used a 6in long half inch bolt. After the fact I was trying to figure out how to attach a pair of reverse lights. That's where the idea to reuse some pods came into play. I already have the wiring I just had to reroute the wires to fit the new location. I use some quick disconnect for a trailer hitch so now if I need to change the tire all I have to do is disconnect the pods take the tube off unbolt the tire and that's it.

Eta #2: the trasheroo is just a duffel bag from a surplus store. $5.
 
Last edited:

ExplorerTom

Full Access Members
Joined
Apr 2, 2015
Posts
2,241
Reaction score
990
Location
Colorado
Awesome. I didn't know you had the 2x4 steel bumper. I thought you got something to work with the factory bumper.
 

Texpedition45

Full Access Members
Joined
Apr 6, 2015
Posts
128
Reaction score
30
Location
Texas
Awesome. I didn't know you had the 2x4 steel bumper. I thought you got something to work with the factory bumper.

Damn I was actually just thinking about my post when I got the message alert. I knew I forgot to post something: the bumper and tire carrier were all from an XJ. So that two-by-four bumper came with it. All the mounts were meant for an XJ that's why we had to cut and figure out how to attach it to the expedition.

My initial idea was to find a way to attach it to the stock bumper. In retrospect though this is a much better setup as it keeps the whole set-up as close to the hatch as possible. My only complaint so far is that I wish tire was at least 2 or 3 in higher than it currently is.
 

SnuffThePunkz

Full Access Members
Joined
Feb 7, 2015
Posts
342
Reaction score
170
Location
BC, Canada
View attachment 21928 View attachment 21929 View attachment 21930 View attachment 21931

Best ones I have on my phone. Basically:

The fist pic shows how it was when I bought it. It's a 2x4 to which everything else was attached. All we did is cut the original mounting points, cut the ends, and weld the passenger side attachment on as the bolts that were used originally would not allow the bumper to sit flat with the part of the frame where the original bumper attached to.

The rest is just how it looks like open and what the tire carrier bracket looks like.

The last pic: it has a bolt with an unknown thread pattern. The hole in the middle is for a second bolt that is supposed to have a piece of bar stock that helps hold the tire in place ( it appears to be more of a friction fit). The piece was missing. What we did is just cut some squared tube to fit and used a 6in long half inch bolt. After the fact I was trying to figure out how to attach a pair of reverse lights. That's where the idea to reuse some pods came into play. I already have the wiring I just had to reroute the wires to fit the new location. I use some quick disconnect for a trailer hitch so now if I need to change the tire all I have to do is disconnect the pods take the tube off unbolt the tire and that's it.

Eta #2: the trasheroo is just a duffel bag from a surplus store. $5.

Where were these damn photos when I asked for you to show your work?
 

Awbarrett1001

Active Member
Joined
Oct 20, 2017
Posts
27
Reaction score
7
Location
Fresno CA
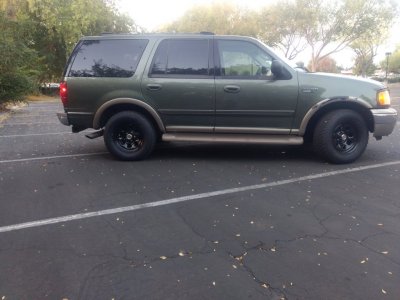
2000 EB stock air suspension (for now, barely works)

16" Pacer soft 8 wheels with 275/65R16 tires (cheap Antares SU-800 A/T)

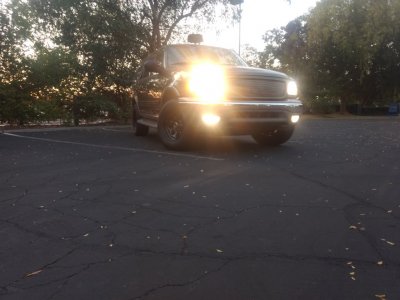
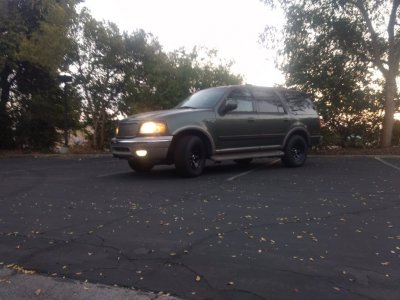
Looking to outfit it with a 2.5" lift, 33's and air to coil swap. Spot and flood lights and rhino lining the exterior, swapping out the seats for the F-150's. Going to add a winch and plenty of under body protection. Change out the gears and retune the motor adding all the under hood goodies. . . . the list goes on, just like every one else, but we'll see what happens, and what changes. . . . for now though this is it. . . just new wheels and tires lol.

And as you can see my trim is peeling, damn pressure washer screwed it all up, oh well, I'm trying to find a good set of fender flares that dont look retarded, until i suppose they will get painted black.

Expy.jpg Expy.jpg Expy 2.jpg Expy 3.jpg Expy 2.jpg
 
Top