ExplorerTom
Full Access Members
Finished my wrench fest.
What an epic adventure that was.
The Dorman intake swap itself was actually pretty easy. The intake was cracked near the coolant crossover tube which was causing my coolant leak. Apparently a fairly common place to crack.
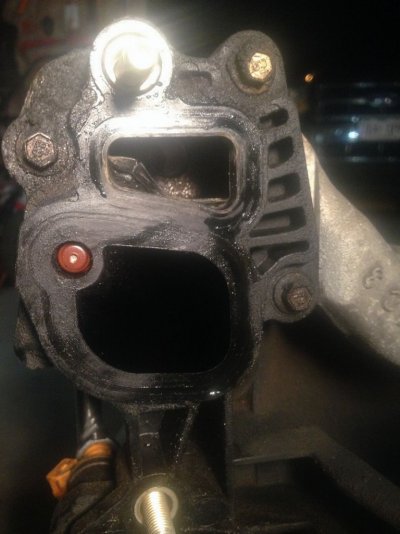
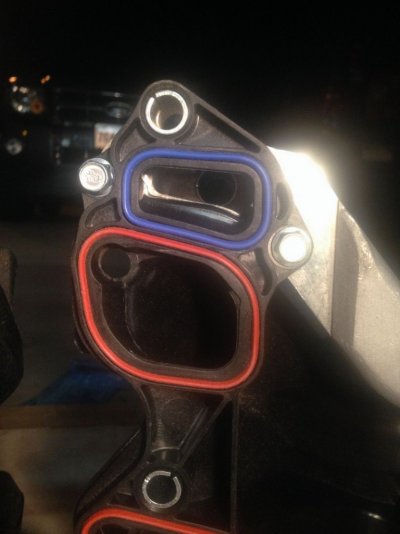
While the intake was off, I pulled the valve covers off. The captive fasteners are a nice touch. I pressure washed the covers and installed new gaskets with some RTV to help hold them in place.
The new intake went on nice and easy. The intake comes with coarse threaded screws to replace most of the fasteners that go into it. Nice in a way because it takes fewer turns to get it tight. Make sure to put the PVC o-ring on the elbow before you install it!
Here's where the fun started.
I also changed the oil. Getting the oil filter off was a serious PITA. It's a good thing I have one of those wrenches that fits over the end of the filter. I put the new filter on and filled the crankcase with fresh oil. When I started the motor, oil was gushing onto the floor.
Crap.
My first thought was since I changed the valve covers, maybe I didn't get it seated all the way and there was a leak. But that was a LOT of oil. I took a look at the old filter and noticed that the gasket wasn't on it. Uh oh. Took the new filter off and sure enough, there was the old gasket.
Oil is everywhere. All over the engine bay and all over the floor.
And in the few seconds the motor was running, it was running like crap.
Fill it up with oil and fire it up again. No leaks. At least that's progress. Still running like crap. Threw a code for #7 misfire. Pulled the coil, swapped the boot and spring. Still misfired. Swap coils with #5. Still misfiring on #7.
Wait a minute. During the valve cover swap, I took apart the main wiring harness connector and didn't tighten the bolt that holds it together. Tightened it up and it definitely drew it together some more. Fired it up and still running crappy. But no more #7 misfire!
I could hear sucking coming from around the DPFE/EGR/EGV. Got a code for excessive EGR flow. Started researching that. Thought it was weird to have any one of them fail at this time. Just because of all this work. I wasnt happy with the vacuum line routing to the FPR- it went right across the EGR pipe. I didn't remember how it was routed before. Went back out and that vacuum line was melted and in 2 pieces.
Crap. Guess I'm going to the junkyard to get a new vacuum line.
While driving there, I had an idea. I wasn't happy with the routing and it melted because I had the EGR and FPR swapped.
Got a "new" EGR vacuum line from a '98 Expedition. I don't think its the same but it works.
Got home, installed the new vacuum line and swapped the other line over to the FPR. Wouldn't you know it, the lines seemed to fit better. Fired up the motor and it ran fine.
Success!
What an epic adventure that was.
The Dorman intake swap itself was actually pretty easy. The intake was cracked near the coolant crossover tube which was causing my coolant leak. Apparently a fairly common place to crack.


While the intake was off, I pulled the valve covers off. The captive fasteners are a nice touch. I pressure washed the covers and installed new gaskets with some RTV to help hold them in place.
The new intake went on nice and easy. The intake comes with coarse threaded screws to replace most of the fasteners that go into it. Nice in a way because it takes fewer turns to get it tight. Make sure to put the PVC o-ring on the elbow before you install it!
Here's where the fun started.
I also changed the oil. Getting the oil filter off was a serious PITA. It's a good thing I have one of those wrenches that fits over the end of the filter. I put the new filter on and filled the crankcase with fresh oil. When I started the motor, oil was gushing onto the floor.
Crap.
My first thought was since I changed the valve covers, maybe I didn't get it seated all the way and there was a leak. But that was a LOT of oil. I took a look at the old filter and noticed that the gasket wasn't on it. Uh oh. Took the new filter off and sure enough, there was the old gasket.
Oil is everywhere. All over the engine bay and all over the floor.
And in the few seconds the motor was running, it was running like crap.
Fill it up with oil and fire it up again. No leaks. At least that's progress. Still running like crap. Threw a code for #7 misfire. Pulled the coil, swapped the boot and spring. Still misfired. Swap coils with #5. Still misfiring on #7.
Wait a minute. During the valve cover swap, I took apart the main wiring harness connector and didn't tighten the bolt that holds it together. Tightened it up and it definitely drew it together some more. Fired it up and still running crappy. But no more #7 misfire!
I could hear sucking coming from around the DPFE/EGR/EGV. Got a code for excessive EGR flow. Started researching that. Thought it was weird to have any one of them fail at this time. Just because of all this work. I wasnt happy with the vacuum line routing to the FPR- it went right across the EGR pipe. I didn't remember how it was routed before. Went back out and that vacuum line was melted and in 2 pieces.
Crap. Guess I'm going to the junkyard to get a new vacuum line.
While driving there, I had an idea. I wasn't happy with the routing and it melted because I had the EGR and FPR swapped.
Got a "new" EGR vacuum line from a '98 Expedition. I don't think its the same but it works.
Got home, installed the new vacuum line and swapped the other line over to the FPR. Wouldn't you know it, the lines seemed to fit better. Fired up the motor and it ran fine.
Success!
Last edited:


