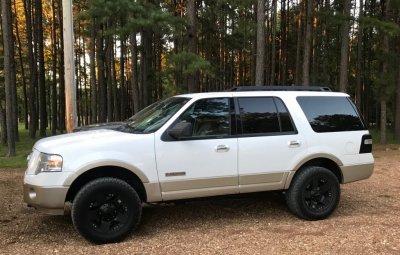
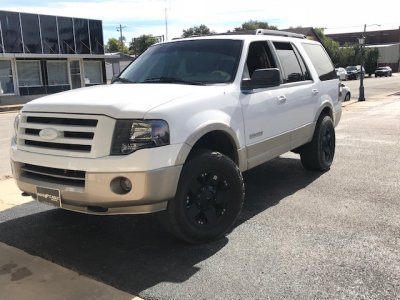
New Project Expedition riddled with problems. Build Thread.

Disclaimer: Links on this page pointing to Amazon, eBay and other sites may include affiliate code. If you click them and make a purchase, we may earn a small commission.

OP
OP
bt93

bt93

Well-Known Member
Joined
Sep 24, 2015
Posts
45
Reaction score
20
Location
Corning, AR
You are inspiring me .... I have a 145k 2007 Limited, and need to tackle the rust on hood and tailgate.

Already replaced. Blower, and swapped out rear air for Arnott rears.

Also did the t repair on the heater hose, and replace all my ignition coils.


Sent from my iPad using Tapatalk Pro
That painting job was super time consuming for me. I got caught up in my OCD and that ends up being very counterproductive. lol
 
OP
OP
bt93

bt93

Well-Known Member
Joined
Sep 24, 2015
Posts
45
Reaction score
20
Location
Corning, AR
Lift is on! i used the rough country 570 on the front which is 2.5" and a generic ebay 2" rear. Next is black housing headlights!

IMG_1920.jpg
 

Adieu

Full Access Members
Joined
Dec 22, 2016
Posts
3,700
Reaction score
786
Location
SoCal
lol believe it or not it is. With enough wet sanding, and buffing anything can be slick.

I started sanding the clear with 1500 grit and finished up with 3000 grit then compound and polish.

What make and color are you using to approximate the Ford White? And is yours regular oxford white or some sparkle/metallic/creme variant?
 
OP
OP
bt93

bt93

Well-Known Member
Joined
Sep 24, 2015
Posts
45
Reaction score
20
Location
Corning, AR
What make and color are you using to approximate the Ford White? And is yours regular oxford white or some sparkle/metallic/creme variant?

I use duplicolor color match spary can in paint code yz which is oxford white. as for clear i use Jammin clear by transtar.
 

and0r

Full Access Members
Joined
Jun 11, 2017
Posts
324
Reaction score
18
Location
CA
can you detail the paint job better for a complete novice? im very interested in how you did that work, and i dont know about paint products, but i am very technical with computers and such
 
OP
OP
bt93

bt93

Well-Known Member
Joined
Sep 24, 2015
Posts
45
Reaction score
20
Location
Corning, AR
First thing i did was remove the interior panel on the hatch and then stripped all the pieces off of the hatch. sanded starting with 220 and finished with 400. I primed the panel after that with self etching primer, after it flashed i primed again with white duplicolor sandable primer. Then sanded the primer starting with 500 and finishing with 1500. I did this step many many times to get the desired smoothness. After that i let the primer cure for 3 days before painting to let it shrink as much as it was going to. Then i sanded it again to make the primer smooth after the shrinkage, sprayed it with 3 coats of color and 3 coats of clear.
 
OP
OP
bt93

bt93

Well-Known Member
Joined
Sep 24, 2015
Posts
45
Reaction score
20
Location
Corning, AR
After the final product cured i sanded it starting with 1000-1500-2000-3000 in that order. then compounded it then polished it.
 

Adieu

Full Access Members
Joined
Dec 22, 2016
Posts
3,700
Reaction score
786
Location
SoCal
Damn that is some perfectionist spraypainting

What was the overall cost?
 
Top