peterwells
Active Member
- Joined
- May 13, 2005
- Posts
- 35
- Reaction score
- 22
Vehicle is a 2008 EL Eddie Bauer, 200 k miles. This is a straight forward job, just a couple of notes to add to what's on YouTube and in the forum.
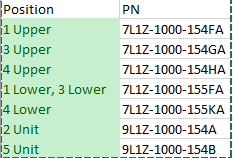
There are five mounts per side, I numbered them #1 through #5 with #1 in front of the front wheel, #2, #3 and #4 between the wheels and #5 at the very back of the car. Here are the Ford PN...

Before taking things apart I thought all positions but #1 were in bad shape but in fact the two single piece mounts (positions #2 and #5) were not worn - it appeared there was rubber missing from the lower cup but in fact the new parts looked the same. The bolts on position #1 were pretty corroded, Dorman makes an aftermarket part for this unit, DORMAN 924064 (according to RockAuto), I didn't find any after market for the other positions.
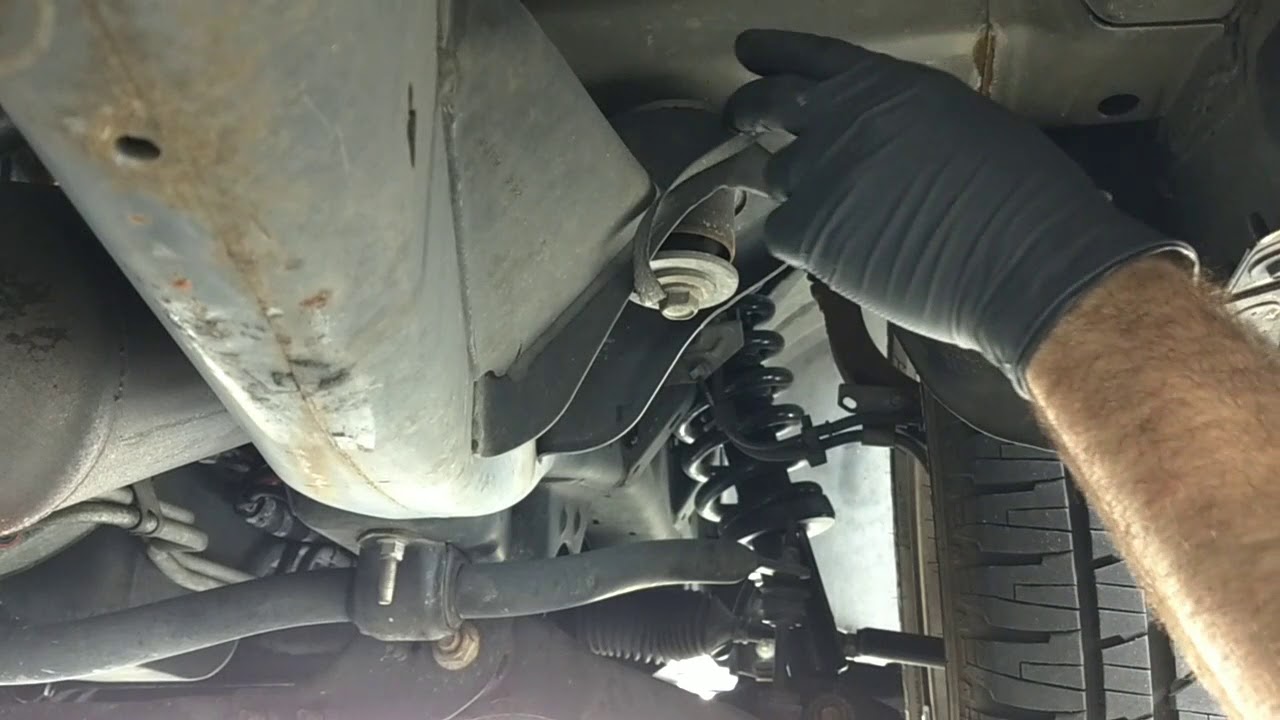
I had two floor jacks and used two pieces of 4x4 approx 10" long cut square with some 6" long pieces of 2x4 to spread the load at the body, lift next to positions #2 and #4 where the body has stiffeners - I wouldn't try this job without two jacks. As others have noted, the nuts for the bolts are captivated and can break loose if you use an impact wrench, they were not hard to remove. Other tools you'll want, some good pry bars to separate the old #3 and 4 units, some Loctite (blue 242 or 243), wire brush to remove the old rubber and clean up parts.
Undo the bolts on positions #1 through #4 and then lift the trim in the trunk by the tail gate to expose the rubber plugs that cover the nuts attached to the position #5 bolt - I did not need a torx for the bolt. The only other note is that the rear bumper cover is attached with a plastic press stud to the chassis, so as you raise the body this gets stressed - remove the press stud before lifting the body - there may be a similar situation at the front of the car but I didn't change the #1 mount so didn't stress anything there. There is a grounding strap on the passenger side that also needs to be removed.
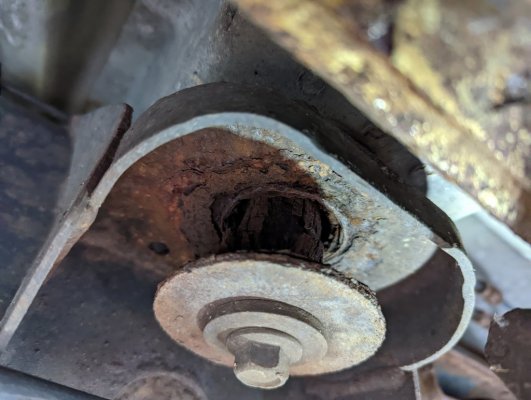
My #3 and #4 units were completely worn, non-existent, there was just the metal washers and a few pieces of crumbling rubber. There were some awful knocking sounds before changing the mounts, those knocks have gone and there are fewer squeaks.
The #3 and #4 parts will cost ~ $150 plus shipping.
Peter
There are five mounts per side, I numbered them #1 through #5 with #1 in front of the front wheel, #2, #3 and #4 between the wheels and #5 at the very back of the car. Here are the Ford PN...

Before taking things apart I thought all positions but #1 were in bad shape but in fact the two single piece mounts (positions #2 and #5) were not worn - it appeared there was rubber missing from the lower cup but in fact the new parts looked the same. The bolts on position #1 were pretty corroded, Dorman makes an aftermarket part for this unit, DORMAN 924064 (according to RockAuto), I didn't find any after market for the other positions.
I had two floor jacks and used two pieces of 4x4 approx 10" long cut square with some 6" long pieces of 2x4 to spread the load at the body, lift next to positions #2 and #4 where the body has stiffeners - I wouldn't try this job without two jacks. As others have noted, the nuts for the bolts are captivated and can break loose if you use an impact wrench, they were not hard to remove. Other tools you'll want, some good pry bars to separate the old #3 and 4 units, some Loctite (blue 242 or 243), wire brush to remove the old rubber and clean up parts.
Undo the bolts on positions #1 through #4 and then lift the trim in the trunk by the tail gate to expose the rubber plugs that cover the nuts attached to the position #5 bolt - I did not need a torx for the bolt. The only other note is that the rear bumper cover is attached with a plastic press stud to the chassis, so as you raise the body this gets stressed - remove the press stud before lifting the body - there may be a similar situation at the front of the car but I didn't change the #1 mount so didn't stress anything there. There is a grounding strap on the passenger side that also needs to be removed.
My #3 and #4 units were completely worn, non-existent, there was just the metal washers and a few pieces of crumbling rubber. There were some awful knocking sounds before changing the mounts, those knocks have gone and there are fewer squeaks.
The #3 and #4 parts will cost ~ $150 plus shipping.
Peter


