2003 Expedition Face Lift Begins

Disclaimer: Links on this page pointing to Amazon, eBay and other sites may include affiliate code. If you click them and make a purchase, we may earn a small commission.

scoot0073

Full Access Members
Joined
Dec 30, 2016
Posts
519
Reaction score
185
Location
Georgia
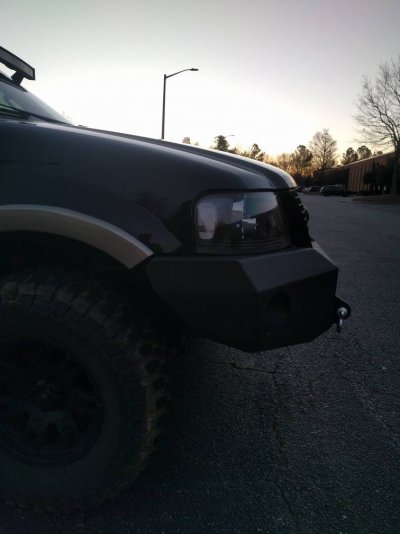
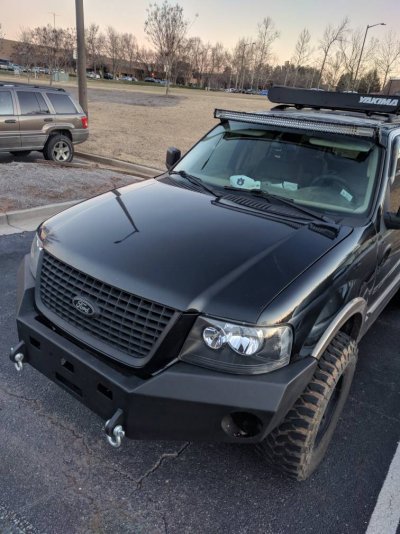
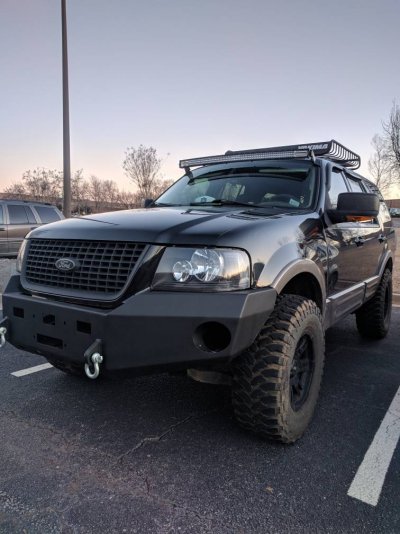
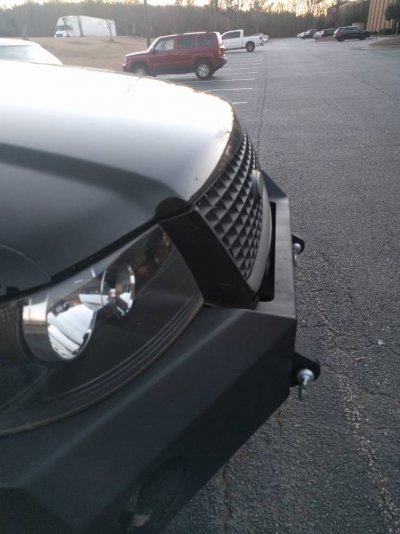
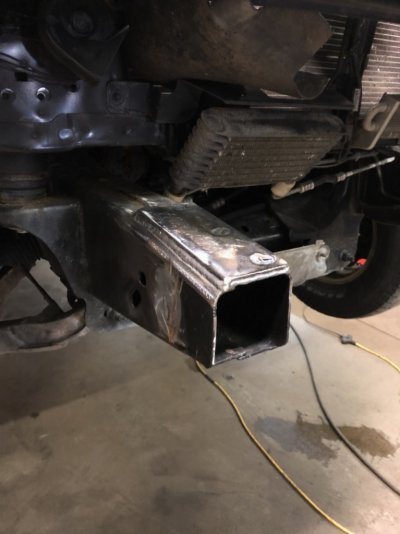
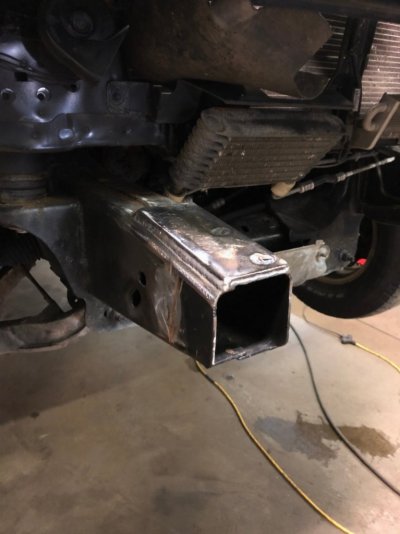
1/4 " 2x2 angle welded it directly to the frame top and bottom and drilled 3/4" holes in the angle and in the bumper and bolted the bumper to the angle. So that way I could adjust the bumper left to right and up n down..

Sent from my Nexus 6P using Tapatalk
 
OP
OP
Vancouver Bob

Vancouver Bob

Full Access Members
Joined
Dec 22, 2016
Posts
719
Reaction score
355
Location
Vancouver, WA
1/4 " 2x2 angle welded it directly to the frame top and bottom and drilled 3/4" holes in the angle and in the bumper and bolted the bumper to the angle. So that way I could adjust the bumper left to right and up n down..

Sent from my Nexus 6P using Tapatalk

I see... with the angle positioned along the inside of the long axis of the frame (front to back)... bumper slides right in between and you bolt it up. That was a smart approach! Simple, strong, and like you said, adjustable. Way easier than the way I did it... of course, I had it designed by the welder so he picked an approach that involved more welding :).
 

scoot0073

Full Access Members
Joined
Dec 30, 2016
Posts
519
Reaction score
185
Location
Georgia
Yup that's how it is . And I never plan on taking it off so welding the brackets to the frame wasn't an issue.
It looks kinda ReDnEcK but I assure you it is solid.
When I take it off to install the winch I'll grab some pictures.


Sent from my Nexus 6P using Tapatalk
 

JoshA77

Full Access Members
Joined
Nov 24, 2016
Posts
102
Reaction score
41
Location
Bozeman mt
My Shackles I got at Tractor Supply bc I'm always there getting feed n stuff. They are 1" 10 or 12,000lb can't remember. They was like $15 each. On bumpy roads they are quite they don't bang or chatter against the bumper
177a2f55c6c0be1a98a37d94aa0b472d.jpgf53e6cbca0245f8fdabe83e602fc0511.jpg274e61eb4e59f31c9dd74ed8699b52c2.jpg126352078527101378bb2782655ffe8f.jpg

Sent from my Nexus 6P using Tapatalk
That looks fantastic scoot!


Sent from my iPhone using Tapatalk
 
OP
OP
Vancouver Bob

Vancouver Bob

Full Access Members
Joined
Dec 22, 2016
Posts
719
Reaction score
355
Location
Vancouver, WA
It was time to change the differential fluid (was instructed to change it after running around 500 miles with the new gears) so snooped around a bit and landed on Amsoil Severe Gear 75W-140. Problem was no body carries it but luckily found a little Amsoil stand inside a truck stop right across the bridge in Portland... Kubitz Truck Stop. Picked up 6 quarts on President's day.

s-l640.jpg

Rear was pretty easy to drain since it has a drain plug... uses a 3/8" drive (no socket). The diff shop used red loctite on the threads so it was a beaoch to get out. Had to hammer it loose and managed to get the old oil drained. It was a light purple when they filled it but came out a dirty, greenish color. Opened the fill plug in the same manner and got a little new oil in there to flush out a bit more of the old oil. Getting the new fluid in was also a beaoch! I bought a hand pump when I got the oil, like what you would get on a hand soap dispenser but larger.
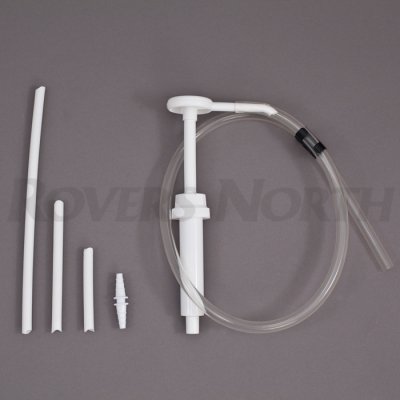
G2039.jpg

It had a screw top to secure it to the container of oil but it was too small for the Amsoil top... so I'm laying on my back, under the car, it's freezing in the garage, one hand is holding the clear plastic tube from the pump in the fill hole while the other hand was reaching back over my head trying to pump this really thick oil up and in while trying to not dump the oil over. I didn't have much leverage to pump the pump so I'm straining and pumping and my arms tired after only a few pumps. Switched hands a few times and kept going. What worked best was to actually lift the oil container with the pump up and pressing the top of the pump handle up against the frame to get the pumping action. I could do this with two hands while still keeping the tube in position. Took about 2.75 qts, give or take. Phew!!

Going to tackle the front tomorrow but bought a drill pump from Home Depot with a few thread adapters. Hopefully that goes smoother. The front doesn't have a drain plug so I'm just planning on sucking it out. We'll see how that goes.
 
Last edited:
OP
OP
Vancouver Bob

Vancouver Bob

Full Access Members
Joined
Dec 22, 2016
Posts
719
Reaction score
355
Location
Vancouver, WA
24494b9f47f17ee94468ddeaaf4895c9.jpg820d2bd1a36389099ace11e69cffd392.jpg

Thanks for the info Bob! Mines going on today!


Sent from my iPhone using Tapatalk

That’s exciting! I’m sure you can’t wait to get it done! Is he going to drill the holes and paint the areas affected by the welding for you or will you need to do that yourself?

Drilling the holes took some effort and I probably didn’t do a very good job keeping everything aligned and drilling straight holes. I drilled the holes on the bumper with the bumper off and then drilled the holes in the frame with the bumper on. Somewhere I didn’t get things just right. I think that’s why the bumper isn’t quite where I want it. At some point I’m going to remove all the bolts and see if I can get it positioned back the way I want it and then see how far off my holes are. If you’re like me you’re going to get really goog at taking the bumper off and back on :).

Thanks for sharing the pics!
 

Gruz7

Supporting Member
Supporting Member
Joined
Jul 9, 2014
Posts
1,631
Reaction score
257
Location
North Smithfield, RI
That’s exciting! I’m sure you can’t wait to get it done! Is he going to drill the holes and paint the areas affected by the welding for you or will you need to do that yourself?

Drilling the holes took some effort and I probably didn’t do a very good job keeping everything aligned and drilling straight holes. I drilled the holes on the bumper with the bumper off and then drilled the holes in the frame with the bumper on. Somewhere I didn’t get things just right. I think that’s why the bumper isn’t quite where I want it. At some point I’m going to remove all the bolts and see if I can get it positioned back the way I want it and then see how far off my holes are. If you’re like me you’re going to get really goog at taking the bumper off and back on :).

Thanks for sharing the pics!
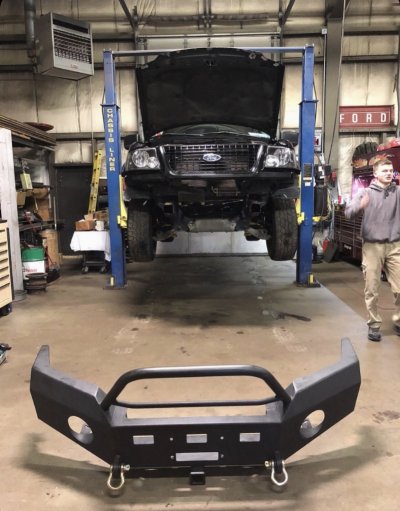
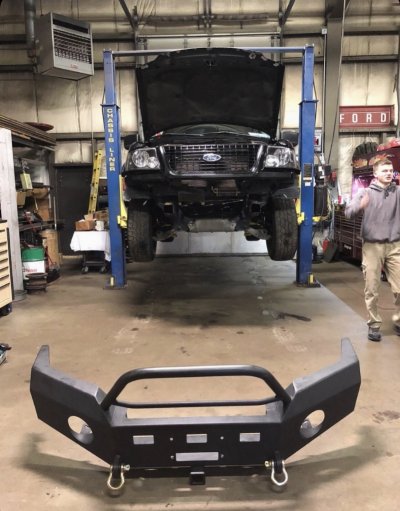
No prob! And yeah we’re drilling holes and welding the nuts onto the inside of the frame rails so I don’t have to make a hole in the side of the frame to fit a wrench inside and hold the nuts. I’ll be priming and painting everything while it’s here I have my chassis paint and everything so that’ll be nice and easy and then bedliner for touch-ups on the actual bumper.
Should be all done in a few hours besides making everything prettier. Really glad you had the idea to make the brackets on top and bottom bigger and use 8 bolts.
Thanks as always Bob!


Sent from my iPhone using Tapatalk
 
OP
OP
Vancouver Bob

Vancouver Bob

Full Access Members
Joined
Dec 22, 2016
Posts
719
Reaction score
355
Location
Vancouver, WA
No prob! And yeah we’re drilling holes and welding the nuts onto the inside of the frame rails so I don’t have to make a hole in the side of the frame to fit a wrench inside and hold the nuts. I’ll be priming and painting everything while it’s here I have my chassis paint and everything so that’ll be nice and easy and then bedliner for touch-ups on the actual bumper.
Should be all done in a few hours besides making everything prettier. Really glad you had the idea to make the brackets on top and bottom bigger and use 8 bolts.
Thanks as always Bob!


Sent from my iPhone using Tapatalk

Great idea to weld the nuts on the inside.. The guy that welded my bumper had the same thought but I wasn't ready to commit to the bolt position... or maybe that's just me having commitment problems :).

Hey, is that you in the one picture with the truck on the lift or is that the welder?
 
OP
OP
Vancouver Bob

Vancouver Bob

Full Access Members
Joined
Dec 22, 2016
Posts
719
Reaction score
355
Location
Vancouver, WA
I still need to do something about the flap underneath the radiator. My first thought was to just pin it up to the bottom of the bumper with some of those plastic push pin things but I think I'd like to get a skid plate of some sort up there. Did you have any plans for that?
 
Top