A/C is warm

Disclaimer: Links on this page pointing to Amazon, eBay and other sites may include affiliate code. If you click them and make a purchase, we may earn a small commission.

OP
OP
J

juan214

Full Access Members
Joined
Sep 11, 2013
Posts
506
Reaction score
60
Location
Stoughton, MA.
The evap superheat test should show no change in temp between inlet and outlet according to the link I posted. Yours does agree but seems high. All the systems I've dealt with so far have had super cold lines to the compressor, even to the point of being uncomfortable.

I'm questioning why it is gaining heat from the condenser to the evaporator though. It may be picking up engine heat since it is still in the gas state.

The condenser should be tested at the line connections on the condenser. Right now those readings are indicating an airflow problem there. Your not getting enough heat removal to change the refrigerant back into a liquid in the condenser. If you can get a shop fan that moves a bunch of air, place it in front of the radiator and measure the temps again and see if they have a wider spread.

Just thinking outside the box now - if the condenser is partially plugged it will not be as efficient as one that isn't and not condense the refrigerant as well or not at all. To see if that is happening you can use your ir temp gun and measure temps across the condenser - left to right and top to bottom. The inlet side should be hotter than the outlet side.

Attempted that earlier, but tried it again with the IR Thermoter (which is off) Through grill at least it can do this test just for change not accuracy.

Top left shows about 165* scanning across Left to Right it drops and drops down as I scan downwards. coolest at bottom left 115* but not the same as ambint temp which is still 93*

Line with gun:
High Line: 185* (+/- 1) temp before the HP sensor and after (at condenser) are the same.
Low Line Split: 115* (+/- .5) from condenser (lower)
120* (+/- .5) after split (upper)

No refrigerant added to system yet, not increased by 5 pounds yet.

Went and had my shock mount welded back together on the truck.

Their R/R machine doesn't work either. its to late to do it, or to hot to work. Was going to have the system vacerd out. Oh well.
 
Last edited:
OP
OP
J

juan214

Full Access Members
Joined
Sep 11, 2013
Posts
506
Reaction score
60
Location
Stoughton, MA.
Lets see how the system reacts by raising the static pressure 5 psi above ambient temp. So if it is 69 degrees out raise the pressure to 74 etc.
Also check the fan clutch. If that isn't moving enough air it will raise pressures.
  • Vent at 82* ambient is 95*
  • Added 5 pounds of pressure no change to vent temp.
  • Added another 5 pounds of pressure no change to vent temp.
  • Checked fan belt it is routed correctly (not backwards).
  • Checked compression on compressor seems fine and has some resistance that I can feel.
  • Chutch engages when running can not test for hold
 

stamp11127

Full Access Members
Joined
Mar 10, 2012
Posts
6,218
Reaction score
1,250
Location
Temple, Georgia
What are the pressures now? You should have seen a low side pressure change.

You may be at the point where it is quicker just to flush the system, check the orifice tube orientation and start over.
 
Last edited:
OP
OP
J

juan214

Full Access Members
Joined
Sep 11, 2013
Posts
506
Reaction score
60
Location
Stoughton, MA.
Check your fan clutch again...


Check your fan clutch again...
  • Going to look at the fan clutch again this morning, When I check mine is like in between what is shown spins a less than a quarter turn. Not free spinning no hard resistance. When I spin it it moves the distance from one blade (outer edge) to the next which is a coulpe of inces.
What are the pressures now? You should have seen a low side pressure change.
  • Back up to 40 and I think 100ish
You may be at the point where it is quicker just to flush the system, check the orifice tube orientation and start over.
  • Was already thinking that just need a shop with a working machine.
Planned on replacing trailing arms today to complete the suspension work on the truck.
 
Last edited:

stamp11127

Full Access Members
Joined
Mar 10, 2012
Posts
6,218
Reaction score
1,250
Location
Temple, Georgia
You may plug a shops machine since you had sealer in there, I would do it myself.

The temp readings you have conflict with one another. One says the condenser isn't removing the heat where the heat gun says it is. This is probably why they say to use a pipe clamp designed for measuring temperature of piping!

Not getting much of a temperature difference at the evaporator can indicate poor airflow over the evap or blocked evap. Thus the need to flush, probably both directions. I would even go to the extent to see if there is blockage of the airflow. You should have a large amount of air movement on the high setting.

Here is a link to adding/changing oil in a Sanden compressor:
 
OP
OP
J

juan214

Full Access Members
Joined
Sep 11, 2013
Posts
506
Reaction score
60
Location
Stoughton, MA.
Check your fan clutch again...

So I order a new fan clutch and it arrived last week. Figuring that mine has well over 200K on it. It only cost me $23.00 delivered. Naturally no one around here had one in stock and the cost was $65 plus let alone it would have to delivered anyway.

So my initial tests show that the fan blades would only spin just shy of of a quarter turn.

The OEM tools suck. I got one set and the 36mm wrench was spread apart and would not break the nut free just kept slipping off. I got a second set brand new never opened and the wrench fit perfectly before I left the store. Got all set up and gave it a couple of love taps with hammer and the new wrench slipped off, spread apart, and never broke the nut free. Said FKit and grabed my pipe wrench ten seconds it broke free.

Pulled it out in a short amount time. Spun it and the clutch was fine it had the same amount of tension as the new one. Replaced it anyway as its probably the original and not replace when I replace the engine. Put it in and recharged the K&N filter over night. The next day drove it around and it sounds like a brand new truck as it accelerates.

It made no real change in the symptoms.
What are the pressures now? You should have seen a low side pressure change.

You may be at the point where it is quicker just to flush the system, check the orifice tube orientation and start over.

I went ahead and ordered a new drier, condensor, PAG 46 oil, orifice tube, and flush.

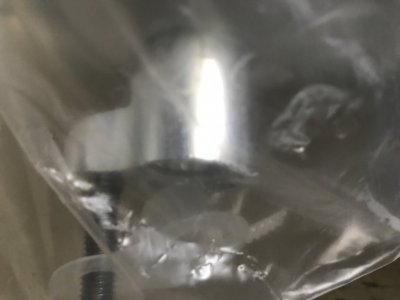
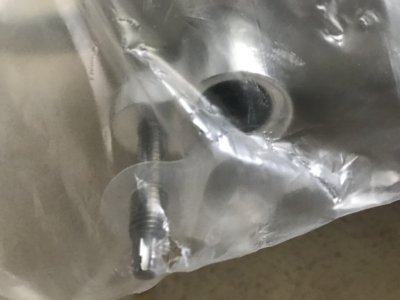
The flush, drier, oil, orifice tube, and condesor all got here today. Opened the box for the drier and the plug was off and the sealed bag had two holes in it at the bolt and the other end at the hose.

IMG_4277.JPG IMG_4276.JPG
I ended up calling the distributor for tech support. The parts guy double checked with someone else and said that as long as the system is vacced down any moisture will be removed. They have been in the A/C business since 1974. Rich you probably know who they are, it's GPD in Macon, GA.

Not sure if I should return it I already have a return label. I believe you posted that the drier should be installed last and should not be exposed for more than ten minutes. The drier was in transit for three days and there is no way of tell if the plug came off before that or during transit.
 
Last edited:

stamp11127

Full Access Members
Joined
Mar 10, 2012
Posts
6,218
Reaction score
1,250
Location
Temple, Georgia
We are having high humidity right now. I wouldn't chance using that drier seeing that it has been somewhat exposed to the ambient air. I'd send that back to them.

They are partially correct about the moisture but incorrect in not saying the desiccant inside may not function if it is saturated from already being exposed to humid air. It's function is to absorb any moisture as the system heats and cools during operation.

I haven't dealt with them but have seen their website.

When you flush the system make sure you place rags or something else to catch the flush that comes out or you will miss any crap that does come out plus make a pretty good mess. Make sure you also flush the rear ac portion also. I'd check the txv back there also and flush the evap at that point. Plus the lines to and from.

If you are going to use a recovery / recharge machine the company may also have a tank of nitrogen. If they do I'd vacuum then fill the system with the nitrogen and let it sit for 15-30 minutes then evacuate again. The nitrogen is super dry, it'll suck up any leftover moisture.
 
OP
OP
J

juan214

Full Access Members
Joined
Sep 11, 2013
Posts
506
Reaction score
60
Location
Stoughton, MA.
We are having high humidity right now. I wouldn't chance using that drier seeing that it has been somewhat exposed to the ambient air. I'd send that back to them.

They are partially correct about the moisture but incorrect in not saying the desiccant inside may not function if it is saturated from already being exposed to humid air. It's function is to absorb any moisture as the system heats and cools during operation.

I haven't dealt with them but have seen their website.

When you flush the system make sure you place rags or something else to catch the flush that comes out or you will miss any crap that does come out plus make a pretty good mess. Make sure you also flush the rear ac portion also. I'd check the txv back there also and flush the evap at that point. Plus the lines to and from.

If you are going to use a recovery / recharge machine the company may also have a tank of nitrogen. If they do I'd vacuum then fill the system with the nitrogen and let it sit for 15-30 minutes then evacuate again. The nitrogen is super dry, it'll suck up any leftover moisture.
I figured I would be sending it back. Thats fine guess I'll have to wait another week or so.

The flushing questions were next. Figuring out how to do it and how to catch it.
Any videos, instructions, or sites to check out for this truck or the process.

The tXV in back was replaced when I did the system over. I would need to remove it to do the flush anyway. What should I check for? I still have the old one around here somewhere.

I just sold the my old HP switch this past week on eBay.

Recovery machines are still down around here service companioes must be backed up or they do not want to do the work.

Dumb question if I find a shop with nitrogen am I skipping the flush?
  1. EVAC the system (if possible)
  2. Remover the drier
  3. Remove TXV
  4. Remove the condenser
  5. Remove compressor drain and fill the compresor with oil.
  6. Remove O tube (have a new one just in case)
  7. Flush the system lines and both EVAPs.
  8. Reintall parts.
  9. Vac down for hold
  10. Fill with Nitrogen?
  11. Vac down for hold
  12. Add remaining oil (12oz. total)
  13. Refill system with 60oz. of R-134a
Am I missing anything?
 
Last edited:

stamp11127

Full Access Members
Joined
Mar 10, 2012
Posts
6,218
Reaction score
1,250
Location
Temple, Georgia
Use a flush can with shop air, I believe I posted one brand in an earlier reply. Our shop air is at 90psi so when you open the valve it blasts the flush into the component.

Hold a clean rag or shop towel on the outlet of the component you are flushing. Flush both evaps in both directions.

Clean the txv with flush and note if any debris is on the needle or opening once you remove it.

Do not skip the flush whether you shoot the system with nitrogen.

Pay attention to the flow of the flush coming out, slow amount means a restriction. Normally when you open the valve there is a "blast" of flush coming out.

Go ahead and replace the orifice tube. Note the direction of flow with the arrow and if any trash on the "old" one. Direction of flow is from the condenser to the evaporator. Some systems will allow you to put them in backwards, don't know if Ford is that way though.

If you drain the oil from the compressor, catch it in a container that is graduated so that you know how many ounces came out. Put the same amount back in.

Add one ounce of oil to each evap, one ounce to condenser. We usually add less than factory spec total and run 50%-70%. As long as you don't go over the suggested factory amount you will be fine.

If you haven't changed the service ports now would be a good time to swap those out also. They are usually junk and leak after a few uses. You can have a leak at a service port and pass the leak test, once you unhook the couplers you hear the leak.
 
Last edited:

Latest posts

Members online

Forum statistics

Threads
53,530
Posts
501,753
Members
47,053
Latest member
cfarnAK
Top