Some Rear Wiper Options

Disclaimer: Links on this page pointing to Amazon, eBay and other sites may include affiliate code. If you click them and make a purchase, we may earn a small commission.

G213

Full Access Members
Joined
Apr 9, 2018
Posts
197
Reaction score
118
Location
Los Angeles
After some poking around and using some old gift cards...I’ve found three different rear wiper/arm combinations you could choose to use on your Gen3. (These may work on other generations, but I’m not sure) Maybe you'll want to try a different style on your truck.

Factory - Snap On Style

Arm Part Number: 9L1Z-17526-A
Blade Part Number: WW1612

This was the style my Expy came with; the blade snaps into the arm. This appears to be the style used for most of the Gen3's. When I first attempted to change the blade, I snapped the arm by mistake. Not a fan of this design. This arm lifts a couple inches away from the glass.

Factory - Slide On Style w/ Release Button

Arm Part Number: 9L1Z-17526-AA
Blade Part Number: WW1614

It looks like this was the style used on 2017s before the design change. This is what I’m currently using. I like this clean look, but it's best for warmer climates; works great for water but not the best for snow and ice. Note that this arm doesn’t lift more than an inch or so off the glass, which makes winter scraping difficult.

Aftermarket - Metal Arm and Bosch Icon Blade

Arm Part Number: Dorman 42651
Blade Part Number: Bosch Icon 13A

This was the style I used before I finally tracked down the part numbers for the slide on arm and blade. This would be my choice if I lived in a colder climate; I’ve run Bosch Icons since they came out, they perform great in snow and ice. This arm lifts a good 4 inches away from the glass, making scraping and snow removal much easier.

Other blades will fit this aftermarket arm as well, as long as they are 13 inches and support the hook-style connector.
 
Last edited:

LokiWolf

Super Moderator
Staff member
Super Moderator
Joined
Apr 2, 2016
Posts
3,650
Reaction score
2,455
Location
Richmond VA
After some poking around and using some old gift cards...I’ve found three different rear wiper/arm combinations you could choose to use on your Gen3. (These may work on other generations, but I’m not sure) Maybe you'll want to try a different style on your truck.

Factory - Snap On Style

Arm Part Number: 9L1Z-17526-A
Blade Part Number: WW1612

This was the style my Expy came with; the blade snaps into the arm. This appears to be the style used for most of the Gen3's. When I first attempted to change the blade, I snapped the arm by mistake. Not a fan of this design. This arm lifts a couple inches away from the glass.

Factory - Slide On Style w/ Release Button

Arm Part Number: 9L1Z-17526-AA
Blade Part Number: WW1614

It looks like this was the style used on 2017s before the design change. This is what I’m currently using. I like this clean look, but it's best for warmer climates; works great for water but not the best for snow and ice. Note that this arm doesn’t lift more than an inch or so off the glass, which makes winter scraping difficult.

Aftermarket - Metal Arm and Bosch Icon Blade

Arm Part Number: Dorman 42651
Blade Part Number: Bosch Icon 13A

This was the style I used before I finally tracked down the part numbers for the slide on arm and blade. This would be my choice if I lived in a colder climate; I’ve run Bosch Icons since they came out, they perform great in snow and ice. This arm lifts a good 4 inches away from the glass, making scraping and snow removal much easier.

Other blades will fit this aftermarket arm as well, as long as they are 13 inches and support the hook-style connector.

I am using the aftermarket arm and love it! Nothing like a real blade to take care of it all!


Sent from my iPhone using Tapatalk Pro
 

Black

Full Access Members
Joined
Mar 26, 2018
Posts
1,373
Reaction score
640
Location
Kentucky
Pretty sure Option 2 was introduced midway of the 2016s.
I have a 16 with that setup.

I am switching to option 3 as it fits all the blades on the shelf of auto parts stores.
 

B-McD

Full Access Members
Joined
Jul 12, 2016
Posts
240
Reaction score
111
Location
Illinois
LokiWolf and others - how difficult is the removal of the factory arm and replacing with the Dorman one above? I have the slide-on style which are a breeze to change but are not very robust for us in the land of ice and snow. Thanks!
 

AllBoostNoEco

Full Access Members
Joined
May 2, 2017
Posts
328
Reaction score
195
Location
GA
LokiWolf and others - how difficult is the removal of the factory arm and replacing with the Dorman one above? I have the slide-on style which are a breeze to change but are not very robust for us in the land of ice and snow. Thanks!
Pop up the plastic at the center, remove 14mm nut, pull arm off. Put new arm on, reinstall nut, pop plastic down, and you’re done. Only thing to watch for is misalignment of the arm when you reinstall it. It’s easy to shift the arm a little and have the blade run off the window.
 

LokiWolf

Super Moderator
Staff member
Super Moderator
Joined
Apr 2, 2016
Posts
3,650
Reaction score
2,455
Location
Richmond VA
LokiWolf and others - how difficult is the removal of the factory arm and replacing with the Dorman one above? I have the slide-on style which are a breeze to change but are not very robust for us in the land of ice and snow. Thanks!

AB Got it. Not hard. You won’t regret it! I will take a pic Tuesday. Wife is on her 4th 12 Hour shift in 4 days(Life as a Nurse).


Sent from my iPhone using Tapatalk Pro
 

LokiWolf

Super Moderator
Staff member
Super Moderator
Joined
Apr 2, 2016
Posts
3,650
Reaction score
2,455
Location
Richmond VA
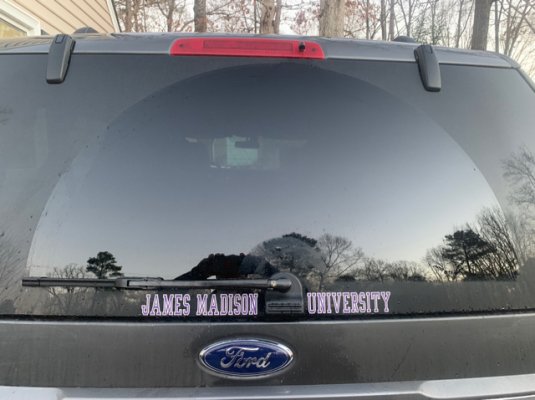
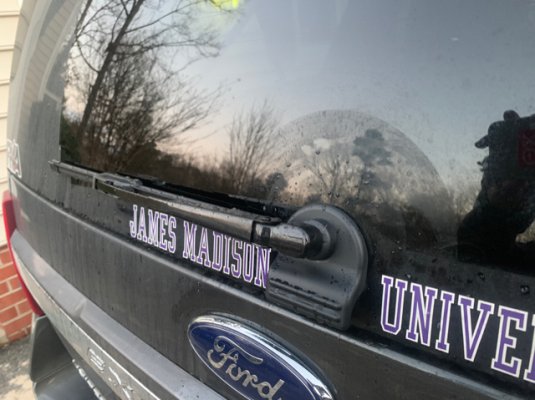
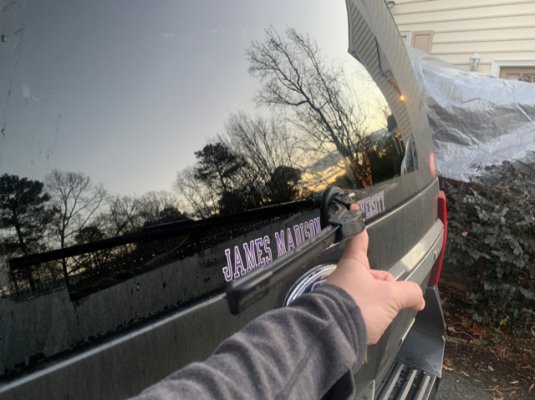
Here are some pics, Also, replace the 13A option of Wiper with the 17A. 13 covers FAR less than the factory. 17A covers perfect!

529d0b413065d9447d15163542560cc5.jpg

545c1ee93c1bb95c6e0159c2f9d3e8e5.jpg

5c1a86b59c10b41c9fcf4a737ee10013.jpg


Sent from my iPhone using Tapatalk Pro
 

GeezingInVA

Well-Known Member
Joined
Jul 3, 2015
Posts
49
Reaction score
9
Location
Clifton, VA USA
Pop up the plastic at the center, remove 14mm nut, pull arm off. Put new arm on, reinstall nut, pop plastic down, and you’re done. Only thing to watch for is misalignment of the arm when you reinstall it. It’s easy to shift the arm a little and have the blade run off the window.

I've purchased and have in-hand the "option 3" arm and the recommended Bosch Icon 17" blade, but...

Being "the guy" who somehow always manages to break something that's supposed to be easy, what exactly do I grab to "Pop up the plastic at the center"? I gently coerced it, but I haven't gotten the plastic center that covers the nut to pop off, yet. Are there tabs holding it on, does it pivot somehow, or is it just on there by friction and I'm just not pulling/prying on it enough?

Sorry to be asking for help on what's obviously the easiest part of this replacement. LOL. :banghead:
 

LokiWolf

Super Moderator
Staff member
Super Moderator
Joined
Apr 2, 2016
Posts
3,650
Reaction score
2,455
Location
Richmond VA
I've purchased and have in-hand the "option 3" arm and the recommended Bosch Icon 17" blade, but...

Being "the guy" who somehow always manages to break something that's supposed to be easy, what exactly do I grab to "Pop up the plastic at the center"? I gently coerced it, but I haven't gotten the plastic center that covers the nut to pop off, yet. Are there tabs holding it on, does it pivot somehow, or is it just on there by friction and I'm just not pulling/prying on it enough?

Sorry to be asking for help on what's obviously the easiest part of this replacement. LOL. :banghead:

The little plastic cover is hinged with pinch tabs. Might need to pop with a flat head...


Sent from my iPhone using Tapatalk Pro
 
Top