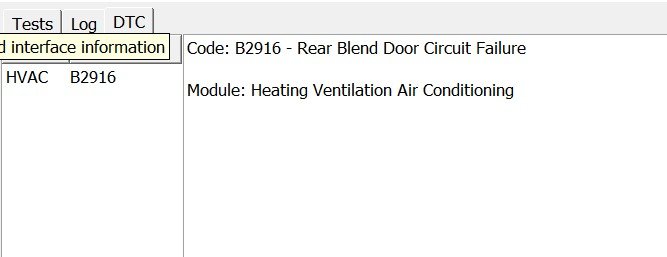
Used the following to swap out the blend door actuator on my ‘04. Looking at my ‘16 these directions look like they apply.
FYI… if the truck is blowing cold that means the blend door is in the cold position (both physically and electronically). So, with the rear temperature set to coldest position connect the new actuator. The gear should spin to position itself to match the temperature selection. Now, install the actuator on the blend door (might wanna disconnect harness). You may have to rotate the entire blend door assembly to line up the splines on the gear. Once aligned, fully seat the actuator and install hardware. Connect harness if it was disconnected for installation.
Below are the two blend door procedures. You’re going to go to the “Hard” One. Be aware you will be instructed to remove the rear panel that covers the HVAC unit; which requires you to remove the rear seat. This works, but takes much longer. I’ve also done it without removing that panel by “squeezing” my hands inside of that panel through the cup holder. It’s really tight!!! Be very careful not to drop anything in there if you decide to do it this way. Good luck…
Tools Required: 5/16" socket (small driver is better than larger in my opinion), phillips screwdriver, Torque head socket, and maybe a flathead to jimmy the trim off in some spots.
Parts Required: Got mine from Oriellly Auto Parts ($34) it's a Dorman Heater Blend Door Acutator:
Part # 604-213- lower
Part # 604-202- upper
"Easy" One
1. Simply Pop off the Long Change/crap holder underneath the rear passenger side glass. (Snaps right out with a little pressure but be careful).
2. Turn on your car and adjust the Rear A/C until you hear the thumping.
3. You will see the Rear A/C unit and right on top is an White/Opaque square box. Unplug the wiring harness from this box and see if it stops. If it does you are in luck! If not see "Hard" One
4. Pop out the cup holder just in front of the open trim hole (you will need to to get another hand in there)
5. Use your 5/16" socket and remove. Place the new part in it's place.
6. Make sure you align the pin (Do this by pluging the wiring harness into the new unit and have someone adjust the Hot/Cold until the pin lines up and the new actuator slips in correctly and the bolt hoes line up.
7. Bolt in and Test....Replace the trim and you are done.
'Hard" One
1. Do above procedure until step 3 if the thumping does not stop put the wiring harness back in "Easy" one and locate the 2nd actuator which is a little farther forward and along the side next to the trim. Disconnect that wiring harness and verify the thumping stops. If it does not stop...Sorry you are SOL for this thread. If it does stop, make sure you have a couple hours to devote to replacing this. If you don't just leave it disconnected until you have time (at least the thumping has stopped but you will likely have drastic temps in the rear)
2. Now you basically need to remove the rear trim panel enough to get the space to remove this unit.
3. Below is the order I would take the trim off...Just need a little force to get the clips out
A-remove the spare tire lid, and jack
B- remove the skid trim
C- remove the black jack liner 5/16" socket and a rubber gasket and it snaps out
D- remove the top center trim
E- Use Torque head socket to remove the top seat belt bolt
F- unscrew the plastic screw which hold down the rear panel trim "ear" to the frame
G- snap off the upper Corner post trim enough to get the rear panel snapped out
H- snap off the rear panel enough so you have some room to work (there won't be much but there is enough to get in there) otherwise you will have to take the entire panel off which I did not do.
4. Unbolt the actuator 5/16" socket Qty 4
5. Place the new part in it's place.
6. Make sure you align the pin (Do this by plugging the wiring harness into the new unit and have someone adjust the Hot/Cold until the pin lines up and the new actuator slips in correctly and the bolt hoes line up.
7. Bolt in and test... replace the trim, and your done.


