hey all. Anyone with a newer model (15-17) have to do anything with their brake lines with a 3/2 kit installed? I'm putting a readylift 3/2 on my 2016 Saturday and the only thing they talk about instruction wise is drilling a new hole for the brake line clip to be moved down an inch or so. Was wondering if anyone actually had to extend their original brake lines.
You are using an out of date browser. It may not display this or other websites correctly.
You should upgrade or use an alternative browser.
You should upgrade or use an alternative browser.
3/2 lift issues 2016
- Thread starter J Ski
- Start date
Disclaimer: Links on this page pointing to Amazon, eBay and other sites may include affiliate code. If you click them and make a purchase, we may earn a small commission.
hey all. Anyone with a newer model (15-17) have to do anything with their brake lines with a 3/2 kit installed? I'm putting a readylift 3/2 on my 2016 Saturday and the only thing they talk about instruction wise is drilling a new hole for the brake line clip to be moved down an inch or so. Was wondering if anyone actually had to extend their original brake lines.
No, but you do need to move the clip like they said.
Just started today. Apparently the 2016 model lower shock mounts are 2 pressed in bolts, not the single slide through like older models. The lift cannot be installed with a spring compressor. Furthermore, my front spacers were packaged in a 2004-2014 f150 box and I had instructions for a 2011 Expedition not my 2016. Sending the kit back and finding every company that sells their product to give a 1 star review
So...you're one of THOSE kind of people...Just started today. Apparently the 2016 model lower shock mounts are 2 pressed in bolts, not the single slide through like older models. The lift cannot be installed with a spring compressor. Furthermore, my front spacers were packaged in a 2004-2014 f150 box and I had instructions for a 2011 Expedition not my 2016. Sending the kit back and finding every company that sells their product to give a 1 star review
Take pictures to show what you're running up against. Every shock I can find for sale lists as fitting 03-17. The ReadyLift also lists as fitting the 03-17. The front spacers that comes with the kit are also marketed for the F-150 because, get this, it's the same spacer that fits the Expedition. Mine was in the same box yours came in. Fit perfect. No spring compressor needed, that's the point of separating the upper ball joint from the spindle on the front, and removing the bolt from the lower control arm on the rear.
Last edited:
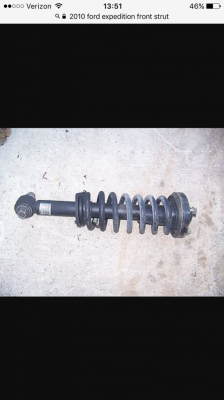
First picture: front strut for a 2010 Expedition
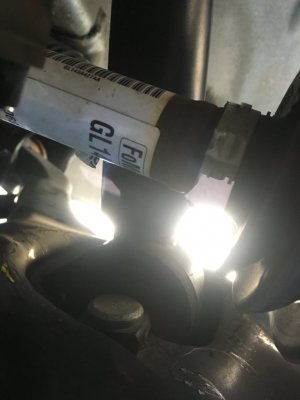
Second picture: front strut lower. As you can see the two bolts running down through the lower control arm unlike earlier models that have one bolt that runs through a piece of metal welded on top of the lower control arm. Bolt is probably 2-3" long and splined into the lower portion of the OEM strut assembly.
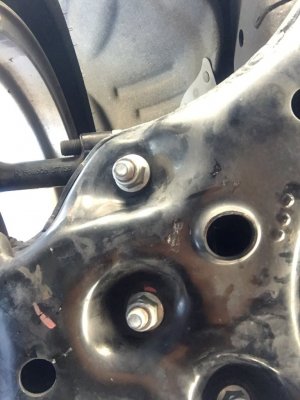
Third picture: shows the bottom of the two bolts coming through the lower control arm in the front.
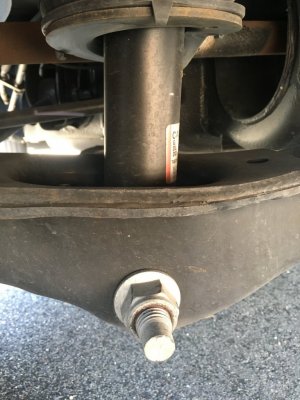
Fourth picture: rear lower strut bolt which runs horizontally through the lower control arm.
Instructions for readylift model 69-2070 only goes up through year 2011
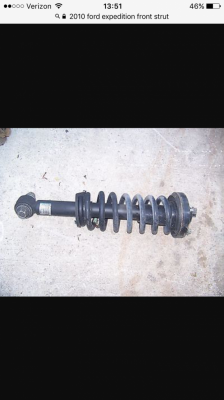
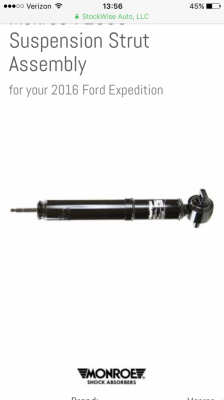 Obvious difference sir looks like you have to punch out be splined bolts to reinstall with the spacer on it which is not listed in the instructions because the 2011 has the older style struts. What do you have to say to that?
So...you're one of THOSE kind of people...
Take pictures to show what you're running up against. Every shock I can find for sale lists as fitting 03-17. The ReadyLift also lists as fitting the 03-17. The front spacers that comes with the kit are also marketed for the F-150 because, get this, it's the same spacer that fits the Expedition. Mine was in the same box yours came in. Fit perfect. No spring compressor needed, that's the point of separating the upper ball joint from the spindle on the front, and removing the bolt from the lower control arm on the rear.
So take the nuts off of the front lower strut mount, with a floor jack under the lower control arm, separate the upper ball joint from the spindle. Lower the floor jack to relieve spring pressure of coilover. Remove coilover, install spacer, reinstall coilover lower studs in lower control arm and maneuver it back into the pocket. Pump the jack handle to raise the control arm and install nuts on top of strut tower. Pull upper control arm down with prybar to install upper ball joint in spindle.
It should follow the directions pretty closely. You could also try emailing ReadyLift for updated instructions, instead of going all SJW tirade on reviews.
It should follow the directions pretty closely. You could also try emailing ReadyLift for updated instructions, instead of going all SJW tirade on reviews.
Okay so are you saying the one on the left is the new one they sent you and the one on the right is a new picture of the old one? can you reuse the flange piece with the two bolts?View attachment 21212 View attachment 21213 Obvious difference sir looks like you have to punch out be splined bolts to reinstall with the spacer on it which is not listed in the instructions because the 2011 has the older style struts. What do you have to say to that?
No, the picture with the springs over the strut is of the older model fords that have 1 bolt that runs horizontally through the lower part of the strut to install. The 16s have 2 bolts that run vertically and when you put a spacer on the top you now have the spacer plus another 2-3" of those bolts that cannot be reinstalled unless the lower control arm is loosened and the two bolts are punched out of their housing. Instructions have not been updated since 2011 for these newer type of struts so I had no idea that needed to be doneOkay so are you saying the one on the left is the new one they sent you and the one on the right is a new picture of the old one? can you reuse the flange piece with the two bolts?
Similar threads
- Replies
- 4
- Views
- 2K
- Replies
- 5
- Views
- 1K
- Replies
- 4
- Views
- 1K

