Conversation mirror replaced with backup camera

Disclaimer: Links on this page pointing to Amazon, eBay and other sites may include affiliate code. If you click them and make a purchase, we may earn a small commission.

obonaven

Active Member
Joined
Jan 18, 2013
Posts
42
Reaction score
9
Location
Southern NJ
My little project is finally done after a month long delay. My truck was in the body shop for a month.

I replace the useless conversation mirror with a 4.3" monitor and added a chrome camera on the liftgate. Parts totaled about $40.

My next project is to install a backup camera up on the rear of my travel trailer. The monitor has 2 inputs so I might as well put it to good use.

IMG_20150715_113855.jpg

IMG_20150829_111854.jpg

IMG_20150829_111901.jpg

IMG_20150829_111949.jpg

IMG_20150829_112030.jpg
 
Last edited:
OP
OP
obonaven

obonaven

Active Member
Joined
Jan 18, 2013
Posts
42
Reaction score
9
Location
Southern NJ
More pics
 

Attachments

  • IMG_20150829_112037.jpg
    IMG_20150829_112037.jpg
    94.9 KB · Views: 87
  • IMG_20150829_112056.jpg
    IMG_20150829_112056.jpg
    90.9 KB · Views: 93

thetechie01

Member
Joined
Mar 6, 2015
Posts
18
Reaction score
6
Location
Olympia
I like that! Mine doesn't have the mirror because of the sunroof, so I had to do the clip on rear view mirror with screen built in, but same idea!
 

CrimsonKing

Active Member
Joined
Jan 29, 2013
Posts
26
Reaction score
4
Location
PA
This is awesome! Can you give a list of the actual parts you used, as well as an overview and pointers for the install? I wouldn't mind doing this.
 

mjayn

Active Member
Joined
Jul 18, 2015
Posts
30
Reaction score
2
Location
Chicago
I like that! Mine doesn't have the mirror because of the sunroof, so I had to do the clip on rear view mirror with screen built in, but same idea!


What brand did you use? Any tips, do and don'ts? I am thinking about a backup camera. I would like to do it the easiest possible way. Just want the wife not to hit anything and so I can keep an eye on trailer(while driving forward would be nice but while backing is the main reason.)

2010 XLT with sunroof.
 
Last edited:

thedodgedude

Member
Joined
Jun 17, 2013
Posts
8
Reaction score
0
Location
Ga
That looks awesome! I think I'll do that to ours! What monitor did you use and did you take any pictures along the way of the install?

Sent from my SM-N920V using Tapatalk
 
OP
OP
obonaven

obonaven

Active Member
Joined
Jan 18, 2013
Posts
42
Reaction score
9
Location
Southern NJ
Sorry but no pics of the install. I bought the monitor and camera off ebay. The hardest part was installing the camera because I had to pull the interior trim off the rear hatch, then secured my wiring using the same path Ford used.
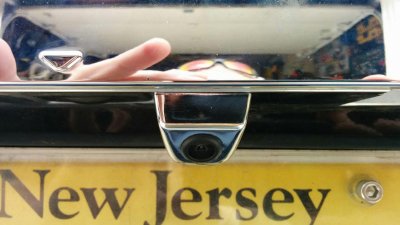
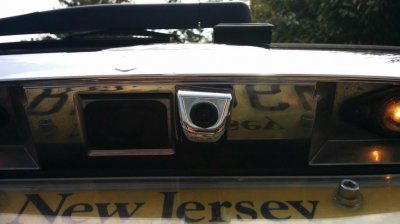
This is the camera - Silver Car Rear View CCD 170 Front Back Forward Camera Reverse Backup Parking | eBay. I picked this one becaue it was Chrome and seemd like a good match to the trim where I installed it. if you look closely it is tilted a little bit to make up for the fact that is is off to the side a little. I used the green, yellow, red lines that are displayed to line in up to a know strainght object nad what litle of the bumper I could see.

This is the monitor - 480 x 272 4 3" inch TFT LCD 2 CH Video Input Color TFT Car Rear View Monitor | eBay. I picked this one because the controls were on the front, it's size and that it has 2 video inputs. I use the other input for a camera I installed on the back of my 25 travel trailer (CCD Rear View Backup Camera Bus RV Truck Trailer Heavy Duty Aviation Connector | eBay). I have not had the chance to use the one on the TT yet on the road.

The monitor has switched power so it will only come on when the ignition is on and also it is designed to not come on unless there is a video input available. The camera on the truck is wired into the reverse lights and will only come on when in backing up. The one on the camper stays on all the time so I can see whats going on behind me when I drive. As far as I cna tell there is no way to switch inputs, It is automatic.

I do wish I could have used a larger monitor but I wanted it to disapear when not in use.

The video cable that came with the truck camera was just long enough to get ot he back of the truck. I had to purchase an extension to run to the hatch.

The trailer camera uses a 4 pin cable, which was perfect to run under the trailer. The cable provided was long enough to run from the top down the side, to the front and into the truck. From there I use a set of adapters (4pin M12 Aviatic Male Female to BNC RCA Male Female DC Power*male Female Cable | eBay and 1M BNC Male to RCA Male Cable for CCTV Security Camera System | eBay) to go from the 4 pin cable to the video and power. I made an adapter to go from the red power plug to a 12vdc plug to use the power point in the back to power it.

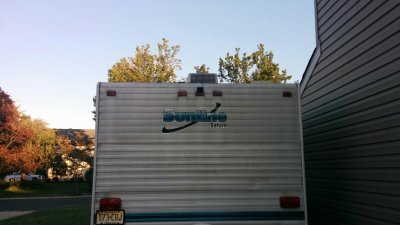
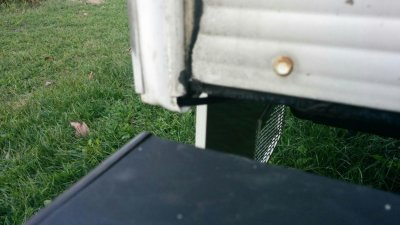
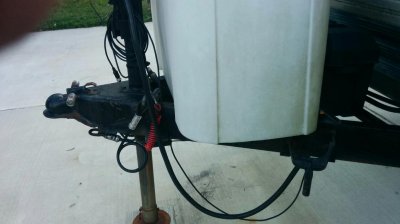
Here are a couple of pics of the camera on the camper. The cable goe up to the roof, across to the left, down behind the white rubber trim to the bottom and then ran it along the frame to the front.
 

Attachments

  • IMG_20150919_174514.jpg
    IMG_20150919_174514.jpg
    98.1 KB · Views: 30
  • IMG_20150919_174505.jpg
    IMG_20150919_174505.jpg
    82.8 KB · Views: 39
  • IMG_20150919_174529.jpg
    IMG_20150919_174529.jpg
    99.4 KB · Views: 31
  • IMG_20150919_174549.jpg
    IMG_20150919_174549.jpg
    94.3 KB · Views: 40
Top