Front
----------------------------------------
Removal
1. NOTE: Release the top portion first.
Remove the sail panel.
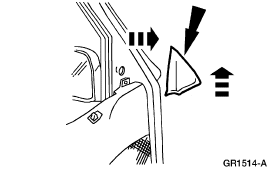
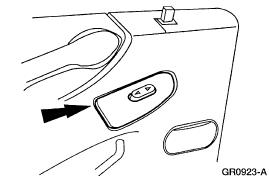
2. Remove the window regulator switch plate.
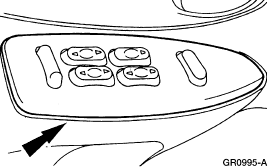
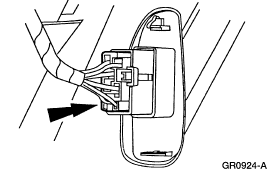
3. Disconnect the electrical connectors.
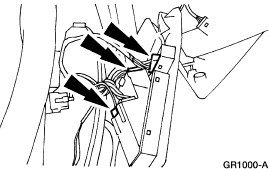
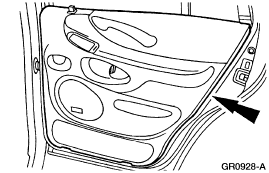
4. Remove the upper door trim panel screw.
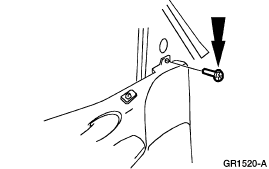
5. Remove the door trim panel screw at the window regulator switch plate opening.
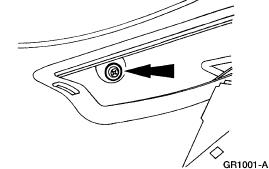
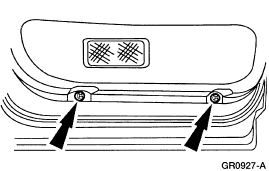
6. Remove the door trim panel screw in the courtesy lamp housing.
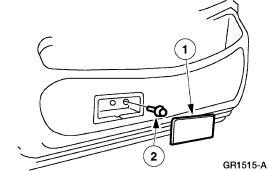
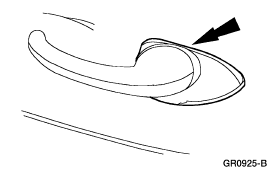
7. Remove the inside door handle trim cover.
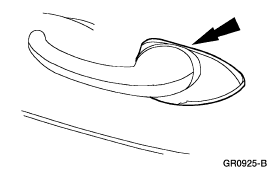
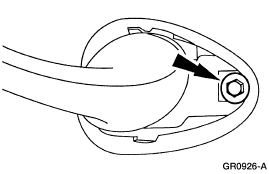
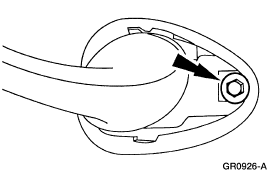
8. Remove the inside door handle.
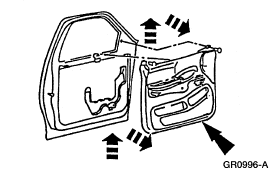
9. CAUTION: To avoid damage to the front door trim panel, do not pull directly outward.
Lift upward and then outward to remove the front door trim panel.
10. Remove the courtesy lamp and socket.
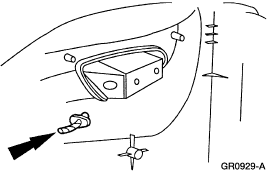
11. Disconnect the power mirror electrical connector.
--------------------------------------------------------------
Installation
1. Connect the power mirror electrical connector.
2. Install the courtesy lamp and socket.
3. Install the front door trim panel.
4. Install the inside door handle.
5. Install the inside door handle trim cover.
6. Install the door trim panel screw in the courtesy lamp housing.
7. Install the door trim panel screw at the window regulator switch plate opening.
8. Install the upper door trim panel screw.
9. Connect the electrical connectors.
10. NOTE: If a new trim panel is required: Some new trim panels have a cut out opening for the window switchplate that is larger than that on the original trim panel. When installing a new trim panel, install the window switchplate in the following sequence to make sure that the switchplate is secured fully into the door trim panel.
Install the window regulator switchplate.
11. NOTE: Install the lower portion first.
Install the sail panel.
----------------------------------------
Removal
1. NOTE: Release the top portion first.
Remove the sail panel.

2. Remove the window regulator switch plate.

3. Disconnect the electrical connectors.

4. Remove the upper door trim panel screw.

5. Remove the door trim panel screw at the window regulator switch plate opening.

6. Remove the door trim panel screw in the courtesy lamp housing.
a. Remove the courtesy lamp lens.
b. Remove the screw.
b. Remove the screw.

7. Remove the inside door handle trim cover.

8. Remove the inside door handle.
-Remove the bolt.

9. CAUTION: To avoid damage to the front door trim panel, do not pull directly outward.
Lift upward and then outward to remove the front door trim panel.

10. Remove the courtesy lamp and socket.

11. Disconnect the power mirror electrical connector.
--------------------------------------------------------------
Installation
1. Connect the power mirror electrical connector.
2. Install the courtesy lamp and socket.
3. Install the front door trim panel.
4. Install the inside door handle.
-Install the bolt, using 9Nm or 80 lb/in.
5. Install the inside door handle trim cover.
6. Install the door trim panel screw in the courtesy lamp housing.
a. Install the screw.
b. Install the courtesy lamp lens.
b. Install the courtesy lamp lens.
7. Install the door trim panel screw at the window regulator switch plate opening.
8. Install the upper door trim panel screw.
9. Connect the electrical connectors.
10. NOTE: If a new trim panel is required: Some new trim panels have a cut out opening for the window switchplate that is larger than that on the original trim panel. When installing a new trim panel, install the window switchplate in the following sequence to make sure that the switchplate is secured fully into the door trim panel.
Install the window regulator switchplate.
a. Insert the rear switchplate clip into the trim panel opening.
b. Install the forward and side clips into the trim panel opening.
b. Install the forward and side clips into the trim panel opening.
11. NOTE: Install the lower portion first.
Install the sail panel.
Last edited:


