Just replying to this thread as a I did a very similar setup recently, albeit only the Sub portion (I did replace the center channel just cuz it's so easy).
I was able to spread my work out over a few weeks but doing some pieces here and there. The crazy order I did this in was essentially:
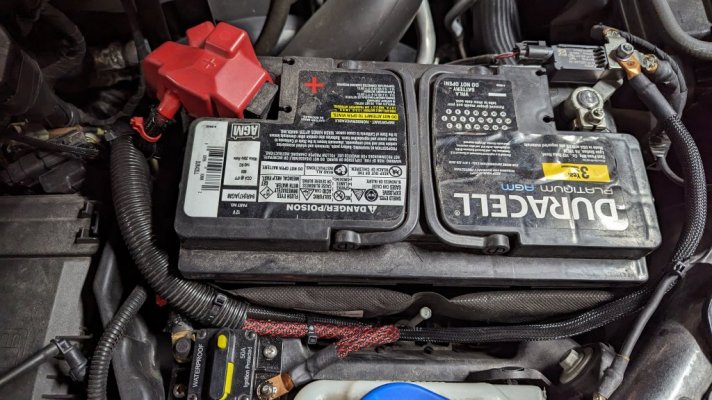
1) Started by laying everything out, getting ready, then ordering materials. Due to the Aluminum chassis and possible ground differentials, I was preparing to run full length power and ground. So I ordered a full lenght kit from the friends at Sounds Good.
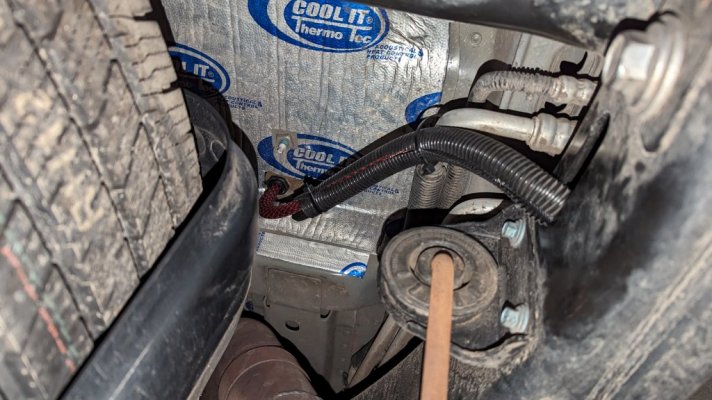
2) While I was waiting for the wiring, I got under the car and spent a couple hours with a fish tape, some twine, and then some steel cable. I was able to use my fish tape and first pull twine from rear to front, the entire way through the actual frame rail. I know many others just follow the frame rail, but I actually wanted additional protection for the wiring from the exhaust and other items, so I pulled twine through first, then steal cable, as I knew this was going to require some serious pulling power with 2x 4GA wires. I pulled the twine and cable from just a hole in the frame rail just to the right of the spare, all the way to the back of the front passenger wheel well.
3) about a week later, I pulled the actual power wires the whole way, and it definitely wasn't easy. I even drilled a hole through one of the wires and ran the steel cable through that before bundling it up together with electrical tape. I then tapered the two cables to hopefully help. It unfortunately came apart about 3" before I wanted it to but was able to use some needle nose locking pliers and was able to get stuff to go. I then bundled the wire up between the 3rd row and the spring loaded covers just before the storage bin.
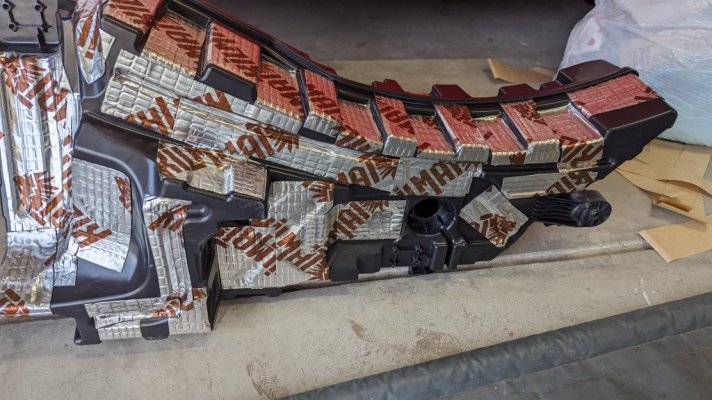
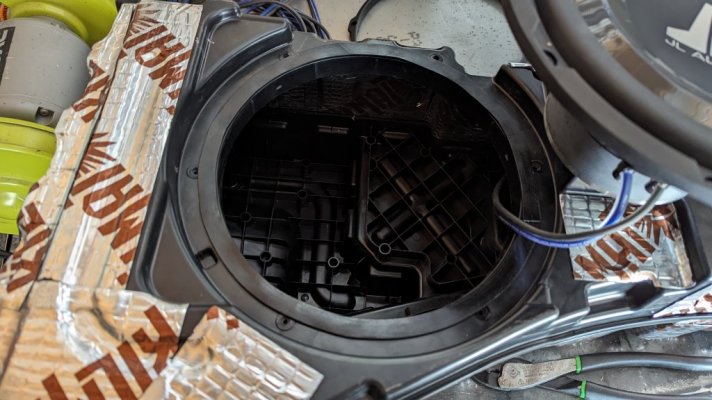
4) A week after that, I made a great decision to actually buy a factory sub enclosure, used, off of ebay. This allowed me to prep the enclosure over time, before actually tearing things apart. This was critical due to the available depth for a driver. For those that want to know, I measured roughly 5.75" max, more like 5.5 or even 5 if your driver has a vented pole. I spent a lot of time as you'll see wrapping the sub enclosure in sound deadening material inside and out. I also used a square of Blackhole stuffing to help change the crazy elongated nature of the enclosure. I also drilled the OEM wires out of the grommet, ran my 10GA wire and sealed the grommet and the wire with pure silicone adhesive.
5) For the driver, unfortunately my existing JL 10W0v3 was too deep, by quite a bit. but this was a good thing that I was able to test fit it before tearing apart the car. So I managed to get a good deal on a 10w1v3 that fit great! With almost an inch to spare. I love this sub, the shape of the magnet, and especially the recessed woofer surround and minimal added clearance for the excursion worked great. In fact, some folks doing this job have had to cut out the factory grill and put a new one on for excursion, this woofer fit so good I had plenty of clearance to even add the super thick foam pieces people use in door speakers. The only downside to this sub is that I really wanted a 2ohm version that could support 400-500W for my monoblock amp. Unfortunately for my price range, depth, etc, I settled on one of these which means at 4ohm I'm pushing about 300W to the sub. Still substantially better than the factory sub.
6) in preparing for connectivity. I had an existing JL audio JX5001/D, and a PPI INT.5B, so I knew I'd be using both of those. But to make things easier, I did buy this harness, and it worked flawlessly (Harness Only -
https://plugnplaykits.com/products/...plug-play-harness-kits?variant=41163051368638). $70 is a bit steep but it worked great to provide high level connectivity to my INT5.B. Given that the factory setup is a dual voice coil setup, I essentially bridged both of the + / - connections as the INT.5B only has a single +/- connection for sub. I also used the INT5.B's automated signal sensing for remote power on/off. I love that I don't have to run a remote since the factory amp does not have a remote wire, power signal is run via the bus. The INT5.B also has a 60 second timer so that it keeps the amp on for 60 seconds after signal stops, to help reduce issues.
7) Install day! I definitely watched the sounds good stereo install videos several times. It definitely helped me figure out the order of panel removal. I'm not going to harp on it too much but these plastic-a$$ panels are huge pains. It literally feels like Ford uses one-time use clips and panels. Pulling some of these out was miserable, regardless of which panel popper I used. Actually panel poppers barely worked, I had to squeeze my hands and fingers in as much as possible to pull them out. Even then, several clips broke and nearly shredded the plastic tabs the clips hang on to. I did buy some replacements ahead of time just in case. The stupid D pillar pieces with the speakers were some of the worst. One of them I had to pull with so much force, then when it finally broke loose, it pulled broke the leads right off the speaker. So I had to repair that with hot glue. Triple check you disconnect all wires before pulling the side panels off. I know Ford directions say you have to remove the seats but you don't.
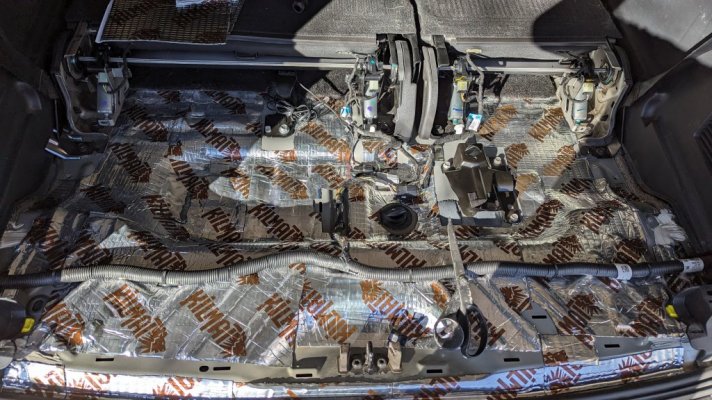
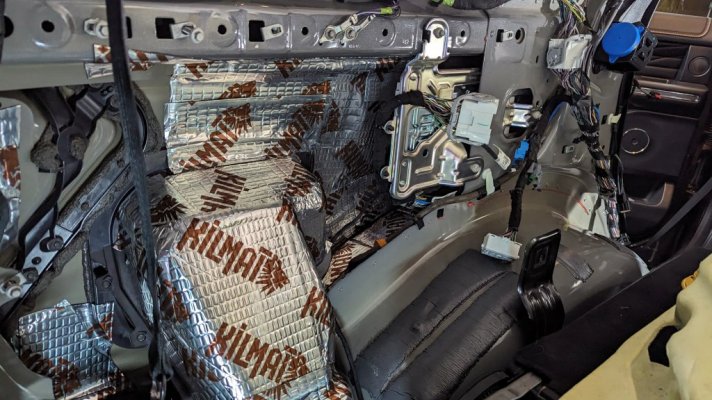
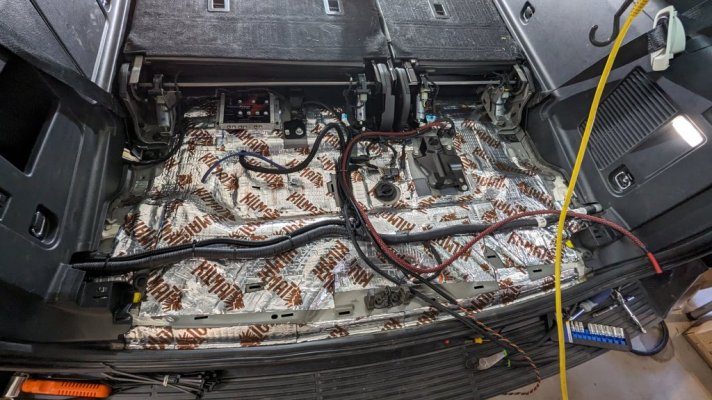
The sub was a bit tough to get out, you have wiring harnesses on top, that I ended up disconnecting completely to move out of the way, and the rubber sound insulation they used actually holds onto the sub a lot. A tip was to first pull out the black mounting tab that the tie down is screwed to, pull that out a bit to give some play. And pull from the rear out and up at the same time. It's insane that these things weigh like 10lbs at max. After pulling the sub, I pulled the park assist module out, and the factory insulation out. Then I pulled the factory amp so I could connect the wire harness referenced earlier and add sound insulation to everything I could reach (also in the pics).
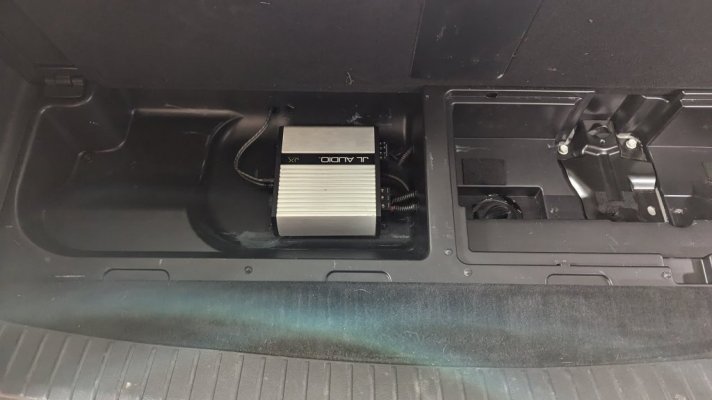
After insulating everything and running my harness wires (high level inputs) and the speaker wire from the sub enclosure, I started putting everything back together. I added 1" insulation foam to the sub frame to ensure the factory grill sits far enough away from the sub for excursion. You'll see in the picture how I bundled and ran the wires, where the INT5.B sits and the Amp. I didn't like that the amp is upside down, but it made it easier to run the wires. Also, I didn't want to mount the amp to the actual chassis, as the spare tire sits right there and I didn't want screws to protrude through the metal and possibly puncture the spare. So I just used black anodized bolts and mounted the amp to the plastic of the bin area.
In the end, I still have some tuning to do but it is a massive improvement in the low end, some of my favorite WU sounds so much better. I do see why some folks do all of the mids and highs too, but honestly these are pretty good at those spectrums. The bass was always lacking for the size and volume of this vehicle. So far I'm very happy and I'm sure I could have done things different but I do find these vehicles a bit more limiting than the old ones, lol. Any questions about my experience, please don't hesitate to contact me.