I didn't know if this little project was going to work so I didn't document very well.
Here's the link to the project that got me thinking I could do this. Keep in mind this will be of absolutely no help on a first gen Expy OEM radio. Might be useful to 2nd gen owners
Adding an auxilary input into a Ford stereo
According to the forums, the signal from a plugged in device would be stronger than the FM receiver signal so all you would hear is your plugged in device. Some users claim they can hear the FM audio if they turn the volume of their device down. Seems to me like the FM audio would come through between songs but maybe the output signal is still strong but mute. I don't know enough about it.
I'm guessing here, but I think the eBay seller is using a 6 pin aux jack switch. They would disconnect the FM receiver output from the circuit board and run to the aux jack. The output of the aux jack would then run to the input side of the main amp. When nothing is plugged into the jack, the FM signal would leave the receiver travel to the jack and back to the amp input. When a device is plugged in, the FM signal would be interrupted and only the plugged in device signal would feed to the amp. That would be a cleaner install signal wise but a much more complicated mod of the radio.
What I ended up doing was actually quite simple and doesn't require nearly as much tear down as what I did.
If you just want to connect to the tape player output:
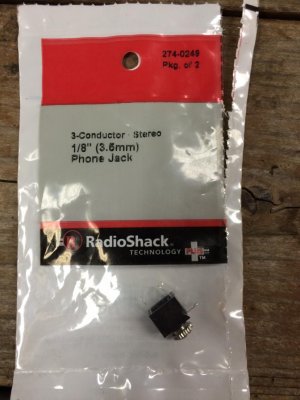
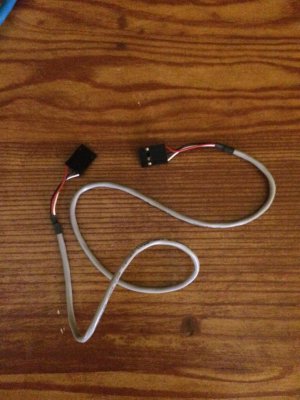
Buy these from (insert favorite electronics store here) I used Radio Shack:
I scrounged this out of my spare parts bin. It's a CD Rom audio cable. The wires are small, pliable, and shielded. I just cut off the ends.

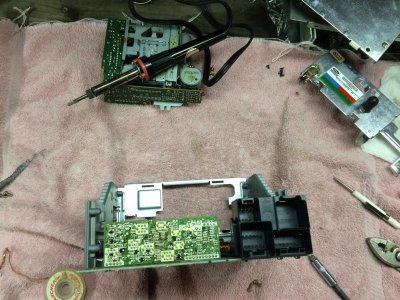
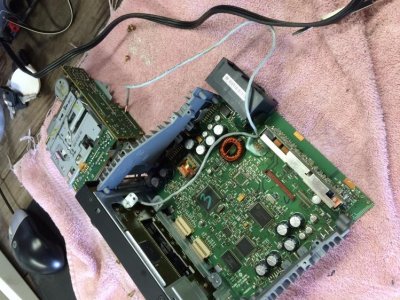
For access remove the top radio cover. There are two screws Torx, not sure of the size but smaller than T-10. Maybe T-7. Since I didn't have the right size Torx I was able to turn them with pliers. After the two screws are out the cover just pops off. The tape unit is held in with 3 screws and I think these were Torx T-10. After you remove the 3 screws the tape unit just lifts out. It's connected to the main board via a socket so you don't have to worry about delicate ribbon cables. Once out, look at the circuit board on the back of the unit. The outputs are clearly marked with an R and L. You'll see the R and L in the upper left corner and also in the lower right corner. Either will work, I used the lower right hoping they would be on the other side of the tape in switch but it wasn't, so a tape has to be inserted for the audio to get through. I soldered my wires to the existing pins on the circuit board. I attached the ground to the screw that secures the circuit board to the tape chassis. Didn't solder, just loosened the screw, stuck the wire under and re tightened.
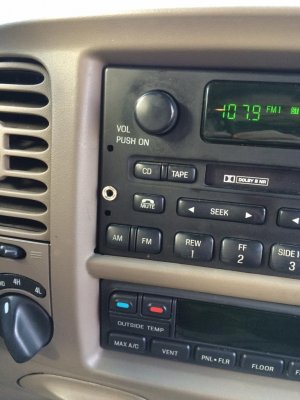
To install the jack, remove the 4 small black screws that hold the face plate on. Carefully unsnap the face plate from the chassis. There are two socket connectors so no ribbon cables to worry about. Once the faceplate is removed you'll need to remove the circuit board from the face plate. There's 6 or 8 screws. Once the screws are removed the circuit board will lift (fall) out. If it doesn't come out easily, you probably missed the screw in the middle by the tape door. The rubber button part might stick to the circuit board or might fall out. Mine fell out (no big deal) and revealed that the only place the aux jack will fit is on the right side. There is a squarish hole that the aux jack will just fit though. The face plate tapers a bit so make sure you drill the hole through the plate far enough over. I didn't and ended up having to wallow out the hole a bit for the aux jack body to clear the face plate side. Fortunately the securing nut was large enough to hide my mistake.
There is a small opening on the circuit board that the audio cable will go through. Before you solder on the aux jack make sure you run the audio cable through the circuit board. There is just enough room for the cable to feed through and everything still bolt up correctly. Solder your wires on the jack, (pin outs are on the package) secure to the the face plate, make sure rubber buttons are in, screw circuit board back on. It shouldn't bind or be difficult to screw on. If it is check your cable routing. Once the face plate is reassembled attach it to the radio. Take care that the sockets engage fully on both sides of the board. I had to hold the back side of the left socket on the main board while pushing the face plate on. The first time I connected the face plate, half my control buttons didn't work because the sockets didn't engage correctly. ( i tested everything before putting all the covers back on)
Reinstall the tape unit and route the audio cable away from anything that moves, reinstall the top cover and you should be good to go.
Cautions and warnings. Do this at your own risk, This mod worked for me but I wasn't to concerned about damaging my radio because I knew I could get a replacement radio for $145 on eBay. I mainly did this because I thought I could and was hoping to not spend $145.
I don't know if the output signal of my iPhone is capable of overloading the amp input circuit so I keep my iPhone headphone volume at about 3/4 maximum. I accidentally hit full volume briefly on my iPhone and nothing blew up but I don't know about long term effects....
I use a tape adapter as my tape to engage the audio circuit, so why didn't I just use the tape adapter to connect my iphone? Well I used to and did for a couple years, but the wires at the audio plug have become damaged and don't work anymore. I could have purchased another one or used my FM adapter but the sound quality of both is not great. When I started this mod I was hoping to use the FM receiver circuit but I had to settle on the tape circuit for now. Audio wise this is a vast improvement over the tape adapter because the signal is not going through the tape head. The signal goes directly to the main amp. It's as pure as you're going to get on the stock system.
I didn't take many pictures of the process but when I go back to hunt for the elusive FM receiver circuit, I'll document better. Maybe someone else has found it for our radios and will share.