This might be a bit long but hopefully clear and easy to understand for anyone that may come by this. Feel free to add any corrections or your own experiences.
In total there are 5 actuators in the car:
FRONT:
1 driver temp blend part# Motorcraft YH1933
1 passenger temp blend part# Motorcraft YH1933
1 mode part# Motorcraft YH1881
REAR:
1 temp blend part# Motorcraft YH1856
1 mode part# Motorcraft YH1856
Easiest to change to most difficult imo:
1: Front mode door
- put your head by the gas pedal and look up should be right there, no need for panel removal. You could remove the gas pedal if you want just for ease
2: Rear mode door
- this is the one on top in the back. I'll link vids from youtube to make it clear. In my 2010 you can only choose mode by controlling temp meaning when you go to full hot it's always on feet and full cold is always on overhead vents. You could just rotate the door yourself to overhead and take this one out permanently so you can have heat or cold coming from the top. But to each their own.
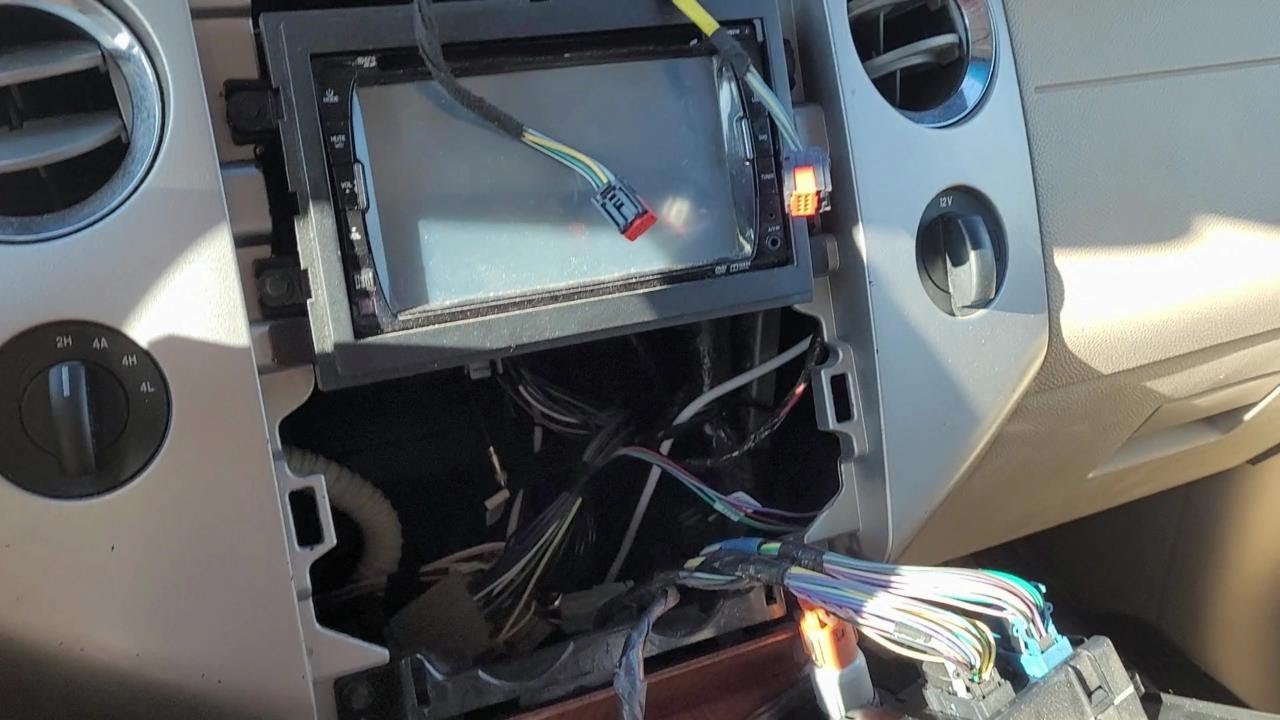
3: Passenger temp blend door
- bunch of vids on this one online. It's mainly panel and stereo removal with one slightly annoying screw in the back.
4: Rear temp blend door
- this one is on the side in the back. 4th screw on here can go to hell. I only put the 2 front facing screws back on after installing new unit. It bothered the perfectionist in me, but the unit held tight to firm shakes and the panel itself should apply pressure to hold in place as well.
5: Driver blend door
- Difficulty level: I'll just roll the window down until I get to the stealership to buy a chevy
VIDEOS (same order as above):
1: No link for this, if you watch the passenger blend door one you'll know what the unit and it's red clip plug look like once you get your head in there and look up
2: If you only want to change the mode door watch this one:
Tips to changing a rear mode door actuator. My particular car was making a loud clicking noise and also blowing hot air in the third row seating whether the ...

www.youtube.com
The fordtechmakuloco vid is for a 2nd gen expedition with the older blend door version but it's a great guide. The other vid is the long way removal, I didn't do it but it helped me visualize everything in there. Also be careful with your clips for putting the biggest panel back flush under the window, mine were brittle and I found out the hard way. Superglue is the friend you wish you didn't need here.
https://www.youtube.com/watch?v=dP5AZp8tLnY&ab_channel=FordTechMakuloco
YOUTUBE MIXXER YM
www.youtube.com
3:
Step-by-step guide on how to remove / replace main temperature blend door actuator on Ford Expedition SUV. Clicking / Tapping noise when adjusting the temper...
www.youtube.com
In this video I respond to a viewer's question! The Viewer described having intermittent cold air in her 2007 Ford Expedition...even after spending $2500 on ...
www.youtube.com
4: Same links as 2
5: There's a lot out there. I haven't tackled this one yet but I'll link some vids I'm watching for research and visualization.
This video shows the process to remove and replace the driver's side temperature blend door actuator in 2011-2014 F-150s, without removing the dash. To skip ...
www.youtube.com
Here is the updated actuator I used, you can buy it here-http://www.amazon.com/gp/product/B00OAKGWNA/ref=as_li_tl?ie=UTF8&camp=1789&creative=390957&creativeA...
www.youtube.com
There's at least 5 more vids on youtube, I'm hoping to find a way to do it without cutting. Maybe I'll just take the loss and have a local auto shop do what fordtechmakuloco was talking about in the end of his vid as something he'd do for a customer
Primary Conclusion: wtf Ford
Secondary Conclusions:
- the first three doors are pretty easy and this is coming from someone who has never done stuff like this before a month ago
- the fourth door is trickier but still quite doable (remember to be nice to the clips when reinserting trim)
- the first four all I used was a cheap ratchet set and some amazon plastic trim removal kit that was max 7$
- door 5: refer to primary conclusion and I'll update if I have anything