My Expedition Modifications and Write-Ups

Disclaimer: Links on this page pointing to Amazon, eBay and other sites may include affiliate code. If you click them and make a purchase, we may earn a small commission.

bricekin

Full Access Members
Joined
Aug 20, 2012
Posts
243
Reaction score
22
Location
South Bend, IN
Hello all!

This thread is going to be my build-log so to speak. I tend to start things, get excited, finish them, and regret not taking more pictures during the process. But, I tend to vividly remember things, so if there is something you see in the project photos I'll be posting here that you want more information on, don't hesitate to ask.

I have the feeling it is going to be a long and boring week here at work so I'll probably start linking pictures and giving information in between them tomorrow.

Here is a small, not so detailed list of things I've already done so you can have something to look forward to.
Audio
Video
Exterior
Interior Mods
Exhaust
PlastiDipping!
 
Last edited:

toms89

technical advisor
Joined
Mar 13, 2011
Posts
5,177
Reaction score
440
Location
MD
Any hints on your next project? :)

:smiley-face-popcorn
 
OP
OP
B

bricekin

Full Access Members
Joined
Aug 20, 2012
Posts
243
Reaction score
22
Location
South Bend, IN
Well... I'm picking up the rest of my hydro-graphic'd items tomorrow morning, so I am hoping to have re-assembly done before work. Then I've got a guy coming to install a vinyl windshield visor in the afternoon since I've made a few failed attempts at it.

I've got my 8" W7s for sale so I can get one of the new slim TW3s JL is shipping at the end of the month to put in the factory box.

Then, once my side work and snow plowing starts picking up again, I'll be doing projectors, Gotts style modification, and a tuner... Then I need to find some new wheels. Hopefully my A4 will go away soon too... that'll help with modification money.
 
Last edited:
OP
OP
B

bricekin

Full Access Members
Joined
Aug 20, 2012
Posts
243
Reaction score
22
Location
South Bend, IN
Ok... here goes... I'll try to remember the order in which I did things and give details of my experience doing it.

This is how it all started... just like this...
th_0dedd7eb-23a3-408d-8dfc-85dbb65c54bf.jpg

The first thing I did was removed the ugly ass running boards.
Not difficult at all... I think there was 8-9 bolts on each side. Added to the look quite a bit but showed off the frame rails which were starting to flake paint... Sooo... out came the rustoleum.

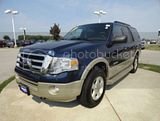
This is about the best picture of it I have right now without the running boards... taken a couple days after I picked up this sweet toy.
th_IMG_20121009_164544.jpg

My truck came optioned with the Audiophile package and I was not pleased with the overall performance in the high frequency department. I replaced the factory tweeters in the front doors with some JL Audio XR series aluminum tweeters and inline high pass filters that I had lying around from a previous install. I mounted them up from behind, knowing that I would probably replace them again someday; I used hot melt glue to keep them in place. They added a little more crispness to the high end but still wasn't quite what I was looking for.

NO PIC

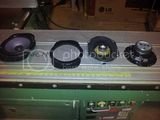
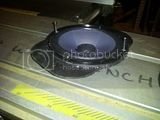
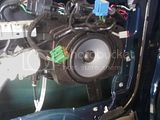
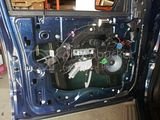
Since I still wasn't happy with the performance of the audio system I decided to try something I’ve been waiting to try in a Ford… Adapting 6.5” into the factory location. I started by making a 6x8 mounting ring out of ¼ wood with the internal cutout for a 6.5” then another 6.5” ring above it to help clear the frame of the speaker without hitting the factory mount which I didn’t want to cut. The 6.5” speaker I used was a JL Audio TR series mid, sourced from my left-over parts bin. Working in a stereo shop definitely has its perks. Even the factory speaker sits pretty close to the door panel so by the time I added half an inch of material behind the speaker; it was hitting the door panel. Using one of the JL grille rings was enough to get the panel off of the surround of the speaker. But… this still wasn’t enough for me and still more needed to be changed.

th_IMG_20120728_212956.jpg th_IMG_20120728_213003.jpg th_IMG_20120804_103954.jpg th_IMG_20120804_103949.jpg

ENTER MY 1996 THUNDERBIRD AFTER THE BREAK
 
Last edited:

GAINMOB

Supporting Member
Supporting Member
Joined
May 19, 2010
Posts
14,561
Reaction score
888
Location
Hampton, VA
nice setup...im running massive audio 6.5 RK-6 components...A LOT BETTER...lol
 
OP
OP
B

bricekin

Full Access Members
Joined
Aug 20, 2012
Posts
243
Reaction score
22
Location
South Bend, IN
That was just the first attempt at better sound... Its on the third revision now and I'm waiting on a response from JL about another product to change it up again. There is a bit more coming in this thread. Just need another slow period at work to do it.

Your doors are actually a bit different than mine aren't they?
 

Scobinott

Member
Joined
Feb 9, 2013
Posts
17
Reaction score
1
Location
Pueblo, CO
Please keep the pics coming. Always looking for new ideas especially with sound systems and interior details!
 
OP
OP
B

bricekin

Full Access Members
Joined
Aug 20, 2012
Posts
243
Reaction score
22
Location
South Bend, IN
My 1996 Thunderbird Sport
This was a project that I had worked on for a couple of years but had only put 6k miles or so on and decided it was time to part with it since I didn’t drive it enough. I did a stereo system in it that consisted of a Pioneer AVIC-Z120BT, 2 sets of JL Audio ZR 5.25” components, a JL Audio HD900/5 five channel system amp, 2 JL Audio 8” W7 subwoofers, an Audiocontrol Matrix line driver, all JL interconnects, and JL 12ga wiring to every component.
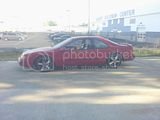
th_2012-06-22190856.jpg th_IMAG0408.jpg th_IMAG0413.jpg

Shortly after I bought the truck is when I decided it was time to put the car up for sale as I would be driving either the Expy or my A4 far more often than the Thunderbird. Asking price was about 5k with all of the equipment in it and all the modifications I had done and 80k miles on the clock. She went nowhere quickly. So… I started stealing parts.

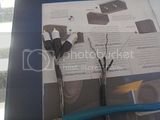
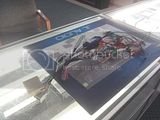
The first thing that was yanked from the car was the head unit. I used the PAC RP4-FD11 wiring harness which kept my steering wheel controls functional, gave me subwoofer inputs for the factory subwoofer, inputs for the factory AUX jack, and inputs to send audio from the Rear Seat Entertainment unit to the new head unit. The only inputs I chose to utilize at this time were the factory subwoofer and the factory AUX input. I also decided to run a set of three RCAs up to the RSE with bare wire on one end that could be used to solder to the input board on the end of the unit so that I could output audio/video from the head unit to the back since the AVIC unit is dual-zone capable. This actually worked out very well but disassembly of the RSE unit is a touch more difficult. It has VERY small hex head screws holding it together… after a half hour of using needle nose pliers… I decided to drill out all of the holes and pull the cover off and threw it to the side.

Pictures of my nearly finished radio harness and the modified RCA cabling for the RSE
th_temp.jpg th_IMG_20120813_145857.jpg

I was happy with this for a little while… But the Thunderbird still hadn’t sold after about another month. So out came the rest of the equipment to lower the price to near blue book.

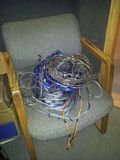
A whole mess-o-wire came out of the Thunderbird
th_IMG_20120904_131505.jpg

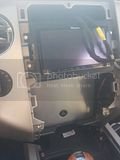
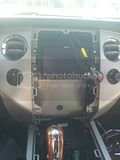
I decided to dedicate a weekend to getting all my doors and interior trim apart and getting wires run and things all sorted. Once that weekend came, it was 90 degrees outside and what joyous fun that was. I started with one of my new favorite tools… a 8’ long section of RG6 cabling and some wire pulling lube (basically KY but comes in a gallon tub… maybe you can get KY in a gallon tub… I dunno). The first step was figuring out the best location for the amplifier. If you’ve got an Expy that’s nearly fully loaded and have never had one apart, I’ll be the first to tell you that stashing things, especially an amplifier, is not so much an easy task. Luckily my amplifier was just small enough that I could fit it under the radio inside the dash. Believe me when I say it was a tight fit once all the wire got to it.
th_IMG_20120914_161015.jpg th_IMG_20120914_161007-1.jpg
 
Last edited:

sgtowing

Supporting Members
Supporting Member
Joined
Jan 30, 2011
Posts
5,505
Reaction score
380
Location
Valrico, Fl
I take it somebody likes JL Audio. :biggrin:

Sent from my Galaxy SIII Using Tapatalk2
 
Top