

2003 Expy Timing Chain Done

Disclaimer: Links on this page pointing to Amazon, eBay and other sites may include affiliate code. If you click them and make a purchase, we may earn a small commission.

Hamfisted

Full Access Members
Joined
Nov 20, 2012
Posts
2,895
Reaction score
1,798
Location
Ft Lauderdale
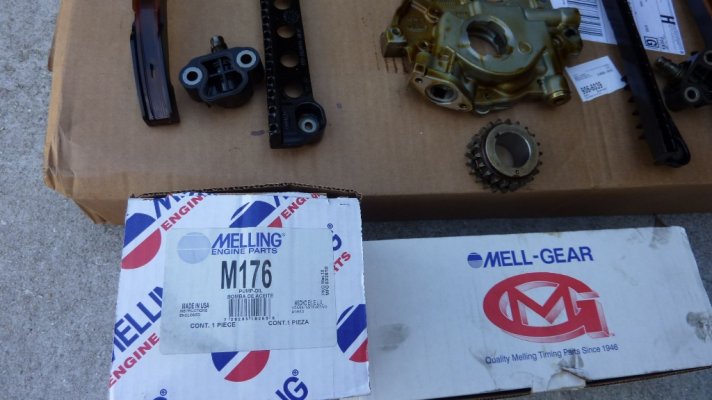
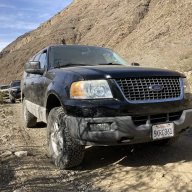
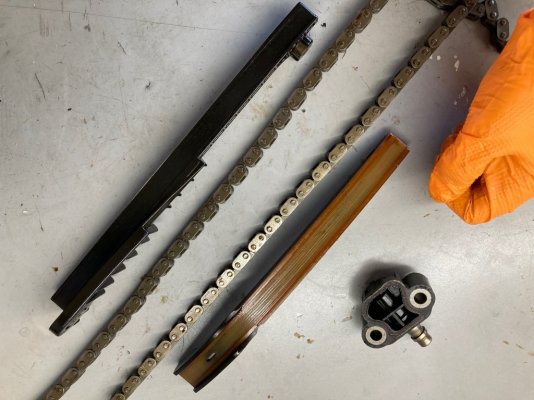
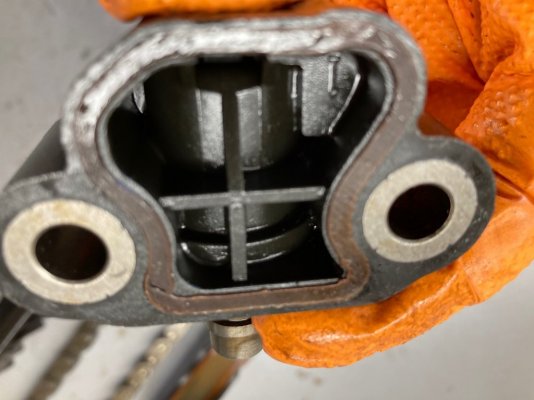
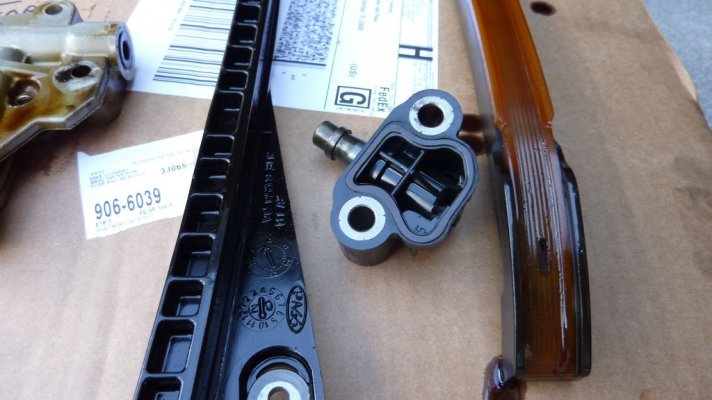
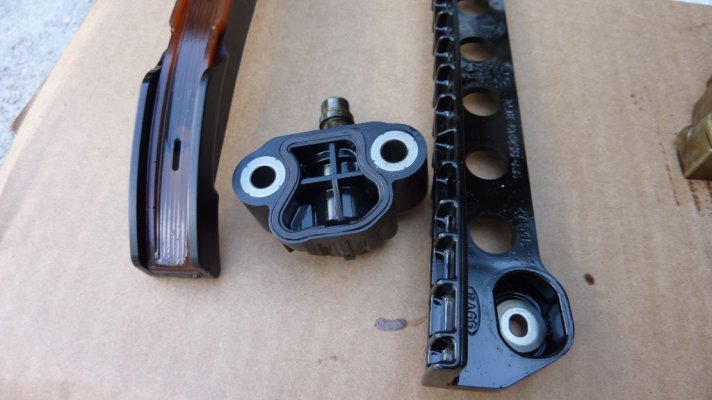
Guests in town for Thanksgiving and looking for something to do. So we ripped into the Expy for a quick timing chain and oil pump replacement job. The Expy has 211k miles on the clock, and always been fed Mobil One 10w-30 oil, with regular changes at 7000 miles and used only Motorcraft filters. Its the older 2V motor, so the strain on the chains is a little less than the 3V motors. Started to develop a cold start chain chatter about 10k miles ago, but nothing bad. Just a little chain slap for the first few seconds until oil pressure built up. After disassembly we saw no blown out tensioners or busted guides. Only a little slack in the two chains due to wear. The tensioner guides showed only about 1/16 track wear from the chains right where the hydraulic tensioners push from behind. Otherwise they were fine.
There is about 4 hours of tear-down just to get to the chains. We didn't remove the heater hoses and coolant, just the passenger side fenderwell liner and tire to get to the lower valve cover bolts on the passenger side. In retrospect it would've been easier to drain the coolant and remove the heater hoses. We used Fel Pro gaskets on reassembly. That DAP super glue from HD works very well to keep the valve cover gaskets in place for reassembly. Otherwise those gaskets like to fall out of their grooves and out of place. Didn't want any oil leaks afterwards. The flex head ratchets/wrenches and electric impact drivers were life savers too. We did this job just for piece of mind. Not experiencing any engine performance issues or noises other than the cold start chain chatter. Probably could've gone at least another 50k miles on these parts without issue.


5syRXp.jpg

bPwYxK.jpg


Plastic hydraulic tensioners .... ugh .... weak spring inside. You can compress 'em by hand... but at least the seals weren't blown out yet ....
P6aT5j.jpg


ReyDaC.jpg


t7mvdQ.jpg


Overall the job really took a full day. We took several breaks just to keep from throwing things. The installation of the chains is very straight forward, as the chains are color marked to make timing easy. For the oil pump installation we didn't remove the oil pan, but if I was doing it by myself I would have on this 2wd Expy. A 4wd I would probably not. But getting the bolts back into the oil pickup line / to pump was a huge PITA, I don't care what FordTech says.
After re-assembly was complete we left the crank sensor unplugged and cranked the engine until oil pressure showed up on the gauges then plugged the sensor back in and she fired right up. Accidentally left #4 fuel injector unplugged, but once we sorted that out she purrs like brand new again.
 
Last edited:
JExpedition07

That One Member
Joined
Mar 30, 2017
Posts
6,531
Reaction score
3,140
Location
New York
Very nice breakdown, I’ll be doing the timing job on my 5.4 3V in spring. The 2V is nice in that it’s a color coded system. Mine also has the startup rattle, so far no dieseling sounds or codes....hoping to make it to warm weather.
 
OP
OP
Hamfisted

Hamfisted

Full Access Members
Joined
Nov 20, 2012
Posts
2,895
Reaction score
1,798
Location
Ft Lauderdale
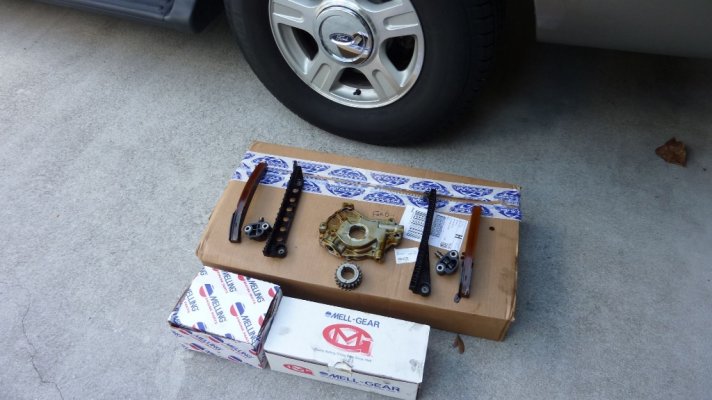
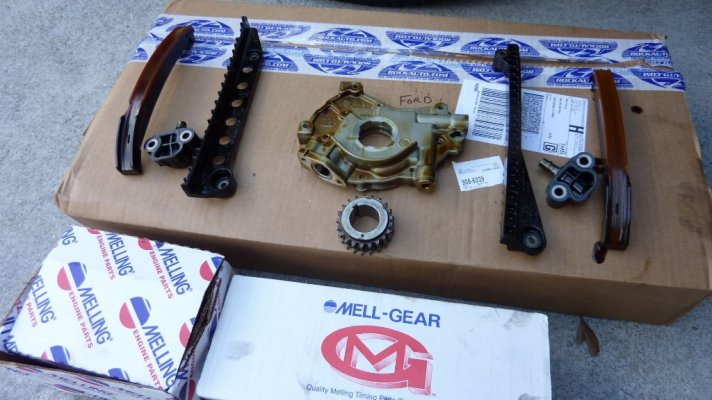
Well you can help your engine out using something heavier than that 5w-20 oil that's for sure. The timing sets are the same if you use Melling. I used the cast iron hydraulic tensioners with the grenade pins and ratcheting mechanism, rather than plastics. The chains are color marked to make the timing setup easy.
If you attempt this job it would really be helpful to have an assistant or two, and better if they have experience tearing down the 5.4 motors. A set of metric Gearwrench flex head wrenches is a must have and a 1/4" electric ratchet like the Milwaukee extended reach M12 ratchet will make the job so much easier. A 36mm open wrench for the fan. A 32mm deep well 6pt axle socket to turn the crankshaft (AutoZone). That special crankshaft tool to set the crank at TDC is a nice to have tool, but if you have the 32mm socket for turning the crank you can set it with the timing mark at 6 O'clock too. It's not a fun job. Down here in FL they get about $3k for this job.


OTC 0624 Crankshaft tool on Amazon ....
https://www.amazon.com/OTC-6024-Crankshaft-Positioning-Tool/dp/B000F5ECRM


Permatex Oil Resistant Silicone....
https://www.amazon.com/Permatex-821...motive&sprefix=Permatex,automotive,185&sr=1-1


Milwaukee 1/4" Extended Reach Ratchet....
https://www.amazon.com/Milwaukee-Fu...=Milwaukee+1/4+extended,automotive,187&sr=8-2


Gearwrench Flex Head wrench set on Amazon....
https://www.amazon.com/dp/B0002U2ODE/ref=emc_b_5_t


Gearwrench Flex Head ratchet set on Amazon...
https://www.amazon.com/GearWrench-8...8HCRB1WCVWA&psc=1&refRID=E8DRR8RRM8HCRB1WCVWA


Sunex 6pt Impact socket set on Amazon....
https://www.amazon.com/dp/B00JO1BO1K/ref=psdc_553372_t3_B078KFWYKT
 
Last edited:
As an Amazon Associate we earn from qualifying purchases.

riphip

Full Access Members
Joined
Nov 6, 2018
Posts
641
Reaction score
192
Location
Memphis, TN.
Good to see you kept your guests entertained. Great job! Hopefully will be a long while before mine needs this. Running Rotella T6 5-40w since I purchased. Great teamwork!!
 

dlyoung1

Active Member
Joined
Dec 24, 2013
Posts
37
Reaction score
3
Location
Central Texas
Glad to see yours went smoothly. I just finished the install of a timing set on my wife's '03 4.6L 2V, and I am having issues. Everything is back together, I replaced the crank and cam position sensors and plugged everything back up. Idles with just a hint of a stumble or a miss somewhere. I put the code reader on it and was very surprised to see codes for injectors 3 AND 4 AND 5 circuits open!

Of course, I have checked harness plugs on all cylinders and all seem solid. Anyone have an idea? Thanks!
 
OP
OP
Hamfisted

Hamfisted

Full Access Members
Joined
Nov 20, 2012
Posts
2,895
Reaction score
1,798
Location
Ft Lauderdale
How many miles are on the Expy? What kind of wear did you find ?
What were the DTC codes exactly ? My issue after I buttoned everything up was that I forgot to plug in injector #4 . But once I plugged that back in everything was fine, no codes. If you have an AutoZone nearby they rent the noid light test kit to test the fuel injector signals.


https://troubleshootmyvehicle.com/ford/4.6L-5.4L/how-to-use-a-noid-light-1

https://www.amazon.com/gp/product/B...gn-20&linkId=d4f33b9fabf2d1dc035d8bc834022fca
 
Last edited:
As an Amazon Associate we earn from qualifying purchases.
OP
OP
Hamfisted

Hamfisted

Full Access Members
Joined
Nov 20, 2012
Posts
2,895
Reaction score
1,798
Location
Ft Lauderdale
Last edited:
As an Amazon Associate we earn from qualifying purchases.

Vincent Vega

Full Access Members
Joined
Jan 21, 2021
Posts
224
Reaction score
137
Location
Huntington Beach, CA
Well you can help your engine out using something heavier than that 5w-20 oil that's for sure. The timing sets are the same if you use Melling. I used the cast iron hydraulic tensioners with the grenade pins and ratcheting mechanism, rather than plastics. The chains are color marked to make the timing setup easy.
If you attempt this job it would really be helpful to have an assistant or two, and better if they have experience tearing down the 5.4 motors. A set of metric Gearwrench flex head wrenches is a must have and a 1/4" electric ratchet like the Milwaukee extended reach M12 ratchet will make the job so much easier. A 36mm open wrench for the fan. A 32mm deep well 6pt axle socket to turn the crankshaft (AutoZone). That special crankshaft tool to set the crank at TDC is a nice to have tool, but if you have the 32mm socket for turning the crank you can set it with the timing mark at 6 O'clock too. It's not a fun job. Down here in FL they get about $3k for this job.


OTC 0624 Crankshaft tool on Amazon ....
https://www.amazon.com/OTC-6024-Crankshaft-Positioning-Tool/dp/B000F5ECRM


Permatex Oil Resistant Silicone....
https://www.amazon.com/Permatex-82180-Maximum-Resistance-Silicone/dp/B0002UEN1U/ref=sr_1_1?crid=2IZ5CD6B6NLXA&keywords=permatex+ultra+black&qid=1575469026&s=automotive&sprefix=Permatex,automotive,185&sr=1-1


Milwaukee 1/4" Extended Reach Ratchet....
https://www.amazon.com/Milwaukee-Fuel-Extended-Ratchet-Bare/dp/B07YKWZ9V3/ref=sr_1_2?crid=20CQSZW4F2H9R&keywords=milwaukee+1/4+extended+ratchet&qid=1575469112&sprefix=Milwaukee+1/4+extended,automotive,187&sr=8-2


Gearwrench Flex Head wrench set on Amazon....
https://www.amazon.com/dp/B0002U2ODE/ref=emc_b_5_t


Gearwrench Flex Head ratchet set on Amazon...
https://www.amazon.com/GearWrench-8...8HCRB1WCVWA&psc=1&refRID=E8DRR8RRM8HCRB1WCVWA


Sunex 6pt Impact socket set on Amazon....
https://www.amazon.com/dp/B00JO1BO1K/ref=psdc_553372_t3_B078KFWYKT
Hamfisted, I have the cold-start chain rattle and am getting ready to do the timing surgery. What brand oil pump did you install, and did you replace the roller followers? Any thoughts on that.
 
As an Amazon Associate we earn from qualifying purchases.
OP
OP
Hamfisted

Hamfisted

Full Access Members
Joined
Nov 20, 2012
Posts
2,895
Reaction score
1,798
Location
Ft Lauderdale
Hamfisted, I have the cold-start chain rattle and am getting ready to do the timing surgery. What brand oil pump did you install, and did you replace the roller followers? Any thoughts on that.
Vincent I used the Melling high volume pump from Rock Auto. I didn't replace the rocker arms at the time when I did the timing chains, but I did when I did the head gaskets this past December. Not that they were bad but just as cheap insurance after 225k miles and I had the cams out anyway. I used the Ford OEM rocker arms from my local dealer. I probably had the beginnings of a head gasket leak back when I did the timing chains, but didn't realize it, or I would've yanked the heads off at that time. The motor never overheated, it just started blowing coolant out of the reservoir after a long drive. I nursed it along for six months before I actually did the repair and had the heads rebuilt at the same time.


This socket works on the Ford Triton crankshaft for turning it without damage >

Ford Triton Crankshaft Socket on Amazon


.
 
Last edited:
As an Amazon Associate we earn from qualifying purchases.

Vincent Vega

Full Access Members
Joined
Jan 21, 2021
Posts
224
Reaction score
137
Location
Huntington Beach, CA
Hamfisted, Ok cool, that makes sense. How did your cam, cylinders, and valve seats look when you pulled your heads off?
Have you had any other big issues? I have replaced the intake man, a couple blend door motors, AC condensor. Not too bad really for 145k miles. Burns about a quart ever 4-5,000 miles. I am hoping to get as many miles out this thing as you have.
 
OP
OP
Hamfisted

Hamfisted

Full Access Members
Joined
Nov 20, 2012
Posts
2,895
Reaction score
1,798
Location
Ft Lauderdale
I had the heads rebuilt at a local head shop, so I didn't see the valve seats myself. But they didn't say anything was out of whack or anything. They just stripped the heads and bead blasted all the carbon off everywhere, re-cut the seats with a three angle cut, resurfaced the valve faces. New springs, seals, and rocker arms. I pulled the crossover off the intake manifold while it was off to inspect it's gasket surface and make sure there was no delamination. I was lucky, there was none. If you don't blow a head gasket you should easily get 250-300k miles out of it before you see any major issues. The oil consumption sounds normal. Use at least a good 10w-30 or 40 oil in it and you should be good to go.
 
OP
OP
Hamfisted

Hamfisted

Full Access Members
Joined
Nov 20, 2012
Posts
2,895
Reaction score
1,798
Location
Ft Lauderdale
what was the total cost in parts? im at 211K and will have my mechanic do this job
I was at about $800 for everything including the head machine work. The valve seals come with the head gasket kit. The Fel-Pro head gasket kit includes new MLS Permatorque head gaskets too. Pretty much everything you need. You'll need new head bolts since they are "Torque to Yield" bolts, can't re-use the old ones, same with crankshaft bolt. Labor is the big killer on this job. I think the book calls for 24 hours of labor, and most shops stick to that figure. I replaced the springs and rocker arms, which isn't normally part of the job, but I did it for peace of mind.
 

PERRY OLANDER SR

New Member
Joined
Apr 22, 2019
Posts
4
Reaction score
4
Location
Austin TX
Okay this is all because of the lies I've been told and had read about concerning our Amazing Ford 5.4 Variable Timing engines. I've been "hot rodding" now for 65 years and at a young age 2 yrs HS auto shop and at 19 began disassembling, inspecting, and overhauling helicopter transmissions. this just means I've been around not smarter, better, or more experienced than any of y'all, just been around. Been through lotta schools too. Do all my own work, incl; body, paint, upholstery, all overhauls, unless i want it done better [which i've needed a few times]. SO NOW EXPEDITIONS, I've two an 06 w/156k n 13 w/132k. I've been using FRANTZ Toilet Paper Filters on eng n trans since 1976. BUT, now or the last two years when driving the 06 it has the timing chain rattle and I've just kept the RPM a little higher at low speeds, PITA, because I'm sorta lazy, and because I figured it was the Tensioner(s) blown gaskets. Finally with the Mrs's after me "hard" all the time for using her 13 i decided to tear it down. A very big PITA. Searching by telephone and online for fixes from independent shops and Ford I found prices ranging rom $2200.oo and $5500.oo and o course Ford recommending a new engine to many of our fellow 5.4 owners. So with the RANTZ filters my oil is "always" like new clean and the filters never showing any any metal or plastic particles. I was concerned about the plastic(?) rails breaking apart, like so many *mechanics* say happens, but yes i'm sure they might[but?] I inspected the rails and found the wear so slight and difficult to see and only one short space was able to "not catch a fingernail" but eel an edge. I've new rails so I'll replace them. BUT, just a visual inspection of the tensioner gasket shows it blew out the same amount in the exact same place on both right and left Tensioner gaskets. The torque was tight on the tensioners, and the tensioners also have a ridge around the edge of the tensioner to hold the gasket in place [so why did it blow out?] but it didn't it blew out at a corner. The engine warranty of 50k just doesn't cover a $2.79 gasket and 2-5,000 dollar repair that fails at over 5k miles. And, i think Ford engineers knew or suspected the plastic or gasket may fail early in the engines life. Now, my dilemma is there is no gasket with the Melling tensioner. I read somewhere, in my very long gasket search, that they are just steel on steel as both are machine surfaces and even after 3yrs of machine shop training in the 1950's ( I understand, but WHA? No gasket ... see old' ). So I must convince myself to reassemble that those machine surfaces without a gasket.
 

Vincent Vega

Full Access Members
Joined
Jan 21, 2021
Posts
224
Reaction score
137
Location
Huntington Beach, CA
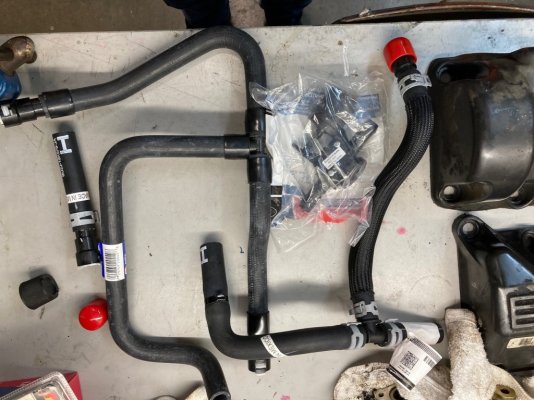
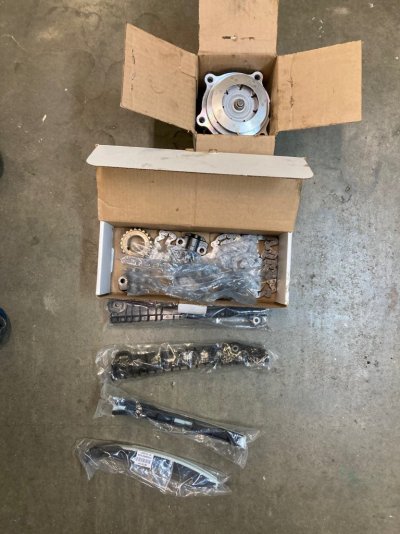
@Hamfisted, The hard parts were the RH valve cover and the power steering pump (WTF man!). Replaced timing, oil pump, water pump, lower radiator hose, all gaskets, all under-hood heater hoses and hot water valve. Motorcraft discontinued one of the heater hoses, and lower radiator hose, so I took your advice and got those from Napa. Both look high quality and made in USA. The cams, roller followers, guides, and everything else all were in good shape. The LH chain had too much play, though. The LH tensioner had a very slight scratch (hardly noticeable) in its gasket, which must have been the problem because the chains were same exact length (no obvious stretching). I tried to replace the roller followers but the tool I had required about 4 hands to use, and there is only room for about half of one (OEM Tools 24434). I later found out the tool was intended for the older SOHC 5.4. The tool for our DOHC 5.4 2V is harder to find, but I found it after I was done with everything. The followers looked fine though, and I can get back in there easily if I need to, now that I know how to get the valve covers off. Runs tight now, good for another 100,000 mi. Thanks for the tips.

Timing new heater hoses.jpgTiming new parts installed.jpgTiming new parts.jpgTiming old parts driver side.jpgTiming old tensioner driver side.jpg
 
OP
OP
Hamfisted

Hamfisted

Full Access Members
Joined
Nov 20, 2012
Posts
2,895
Reaction score
1,798
Location
Ft Lauderdale
Yeah, you gotta get those heater hoses off and out of the way for that RH valve cover. You also have to pull the power steering pump pulley off to get to those mounting bolts. I've done it both ways, and it's just not worth trying to shortcut. It adds many hours of frustration and fatigue. Other than that the jobs pretty easy ! I also use a lot of cordless ratchet tools when doing it. That seems to cut hours off the job too. Hey I use the same work gloves !
 

Vincent Vega

Full Access Members
Joined
Jan 21, 2021
Posts
224
Reaction score
137
Location
Huntington Beach, CA
@Hamfisted Yes, I used a Milwaukee e-ratchet and it helped alot, although some of the bolts were too tight for it. I was looking at the Dewalt 1/4 in impact because it is small and has more torque than the e-ratchet, but I am too poor.
It was a chunk of work but not too bad. Now that I know what to remove I could crush this job if I needed to do it again. At first, I was afraid to pull the heater hoses and F up the quick-connect O-rings, but as usual I changed my mind halfway through and replaced them anyway, after I lost alot of time working around them. Also I could not see how to pull the AT dipstick tube until I went ballistic, pulled the inner fender skirt and saw the bolt staring right at me (5 minutes for the skirt, 1 minute for the bolt after an hour of frustration), then the RH valve cover came right out.
Yes, would have been way easier if I pulled off the PS pulley. Dumb question, do I need a special puller to remove the pulley, or just remove the hexhead (with an impact, I guess)?
I like those orange gloves because they hold up. Other kinds shred too easily and then I get gear oil on my hands that makes me smell like Pigpen for a year.
 
OP
OP
Hamfisted

Hamfisted

Full Access Members
Joined
Nov 20, 2012
Posts
2,895
Reaction score
1,798
Location
Ft Lauderdale
Yes, it's a special puller. But it works on most all PS pulleys. You use it to remove, and re-install the pulley.
You'd be there a long time if you tried to remove that hex head, that's the PS pump shaft.
Those are the heaviest mil gloves I could find too. There's a bunch of YouTube videos out there on how to use the puller, and the kits are cheap.
Yeah, I used my Milwaukee cordless extended 1/4" ratchet and the 3/8" 18v ratchet almost exclusively on the job. Re-assembly was a mix of tools though.


PS Pulley Removal Kit on Amazon


.
 
As an Amazon Associate we earn from qualifying purchases.
Top