2003 Expedition Face Lift Begins

Disclaimer: Links on this page pointing to Amazon, eBay and other sites may include affiliate code. If you click them and make a purchase, we may earn a small commission.

OP
OP
Vancouver Bob

Vancouver Bob

Full Access Members
Joined
Dec 22, 2016
Posts
719
Reaction score
355
Location
Vancouver, WA
I have the EL extended length size expedition. I've got 20" wheels and 275 55R 20 tires on it now. It's mostly a highway cruiser so I don't want to go with tires that make a lot of noise. I had some on my last Expedition and they drove us crazy on our trips.

Yes, that's exactly why I went with the RT's vs the MT's. I love the look of the MT's but I've read/heard a lot of talk about the noise and the feel. I love the way my Expedition drives and the level kit didn't change that. We'll see how she feels with the bigger and heavier tires on.
 
OP
OP
Vancouver Bob

Vancouver Bob

Full Access Members
Joined
Dec 22, 2016
Posts
719
Reaction score
355
Location
Vancouver, WA
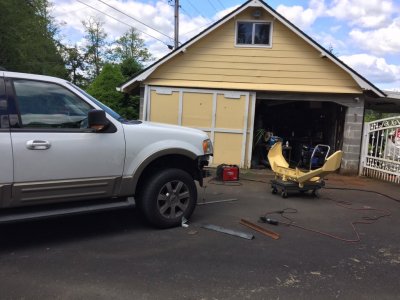
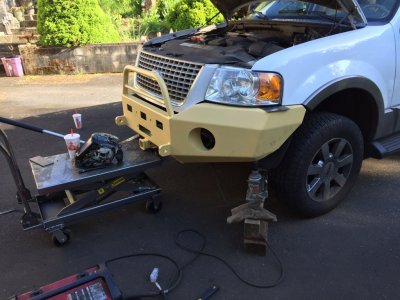
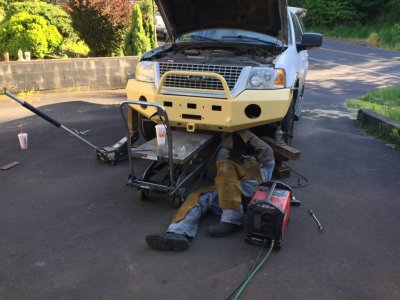
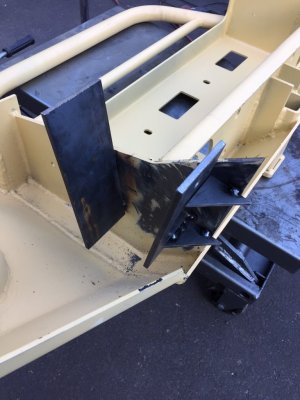
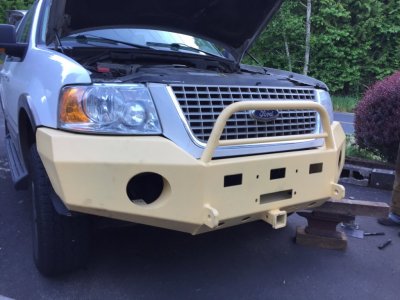
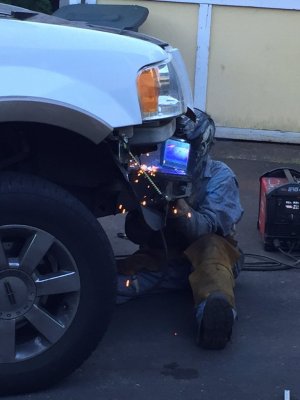
Back from a day at the welder. The owner is a tug boat captain and he was out on the boat (for two weeks) but his son and the fab guy/welder were both there. All three are really nice guys and Richard (welder) did a great job coming up with a mount that we both were happy with. Considered front mounts, side mounts and top/bottom mounts. We went with top/bottom because it would make installation/removal easier since the brackets would hold the weight of the bumper while it was being slid into position and bolts mounted. He took the time to make sure the bumper was positioned just right, made sure I was happy with how it looked before tack welding things in place.

IMG_6807.JPG

IMG_6819.JPG

IMG_6820.JPG

IMG_6861.JPG
 
Last edited:
OP
OP
Vancouver Bob

Vancouver Bob

Full Access Members
Joined
Dec 22, 2016
Posts
719
Reaction score
355
Location
Vancouver, WA
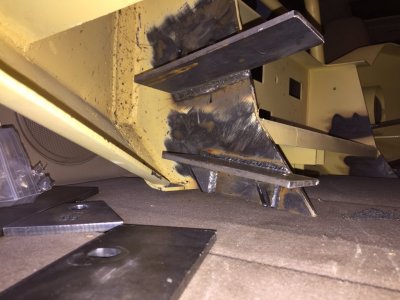
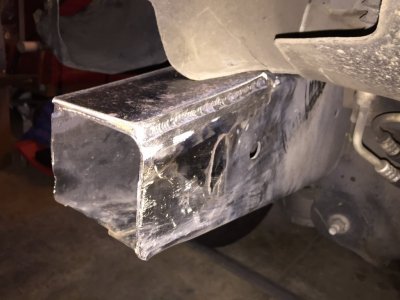
Once tack welded, we then took it off and he welded it. We were planning on two long bolts from top to bottom of the frame beams but once things were tacked in place we noticed that this wouldn't work because the top and bottom surfaces of the beams were not parallel. Thought going with four individual bolts would be best but there was no way to get the nuts/washers on the inside of the beam because the opening (on the front of the beam) is too far forward into the bumper and no way to get a hand in there. So I'm going to bore a hole into the side of the beam large enough to get the washer/bolt and a finger in there. Here are a few pics of today's effort...
IMG_6865.JPG

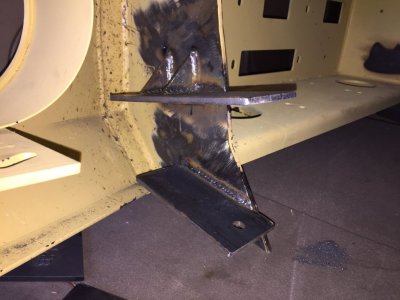
He added gussets both top and bottom for extra strength...
IMG_6869.JPG

IMG_6870.JPG

The frame beam is an interesting thing. It's like a flat piece of metal that was folded into a beam. So the top of the beam is single thickness while the bottom, where the two ends overlap, is double. The original tow hooks mount to the bottom where the metal is doubled up. so I asked Richard to add a plate to the top, where it's single thickness, to beef things up. All it needs now is some holes. I'm also thinking of having them put a little finishing touch on the ends where the bumper meets the trim.
IMG_6871.JPG
 

ExpeditionAndy

Supporting Member
Supporting Member
Joined
Aug 31, 2013
Posts
3,711
Reaction score
1,126
Location
Fort Wayne, Indiana
Wow that is a lot of work! The bumper looked good sitting up there. Where are you going to have them add the extra metal pieces?
 
OP
OP
Vancouver Bob

Vancouver Bob

Full Access Members
Joined
Dec 22, 2016
Posts
719
Reaction score
355
Location
Vancouver, WA
Not bolted on yet but this is what she'll look like when it is... it's basically just resting on the mounting plates here.

IMG_6868.JPG
 
Last edited:
OP
OP
Vancouver Bob

Vancouver Bob

Full Access Members
Joined
Dec 22, 2016
Posts
719
Reaction score
355
Location
Vancouver, WA
Wow that is a lot of work! The bumper looked good sitting up there. Where are you going to have them add the extra metal pieces?

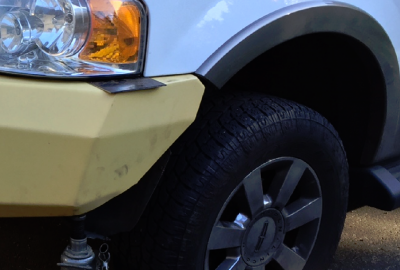
The ends of the bumper where it comes up to the trim. It's doesn't tie in well. Not a big deal but just one of those little details.

upload_2017-5-20_22-17-44.png
 
OP
OP
Vancouver Bob

Vancouver Bob

Full Access Members
Joined
Dec 22, 2016
Posts
719
Reaction score
355
Location
Vancouver, WA
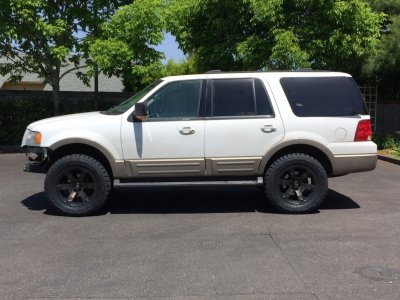
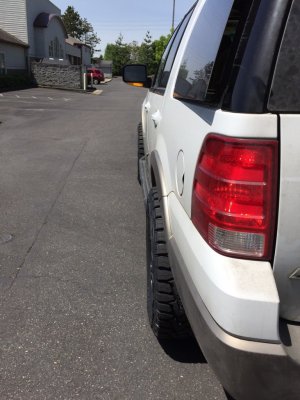
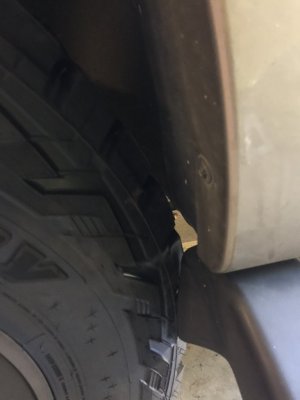
Got the new shoes on today. Had to do a little trimming of the running boards but that was it. Drove it around a bit and the drive felt good. Didn't take it on the freeway. Yesterday when I went up to Kelso to have the welding done, I had a bit of a vibration in the steering wheel up around 65-70. I'm curious to see if that went away... I'd like to be able to blame it on wheel balance of the old setup.

IMG_6882.JPG

IMG_6883.JPG

IMG_6875.JPG
 
Last edited:

ExpeditionAndy

Supporting Member
Supporting Member
Joined
Aug 31, 2013
Posts
3,711
Reaction score
1,126
Location
Fort Wayne, Indiana
Got the new shoes on today. Had to do a little trimming of the running boards but that was it. Drove it around a bit and the drive felt good. Didn't take it on the freeway. Yesterday when I went up to Kelso to have the welding done, I had a bit of a vibration in the steering wheel up around 65-70. I'm curious to see if that went away... I'd like to be able to blame it on wheel balance of the old setup.
Looks good. I wonder if the vibration has anything to do with the bumper not being on it to block the wind.
 
Top