First, I want to thank everyone for adding their pieces to this, sure does help a lot and it's productive help!
I undertook this process today, was assuming it would be a two day project, first day take it apart, mount the light, the put it all back, then on day two wire everything. But it actually went a little faster than I thought, and unfortunately once you get some of this done, its kind of impossible to stop.
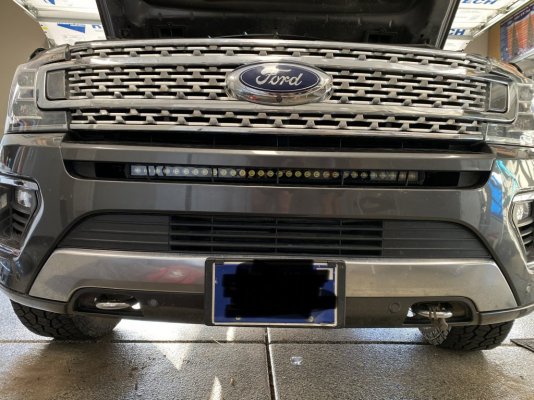
With that, I have included a few picture in case they help anyone else, and I'll give a few notes from my experience. I actually found the removal of the cover to be pretty easier, far easier than my previous vehicles (which also kind of scares me with this enormous $1K cover). The worst part was the wiring harness, I ended up popping it off of it's mount, so I could get to the tabs better. What a pain.
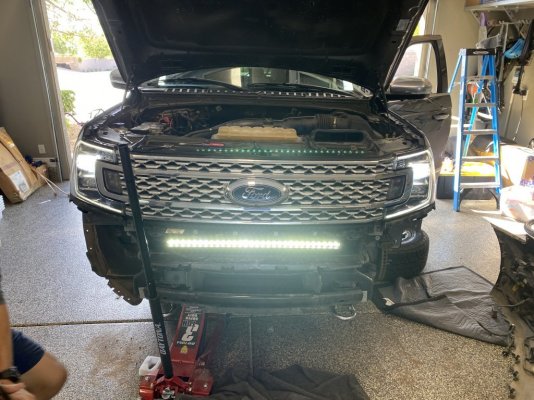
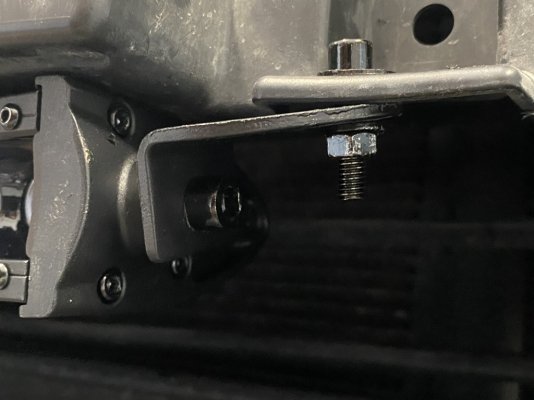
Once I got the cover off, mounting the light wasn't too bad. I relocated the temp sensor to about 1.5" below it's initial spot. This did mean that I had to tug on the wires/loom a bit but it worked out well. It's just about centered now between the bottom of the light and the cover. To mount mine, I ended up buying all stainless hardware from my local Ace, as the stuff that was included wouldn't really fit. I had to use the brackets inside out for things to line up. I also used nylon insert nuts to help ensure this thing wouldn't loosen as much over time.
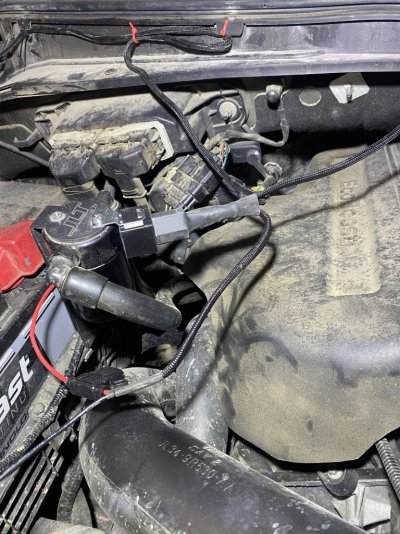
That's when things got a little rough, for one, getting that massive twist on wire connector through anything in there was a pain, I finally loosened up the Left headlight mounts a bit, so I could squeeze it through a slot in the louver assembly, towards the top right (looking at it) there was a small section of foam insulation, managed to get it through there. But that took some work! I then mounted it under the headlight assembly to keep it from rattling.
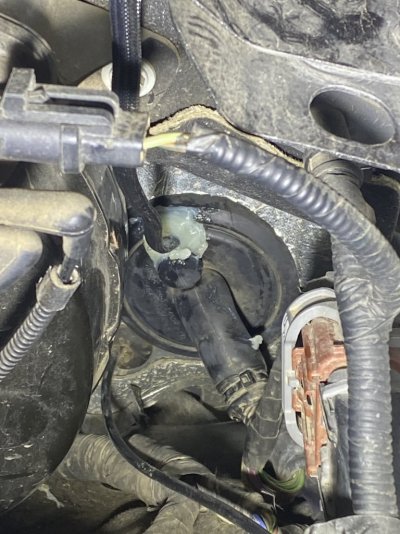
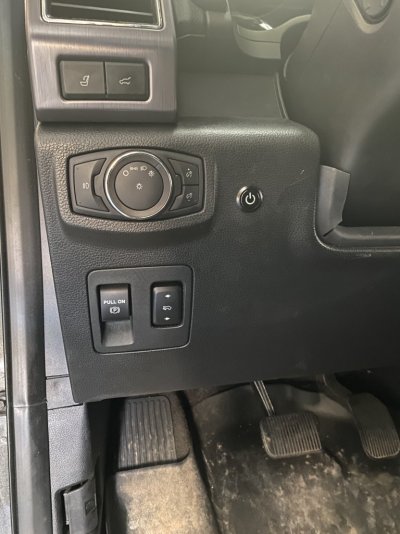
Then I attached the wire assembly, and ran that across the engine bay, over the master cylinder, over the engine, to the battery area. That wasn't bad, found a perfect place to mount the relay. But then, I spent a good 1-1.5hrs trying to get the wires through the firewall. I started by trying to push an insulated 12GA piece of wire from the inside, through the grommet, but that wouldn't work, I then tried going from the engine compartment, through to the interior and that didn't work. Even after cutting off the cable ties, the bend they have these wires at, and the way the grommet sleeve was crimped down, meant I couldn't get anything to go through there. So I ended up carefully drilling a 1/4" hole through the rubber outer section of the grommet, and was finally able to get some wires through. I didn't use the Rough Country surface mount switch, to me it looked kind of janky for such a nice light, so I pre-ordered several LED push button style switches, and settled on the one in the photo, the blue goes well with the interior lighting I'm using. Oh, and I did use a switched circuity inside, so that my signal wire will only come on when the vehicle is on, just a personal preference.
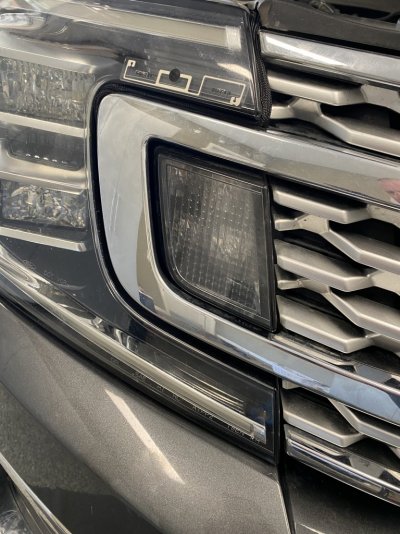
One thing that worries me a little, is how hard it was to get the screw back in place below the ford emblem, unfortunately if I had it to do again, I would probably add some 1/4" or 1/2" spacers in the brackets to lower the light a tad, that would make it easier to get that screw in/out. To get it in, I had to kind of pry my socket extension between the light housing and the bumper cover, really made me nervous, but getting it out will be even harder.
All in all, probably spent about 5 hours of actual time. Not too bad, nothing like engine/suspension work, etc.
View attachment 34664
View attachment 34665
View attachment 34666
View attachment 34667
View attachment 34668
 4DC527A9-D42E-4737-BA67-EB8F64A61E8B.jpeg200.3 KB · Views: 52
 283443CC-1820-409E-988E-4AC45B11C650.jpeg193.9 KB · Views: 47
 0BEF557C-64C8-4027-9271-436553A7A73B.jpeg197.4 KB · Views: 49
 6D5358C4-4726-474F-8F6F-A3A93346E785.jpeg108.4 KB · Views: 52
 044708EF-3796-434E-AC5F-4994E2BFD1A3.jpeg252.6 KB · Views: 41

