How to do Door Switch LED Swap with pics

Disclaimer: Links on this page pointing to Amazon, eBay and other sites may include affiliate code. If you click them and make a purchase, we may earn a small commission.

99 Expy

Full Access Members
Joined
Feb 19, 2010
Posts
1,016
Reaction score
2
Location
Laramie, WY
Well, its spring break here in Wyoming, and since I just got back from Arizona, I decided to stay at school for the week. Like most of you here, when I sit around with nothing to do, I usually end up messing around with stupid little things to make use of my time. I read another thread about changing the door switch lights to LED the other day, so I figured I would give it a try. I stopped down at Radioshack, and they only had some 3mm red led, so I gave them a try. I wanted to do blue, but figured for $1.50 per switch you can't lose, and after getting one switch done, I love the red!!

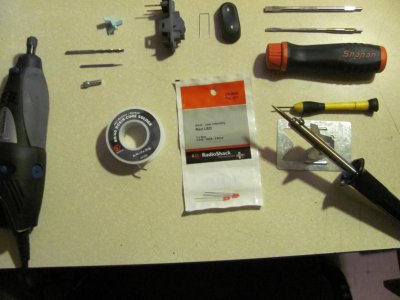
Here is the list of everything I used.
- Multiple regular tip screwdrivers, the smaller one seemed to work better
- Soldering iron - $5 at wally world
- Soldering wire - $3 at radioshack
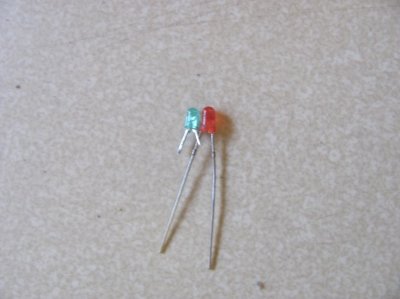
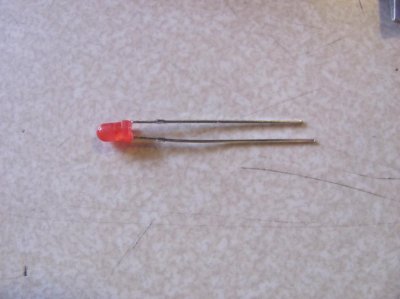
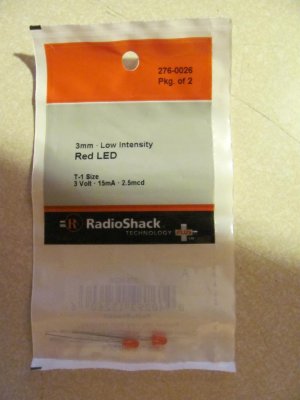
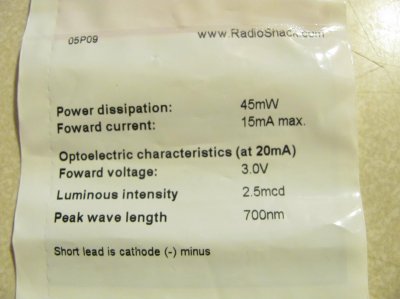
- 1 pack of 2 red LED bulbs - $1.50 at radioshack
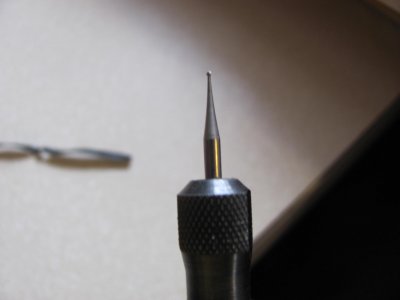
- Dremel tool with plastic reamer and probe thing with drill bit on the tip
- Hand held file with different grits
-Patience and some time

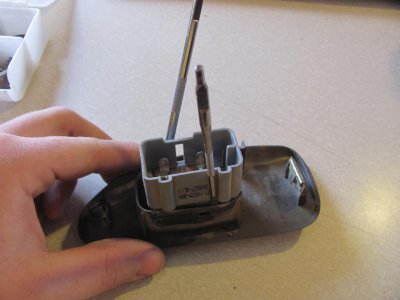
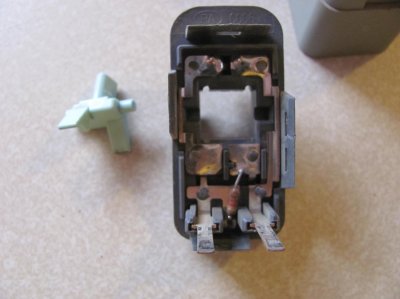
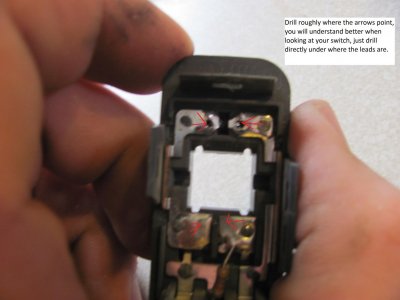
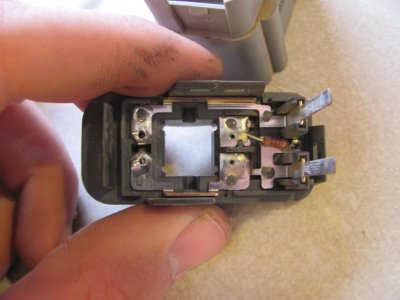
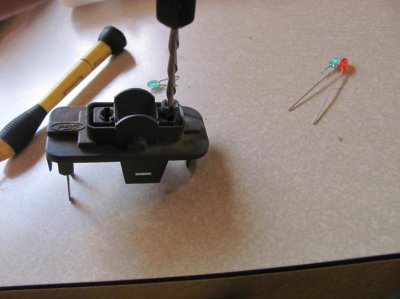
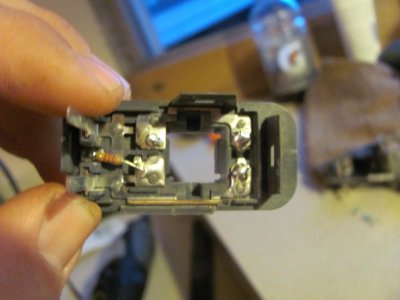
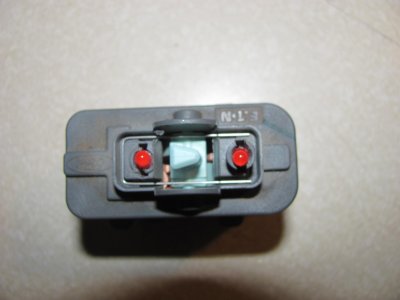
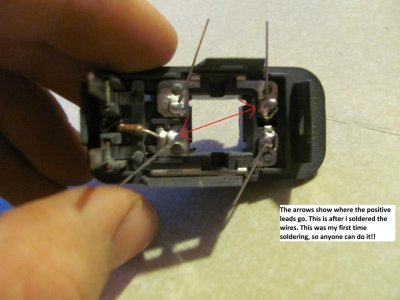
I started with the back switches so that if they turned out bad, I don't have to see them. The insert piece in the door pops out by pulling up on it with your fingers, then the wire harness comes out by pushing one clip. I then moved to my office (dorm room lol). The switch comes out of the door insert by 2 clips. Next, pop off the button, put a screwdriver under it and pry it up. It comes off pretty easy. When the button comes off, there will be a metal piece under it, and remember which way it points (mine had a mark on the side it faced, and the piece the button goes on also faces to the mark. Next, separate the top and bottom of the switch (work your way around by loosening each tab and it will pop off easily, I was kind of rough taking them out, and the plastic held up fine). When the switch is seperated, the plastic piece that holds the button on will pop off, and now the work starts. I went through more work than I needed for the first switch and still have to put it together, but the second switch took about 30 minutes to complete. The wires for the bulb go straight down, so I used my dremel with the little drill bit thing on the end to grind through and cut the wire (it takes a little work to get the lead cut, but when it is free, the bulb will pop out. The holes that I drilled to get the leads out will work for putting the new leads through.
 

Attachments

  • IMG_1986.jpg
    IMG_1986.jpg
    83 KB · Views: 527
  • IMG_1991.jpg
    IMG_1991.jpg
    79 KB · Views: 409
  • IMG_1995.jpg
    IMG_1995.jpg
    79.3 KB · Views: 391
  • IMG_1998.jpg
    IMG_1998.jpg
    80.5 KB · Views: 440
  • IMG_1999.jpg
    IMG_1999.jpg
    79.3 KB · Views: 547
OP
OP
99 Expy

99 Expy

Full Access Members
Joined
Feb 19, 2010
Posts
1,016
Reaction score
2
Location
Laramie, WY
Continued. . .

The new LED bulb will not fit directly in, so I used a file with a fine grade to file off the lip at the bottom of the bulb (it doesn’t take much pressure to take off the plastic, and the bulb held up fine). I then used the plastic reamer attachement on the dremel to ream out where the light sits in the switch because the insert for the bulb is slightly tapered. I didn’t take much material off, but I just made it the diameter of the bit. Once that is all done, the bulb should slide down, and be close to the depth that the factory bulbs were, but mine were still slightly higher. When you look at the bulb, the longer of the 2 leads is the positive lead.
 

Attachments

  • IMG_2001.jpg
    IMG_2001.jpg
    83.5 KB · Views: 360
  • IMG_2002.jpg
    IMG_2002.jpg
    79.2 KB · Views: 300
  • IMG_2003.jpg
    IMG_2003.jpg
    83.9 KB · Views: 311
  • IMG_2004.jpg
    IMG_2004.jpg
    77.6 KB · Views: 321
  • IMG_2006.jpg
    IMG_2006.jpg
    84.3 KB · Views: 348
OP
OP
99 Expy

99 Expy

Full Access Members
Joined
Feb 19, 2010
Posts
1,016
Reaction score
2
Location
Laramie, WY
Continued. . .

When you look at the bulb, the longer of the 2 leads is the positive lead. Take this into account when putting the bulb in. See the picture to see where the positive leads go. Once the bulbs are in all the way and in the right way, now you solder them to the switch. Once everything is soldered together and cooled down (only takes a couple of seconds), the left over wire from the leads will come off by just bending them back and forth. Now you can then put the switch back together following the steps used to pull it apart and enjoy the new colors!

The lights worked perfectly after putting them in, and I will soon finish the other side rear window switch. I will do the front doors as soon as the store gets more stock in since they only had 2 sets of lights on stock :shakehead: 
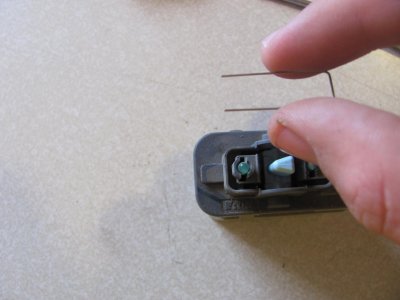
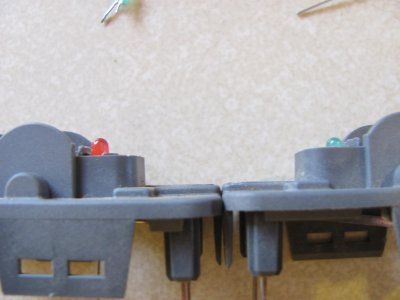
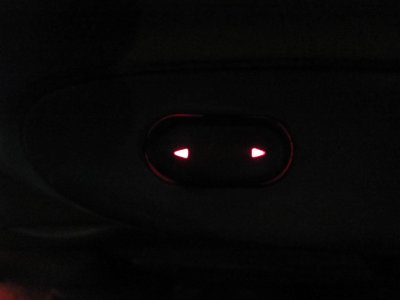
The picture really doesn't show the color well, but it is a deep glowing red, and looks awesome. I will update the thread as I get the rest of the lights in. Hope you enjoy and can inspire someone else to do this!!
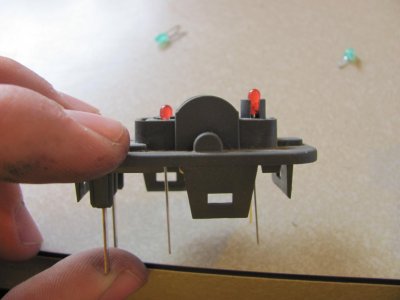
 

Attachments

  • IMG_2008.jpg
    IMG_2008.jpg
    75.2 KB · Views: 318
  • IMG_2009.jpg
    IMG_2009.jpg
    84.4 KB · Views: 301
  • IMG_2012.jpg
    IMG_2012.jpg
    86.7 KB · Views: 382
  • IMG_2014.jpg
    IMG_2014.jpg
    72 KB · Views: 1,575
  • IMG_2019.jpg
    IMG_2019.jpg
    136.9 KB · Views: 404
OP
OP
99 Expy

99 Expy

Full Access Members
Joined
Feb 19, 2010
Posts
1,016
Reaction score
2
Location
Laramie, WY
I forgot to mention that the LEDs are 3 mm, and here is what the bag looks like, and some specs and a picture of the tools used minus the file.
 

Attachments

  • IMG_2023.jpg
    IMG_2023.jpg
    85.2 KB · Views: 300
  • IMG_2027.jpg
    IMG_2027.jpg
    80.2 KB · Views: 265
  • IMG_2029.jpg
    IMG_2029.jpg
    87.2 KB · Views: 321
OP
OP
99 Expy

99 Expy

Full Access Members
Joined
Feb 19, 2010
Posts
1,016
Reaction score
2
Location
Laramie, WY
They make green, and I'm sure almost any color, but I just got the red since that is all that was in stock here in town, and I didn't want to want to wait for them to get shipped from somewhere. What color are yours? The soldering is really easy. I got an electric soldering iron, and you plug it in, let it get hot, make sure your wires are in order, and touch the tip of the iron to the solder wire, and it will melt like liquid and form where you need it.
 
OP
OP
99 Expy

99 Expy

Full Access Members
Joined
Feb 19, 2010
Posts
1,016
Reaction score
2
Location
Laramie, WY
I decided that since I will have to wait for more bulbs at the store, so I bought some blue LEDs from superbrightleds, and they do have green. I figure that the blue won't be as bright while driving in the dark as the red would. I ordered extra so I will be able to do the steering wheel lights as well. I will be doing the rest of the lights soon, but I think they have different bulbs, so hopefully radioshack will have them or I'll just order them

http://www.superbrightleds.com/cgi-bin/store/index.cgi?action=DispPage&Page2Disp=/leds.htm#threemm
 

panda24619

Full Access Members
Joined
May 18, 2010
Posts
5,485
Reaction score
43
Location
San Diego
i got leds laying around on my work bench in the garage. looks like i found my new project. i got red, green, yellow, orange, white, and a really big blue one. that one blinds everyone! haha i think im going blue dash and red everything else. who knows. but if you do the steering wheels leds put it on here as well. im thinking all red in my truck!
 
OP
OP
99 Expy

99 Expy

Full Access Members
Joined
Feb 19, 2010
Posts
1,016
Reaction score
2
Location
Laramie, WY
I will get all of them on here when I do them, I pulled my headlight switch apart and am going to see if they have the light for that at the store today. For my cluster lights, I'm going to see if I can just put a blue lens or something over it or something. I saw one person that did it and it looked good. I would like to stay away from the LEDs, because I don't want any big hot spots.
 

GAINMOB

Full Access Members
Joined
May 19, 2010
Posts
14,565
Reaction score
893
Location
Newport News, VA
From what i saw on youtube if u go bright white the cluster panel will be blue...its true color
 
OP
OP
99 Expy

99 Expy

Full Access Members
Joined
Feb 19, 2010
Posts
1,016
Reaction score
2
Location
Laramie, WY
If I remember right, my year expy has a green tint on the back of the cluster, so I think you can take it off with acetone and then the clear bulbs would work with a blue tint added, but I will have to look more into it.
 

GAINMOB

Full Access Members
Joined
May 19, 2010
Posts
14,565
Reaction score
893
Location
Newport News, VA
If I remember right, my year expy has a green tint on the back of the cluster, so I think you can take it off with acetone and then the clear bulbs would work with a blue tint added, but I will have to look more into it.

to avoid doing that since youre replacing the bulbs...people would use bright white led bulbs...it was on YouTube and F150forum.com
 

panda24619

Full Access Members
Joined
May 18, 2010
Posts
5,485
Reaction score
43
Location
San Diego
you could have green, but i think most are blue. i know i have blue. i have a bulb out and i can kinda see the blue there. but i want to replace my bulbs and http://www.superbrightleds.com/bulb_cross.php this helped out a lot. theres even a how to on how to navigate the site. so thats nice. gotta change mine to purple by getting red leds. haha
 

GAINMOB

Full Access Members
Joined
May 19, 2010
Posts
14,565
Reaction score
893
Location
Newport News, VA
everything is green on the inside of my GREEN EB...thats why im interested in breen...green lights for the windows would be sooooooooo GANGSTA!!! sooooo HARD!!!!
 

Petrini

Full Access Members
Joined
Jan 18, 2011
Posts
181
Reaction score
2
Location
MT
For my cluster lights, I'm going to see if I can just put a blue lens or something over it or something. I saw one person that did it and it looked good. I would like to stay away from the LEDs, because I don't want any big hot spots.

There already is a blue lens on the cluster lights, it just looks that nasty green/teal color because of the regular non-led buls giving off a yellowish light. So white bulbs would make them a cool blue color, blue bulbs would ake a REALLY blue color.
 

WHOISMOOTOO

Full Access Members
Joined
Dec 8, 2009
Posts
1,757
Reaction score
11
Location
Dallas, TX
Ill def play with this and see what i come up with, just not sure i want to split open the speedo cluster
 

GAINMOB

Full Access Members
Joined
May 19, 2010
Posts
14,565
Reaction score
893
Location
Newport News, VA
There already is a blue lens on the cluster lights, it just looks that nasty green/teal color because of the regular non-led buls giving off a yellowish light. So white bulbs would make them a cool blue color, blue bulbs would ake a REALLY blue color.

thats what i've been trying to tell everybody...
 
OP
OP
99 Expy

99 Expy

Full Access Members
Joined
Feb 19, 2010
Posts
1,016
Reaction score
2
Location
Laramie, WY
I got my blue LEDs from superbrightleds.com today, so I will hopefully be able to do all my door switches and steering wheel lights before long, but after breaking my nose today in rugby practice, I think I'm going to wait for a little bit to put them in.
 

panda24619

Full Access Members
Joined
May 18, 2010
Posts
5,485
Reaction score
43
Location
San Diego
I got my blue LEDs from superbrightleds.com today, so I will hopefully be able to do all my door switches and steering wheel lights before long, but after breaking my nose today in rugby practice, I think I'm going to wait for a little bit to put them in.

OUCH! that must have hert. hope your all okay. and let us know how you do the steering wheel. cause i wanna do all my switches and make them all blue. except the lights. maybe red. idk yet. maybe everything red and cluster purple cause of the red leds. haha
 
OP
OP
99 Expy

99 Expy

Full Access Members
Joined
Feb 19, 2010
Posts
1,016
Reaction score
2
Location
Laramie, WY
No worries!! I do my best not to let pain slow me down. It hurt quite a bit when I got hit since I got kicked in the nose and the eye, but its all better now, just a nice little throbbing pain :) Anyway, I like the color of the red, but I chose the blue because I think it will be more calming when driving in the dark, rather than the red, and I just like blue in general, hopefully they turn out to be a dark blue, but anything is better than my dim green lights on there now!
 
Top