1999 Expy engine knock

Disclaimer: Links on this page pointing to Amazon, eBay and other sites may include affiliate code. If you click them and make a purchase, we may earn a small commission.

juan214

Full Access Members
Joined
Sep 11, 2013
Posts
506
Reaction score
61
Location
Stoughton, MA.
1999 Expy engine knock..... Back together

So I go on a drive to N.J. from MA. Check all my fluid before I leave. Oil and Filter about 300 miles ago K&N filter with 5W 20. Drove all the way down 250 miles no issues (but the usual valve ping). All gauges reading good getting 10.3 mpg. Cruising between 50 ad 55 mph. Just as I get to my exit I hear something odd. I pull over engine idles rough has a knock. Gauges still fine no CEL.
Damage done I guess, drove off the highway to nearest hotel. Oil level good, filter not collapsed, no leaks, and antifreeze level all good. So I assume a spun bearing. Rented a trunk and trailer ad got it back home. It starts with no issue not even drag on it. Seems to be more of a top end knock than lower. Got a second opinion that person says the same thing as I do. Sound like knock or clatter?
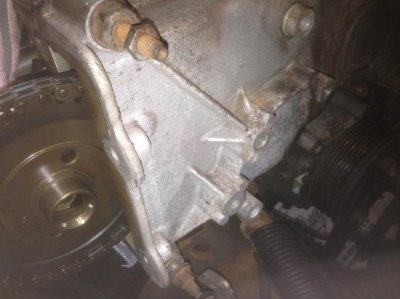
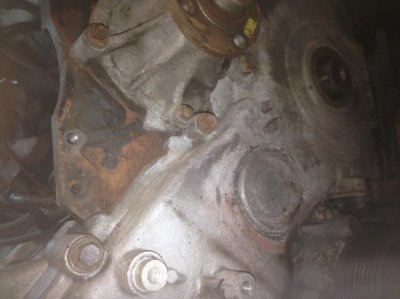
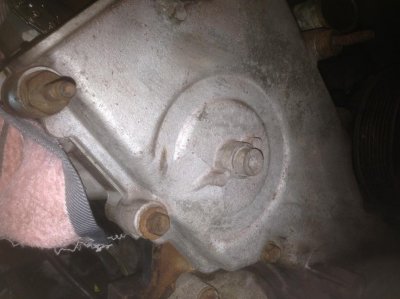
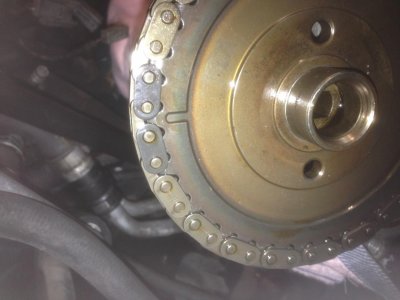
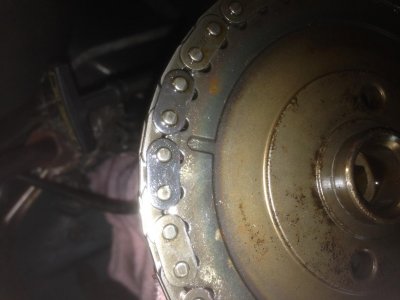
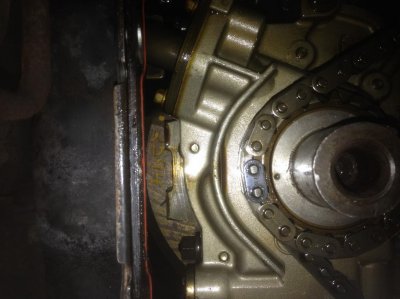
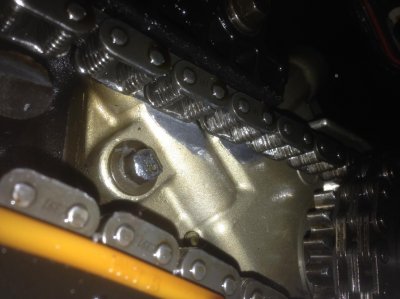
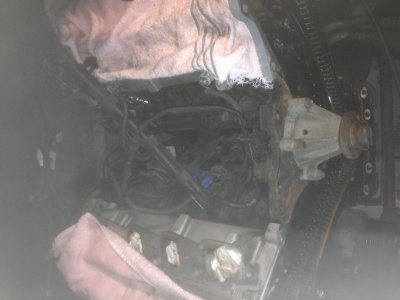
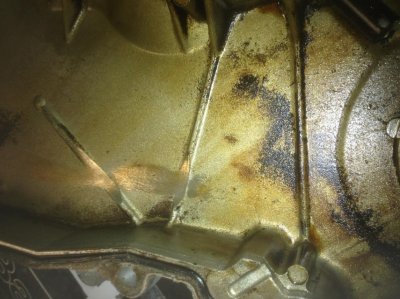
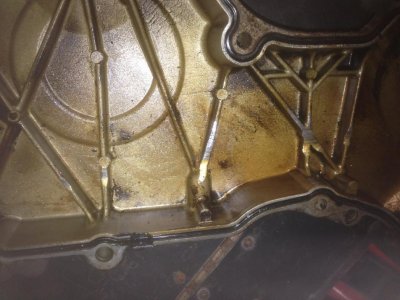
Started disassembling the engine to pull the valve covers to see if the issue is under there. Way to much to get to them so basically started to break it down for a complete pull.
Looking to see anyone has any suggestion as to what to look for as I go. i'm going to look at the exhaust today I do not think its that though.
 
Last edited:

stamp11127

Full Access Members
Joined
Mar 10, 2012
Posts
6,207
Reaction score
1,246
Location
Temple, Georgia
I would use a mechanics stethoscope and locate the tap before tearing into it...
 
Last edited:
OP
OP
J

juan214

Full Access Members
Joined
Sep 11, 2013
Posts
506
Reaction score
61
Location
Stoughton, MA.
Thanks for the reply. I went to continue taking it apart. What would have been process, what would I be listening for just for future reference if I the same issue later. Started taking apart the top end to see whats going on under the covers. Anything to look for? dose this engine have those butterfly baffles? I have seen that this could be an issue.

History:
The engine was rebuilt has about 30K on it now.
Had to replace (plastic belt tensioner). Warranty
No start issues, Quarter Sized hole blown through Plenum. (2013)
Fine since
 

stamp11127

Full Access Members
Joined
Mar 10, 2012
Posts
6,207
Reaction score
1,246
Location
Temple, Georgia
When there isn't anything wrong with an engine it will have "normal" operating sounds. You will be able to hear them through the stethoscope and not notice anything standing out. When there is something wrong you cannot miss it since the difference in sound is so apparent.
You can use the scope anywhere on the engine being careful where you place it - avoid the fan blades, serp belt etc. Don't slap it on the engine the sound amplification is very high.

Make sure the oilers in each head are not obstructed.
 
OP
OP
J

juan214

Full Access Members
Joined
Sep 11, 2013
Posts
506
Reaction score
61
Location
Stoughton, MA.
Thanks for the info I'll look at those. What would they effect top or bottom or both?
Hoping its something simple up top.
Worst case not sure which way to go with this. Finances is one issue, but need it fixed. Debate is replace or rebuild again as this engine was (supposed to be) rebuilt once. Cost of used engines with 100K is over $1000.00 or more, even saw one with 253K on it. Rebuild kits depend on what gets replaced $386 to $700. Make no sense to buy used if new parts are the same cost. Then machining and using old connecting rods if able.
Any idea what the machining would average?
* Guessing on boring the cylinders
$500.00
* The crank if scored.
$200.00
* The Rods if scored.
With crank
* I know I'm missing something else.
Heads $400 labor plus parts
Got any ideas what should be or recommend to do here?
Have you pulled one of these? Any tips?
Did you pull the nose, does it need to? Any where i can get info on this?
 
Last edited:

stamp11127

Full Access Members
Joined
Mar 10, 2012
Posts
6,207
Reaction score
1,246
Location
Temple, Georgia
You don't know the cost of a rebuild until you have the engine apart and are able to measure the parts & clearances between them.
Oilers are for the top end.
If time is a problem crate engines are the way to go. The engine can come out through the top with the hood off. More can be had by pulling the radiator out also.
 
Last edited:
OP
OP
J

juan214

Full Access Members
Joined
Sep 11, 2013
Posts
506
Reaction score
61
Location
Stoughton, MA.
So this is where I'm at today. Pulled throttle body, intake, plenum, fuel rails, injectors, coil packs, harnesses, hoses, right valve cover.
IMG_7476.jpg
This #6

Have not pulled the left valve cover I'm assuming that it may have the same issue.

What do you think about this?
Could this be my noise?
Hammering up and down the stem?

IMG_7478.jpg
 

stamp11127

Full Access Members
Joined
Mar 10, 2012
Posts
6,207
Reaction score
1,246
Location
Temple, Georgia
Well...you have a problem with that head. Part of the guide is missing (which is obvious). It probably is still in the cylinder beating the hell out of everything or it is in small pieces in there - beating the hell out of everything.

Couple choices at this point:
1) Borescope to view the cylinder/piston checking for damage
2) Pull the head to inspect the cylinder/piston
3) Price a rebuild
4) Price another engine
5) Price reman heads and gasket set if the internals are ok from #1 or #2 above
6) Get sheet faced and worry about it later
 
OP
OP
J

juan214

Full Access Members
Joined
Sep 11, 2013
Posts
506
Reaction score
61
Location
Stoughton, MA.
The guide looks the same size as the other seven. Looks like it broke slid down and is probably hammering back and forth. I think it may be the same for a couple of exhaust valves too. Unless that one is echoing in the engine.

Do not have Borescope to view the cylinder/piston to check for additional damage. Hope the plugs come out they only got 30K on them. I'll see if I can rent one or I'll have to just pull the head to inspect the cylinder/piston myself. Rebuilt engines range between $1850 to $3000. Re-manufactured heads $600 and gasket set is $150 all on eBay. Don't drink that much now this happened LOL. Not sure if I would save any money rebuilding myself. But I would definitely know it was actually done 100%

Still need to check the timing components.

Think I'm better off coring / exchanging the heads for reman?
Any tips on the head removals?
Any tip on what to look for behind the timing cover?
Dumb Question, besides pulling the pan is there a way to check the rod bearings?

Thanks
 

stamp11127

Full Access Members
Joined
Mar 10, 2012
Posts
6,207
Reaction score
1,246
Location
Temple, Georgia
See if the other head has the same "issue" with the top of the guide. It may look like a problem but not be. What are the chances all or half of them are missing some material?
I would wait before pulling the head off.
Timing chains - look for missing guide pieces. Drop oil pan to retrieve them or oil pickup will clog.
Rod bearings - drop pan and pull rod caps is the only way to check clearance
 
Last edited:
OP
OP
J

juan214

Full Access Members
Joined
Sep 11, 2013
Posts
506
Reaction score
61
Location
Stoughton, MA.
The other seven intake guides look fine. Planning on checking them with a pair of needle nose pliers to see if there is movement. The exhaust valve guides I believe can not be seen unless I pull the manifolds and look through the ports.
I'll rent or buy a scope before pulling the head off, either way I have to pull the left bank head with bad guide anyway.

Dropping oil pan, any tips here to get it off?
Will I have to jack the motor up?
Think I'm better off coring / exchanging the heads for reman, or will a rebuild still work on it?
Any tips on the head removals?

Haven't look at the truck in a couple of days, probably start it again on Thursday
 

stamp11127

Full Access Members
Joined
Mar 10, 2012
Posts
6,207
Reaction score
1,246
Location
Temple, Georgia
Oil pan - depends on how much clearance there is between the pan and crossmember. I don't recall other members complaining about lifting the engine so you probably don't have to.

I always go with reman heads. You still don't know the condition of the piston/cylinder wall so you should wait and see what direction you will need to take once the head is off.

Don't be in a hurry taking the head off. Keep everything neat, labeled and organized.
You will need the camshaft lock tool for reinstalling the heads.
 
OP
OP
J

juan214

Full Access Members
Joined
Sep 11, 2013
Posts
506
Reaction score
61
Location
Stoughton, MA.
So here's where we are at. Spent a few hours on it the last two days.
i got the needle nose pliers onto the broken valve guide and its tightly wrapped around the STEM. So she's really hammering in against the head.
Drop the steering pump off the motor and timing chain cover. Three out of four bolt (one missing?). Both cam covers are off, everything looks OK. Cleaned up the covers of all the dirt and grime. Cant find a wrench to take the bottom EGR tube nut off. Got new wrenches to add to the collection (1 1/16, 1 1/8, 27mm) none worked. I assume it's 1 3/6 the 1 1/4 is to big, or its 30mm. I believe the the conversion 30.0125mm something like that. I'll deal with it later, might pull it with the head and manifold if clearance allow. Now onto the timing chain cover. Crap load of bolts,four nuts, and three brackets (one nut and hose bracket missing).
 

Attachments

  • IMG_7499.jpg
    IMG_7499.jpg
    93.5 KB · Views: 45
  • IMG_7500.jpg
    IMG_7500.jpg
    94.8 KB · Views: 42
  • IMG_7501.jpg
    IMG_7501.jpg
    98.8 KB · Views: 41
  • IMG_7502.jpg
    IMG_7502.jpg
    93.4 KB · Views: 42
  • IMG_7503.jpg
    IMG_7503.jpg
    96.1 KB · Views: 42
Last edited:
OP
OP
J

juan214

Full Access Members
Joined
Sep 11, 2013
Posts
506
Reaction score
61
Location
Stoughton, MA.
What would a re-builder be without extra parts left over. Any way finally got the timing chain cover off. Initial inspection revealed that there was excessive slack on the left chain and very slight on the right. The left could touch the other side. Cranked the crank marker to 6 o'clock (a whole 180 degrees) took a bit. All markers lined up as they should, so I assume it did not jump timing.
 

Attachments

  • IMG_7506.jpg
    IMG_7506.jpg
    91.1 KB · Views: 37
  • IMG_7507.jpg
    IMG_7507.jpg
    93.5 KB · Views: 37
  • IMG_7508.jpg
    IMG_7508.jpg
    95.5 KB · Views: 38
Last edited:
OP
OP
J

juan214

Full Access Members
Joined
Sep 11, 2013
Posts
506
Reaction score
61
Location
Stoughton, MA.
Reinspected the timing system, every was good and tight now. What happened was taking the balancer bolt off the engine was crank backwards, which compressed the tensioner producing the slack. Which was a good as it produced that the left tension is bad. Continuing the inspection by manually compressing the tensioners the right gave very little and produce oil, on the other hand the left tensioner gave very easily and no oil just an empty bubbling noise. The sprockets look OK until I get the chains off. The guides seem ok beside one on the right might need to be tightened. I decide to do more looking around. So grabbed the drop light and CONTINUED inspecting. This would have been caught once the chains were off. The left side (drivers) of the oil pump had a deep gouge in it from the chain and the block had a rub as well. Turned the timing chain cover around and the damage was evident the chain was running a gouge on the ribs inside the cover. One of the pump bolt was being ground down too. From one the pictures looks like teeth might be chipped. All the damage was fresh still silver colored no oil burn or tarnish. I took the Crankshaft Timing Ring off the crank which gave a little trouble but it came off.
NOTE: The right tool for the right job. I do not have crank tool to move the crank around as I needed. I believe you can use a 33mm socket deep which I do not have either. So I used a 1 1/4" shallow 1/2" drive socket. It worked but it slipped a few times. The Crankshaft Timing Ring I took off did not slide back on so I didn't force it on. It did cause some damage, some small burrs so take your time. I'm going to hit it with some emery cloth so I'll post the end result later.
 

Attachments

  • IMG_7509.jpg
    IMG_7509.jpg
    92.3 KB · Views: 43
  • IMG_7510.jpg
    IMG_7510.jpg
    88 KB · Views: 46
  • IMG_7511.jpg
    IMG_7511.jpg
    90.7 KB · Views: 52
  • IMG_7513.jpg
    IMG_7513.jpg
    100 KB · Views: 48
  • IMG_7514.jpg
    IMG_7514.jpg
    99.5 KB · Views: 44
Last edited:

stamp11127

Full Access Members
Joined
Mar 10, 2012
Posts
6,207
Reaction score
1,246
Location
Temple, Georgia
Who "rebuilt" the motor 30,000 miles ago? For that mileage the chains and tensioners should be in good shape. Unless you were the rebuilder I would say you've been suckered.
Use a socket and breaker bar to rotate the crank clockwise. Get the cam holder also.
 
Last edited:
OP
OP
J

juan214

Full Access Members
Joined
Sep 11, 2013
Posts
506
Reaction score
61
Location
Stoughton, MA.
The motor was rebuilt 30,000 miles ago by Marshall's Machine in Maine. I would not recommend them to anyone ever. I would recommend anyone on the north east avoid them all together. Their service after they are paid is the worst of any company I have dealt with. It's a cat and mouse game with them. Try getting warranty work done is like pulling teeth.
 
Last edited:
OP
OP
J

juan214

Full Access Members
Joined
Sep 11, 2013
Posts
506
Reaction score
61
Location
Stoughton, MA.
The right tool for the right job. I do not have crank tool to move the crank around as I needed Its part of a kit for over $200.00. I believe you can use a 33mm deep 1/2" drive socket which I do not have either. So I used a 1 1/4" shallow 1/2" drive socket. It worked but it slipped a few times. The Crankshaft Timing Ring I took off did not slide off easily when I took it off. I did try to put back but it would not go back on so I didn't force it on. It did cause some damage, some small burrs so take your time. Here are the results of this adventure I hit it with some Emory cloth I cleaned it up some. I took a closer look seemed like the key mushroomed. I guess it's a softer metal then most key. I ended getting a file and squared up the sides. DO NOT touch / file the top of the key. I also filed down all the high spots on the crank itself. Check the Crankshaft Timing Ring for fitment and it slid on better than before. I hit again with the emery cloth, oiled it and it's good to go.
 
OP
OP
J

juan214

Full Access Members
Joined
Sep 11, 2013
Posts
506
Reaction score
61
Location
Stoughton, MA.
Engine Timing Crankshaft Gear

The Engine Timing Crankshaft Gear did not want to come off by hand. I took my 27mm open wrench and use used to pry it away from the oil pump. Facing the oil pump there is a notch on the top left this where I inserted the wrench. It slid out with no real effort. Oil just seeped in and dried up from the heat. The groove is the damage caused by the slack in the timing chain.
 

Attachments

  • image.jpg
    image.jpg
    98.2 KB · Views: 29
Last edited:
Top