2017 Spark plug change

Disclaimer: Links on this page pointing to Amazon, eBay and other sites may include affiliate code. If you click them and make a purchase, we may earn a small commission.

gregcm21

Member
Joined
Apr 7, 2019
Posts
9
Reaction score
8
Location
Houston
2017 Ford Expedition Platinum EL 4x4
83,000 miles

I decided to change the spark plugs on my wife's Expedition. The Expedition was running good. No issues with idle, drive-ability, or anything. I've read different opinions on when to change them. So I thought why not go ahead since it is a boosted engine. We don't tow anything yet. The Expedition is completely stock save for the catch can which was installed in the last 2 months. We recently had the water pump start leaking but that was replaced under the CPO warranty.

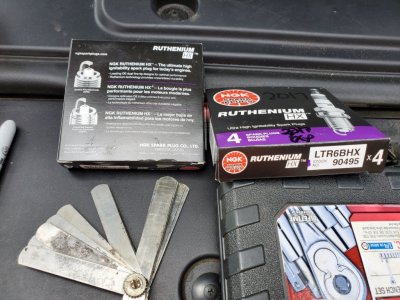
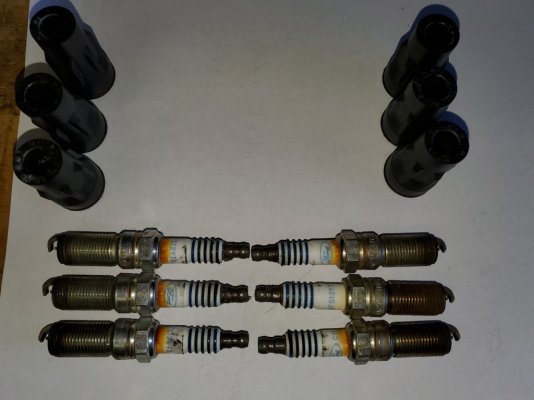
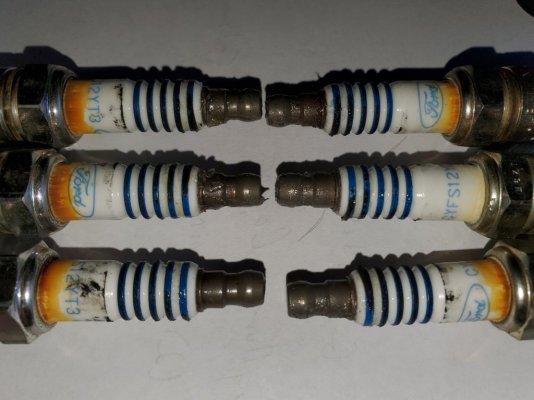
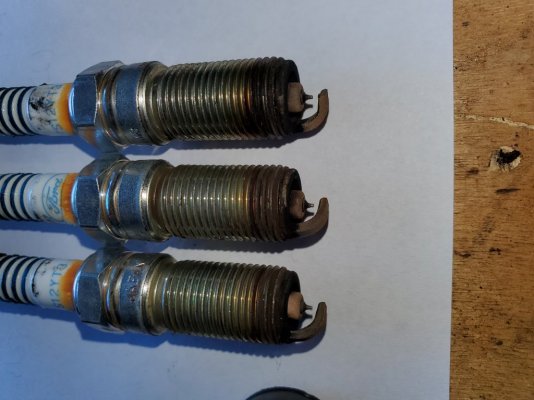
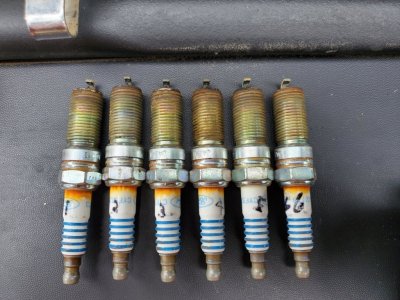
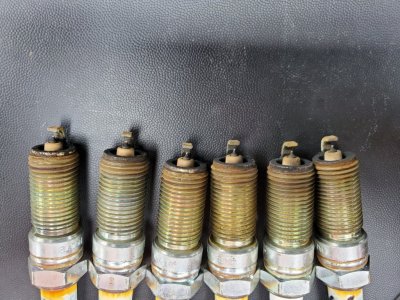
The replacement was actually quite easy. The right side (passenger) of the engine is easy. Plenty of room to access the plugs. The left side (drivers) was also easy. I did have to unplug the connector the to whatchamacallit (I can only guess is the high pressure regulator??? between 5 and 6). All of the plugs were gapped over .045". To me, the old plugs look good other than the gap. The NGK Ruthenium replacements were pregapped to .030". The manual says .030-.033" so I left them alone. I used NGK Ruthenium HX 90495. I used NGK Ruthenium's on my Hyundai Genesis 5.0 with no issues for more than a month.

I thought this might be helpful to others that are trying to decide to change themselves. I used 3/8" ratchet with 4" and 6" extensions, spark plug socket, 1/4" ratchet with 5/16" socket and extensions, and a magnetic pickup to pull the plugs out. The hardest part for me was pulling the coil over plug off the old plugs...a little patience. Don't drop anything as it can be fun finding it...without dropping the pan covers and skid plate.
20200628_114617.jpg

20200628_114626.jpg

20200628_114956.jpg

20200628_115138.jpg
 

99WhiteC5Coupe

Full Access Members
Joined
Jun 3, 2015
Posts
2,600
Reaction score
1,306
Location
USA
2017 Ford Expedition Platinum EL 4x4
83,000 miles

I decided to change the spark plugs on my wife's Expedition. The Expedition was running good. No issues with idle, drive-ability, or anything. I've read different opinions on when to change them. So I thought why not go ahead since it is a boosted engine. We don't tow anything yet. The Expedition is completely stock save for the catch can which was installed in the last 2 months. We recently had the water pump start leaking but that was replaced under the CPO warranty.

The replacement was actually quite easy. The right side (passenger) of the engine is easy. Plenty of room to access the plugs. The left side (drivers) was also easy. I did have to unplug the connector the to whatchamacallit (I can only guess is the high pressure regulator??? between 5 and 6). All of the plugs were gapped over .045". To me, the old plugs look good other than the gap. The NGK Ruthenium replacements were pregapped to .030". The manual says .030-.033" so I left them alone. I used NGK Ruthenium HX 90495. I used NGK Ruthenium's on my Hyundai Genesis 5.0 with no issues for more than a month.

I thought this might be helpful to others that are trying to decide to change themselves. I used 3/8" ratchet with 4" and 6" extensions, spark plug socket, 1/4" ratchet with 5/16" socket and extensions, and a magnetic pickup to pull the plugs out. The hardest part for me was pulling the coil over plug off the old plugs...a little patience. Don't drop anything as it can be fun finding it...without dropping the pan covers and skid plate.

View attachment 36782

View attachment 36783

View attachment 36784

View attachment 36785


If the OEM Motorcraft spark plugs were in such good shape and you were having no issues, why did you install a different brand instead of the correct Motorcraft spark plugs?
 

mquick5

Full Access Members
Joined
Aug 27, 2018
Posts
588
Reaction score
152
Location
Buckeye Country
If the OEM Motorcraft spark plugs were in such good shape and you were having no issues, why did you install a different brand instead of the correct Motorcraft spark plugs?
He said he used them in his Hyundai for more than a month without issues.

Sent from my SM-G930T using Tapatalk
 
OP
OP
G

gregcm21

Member
Joined
Apr 7, 2019
Posts
9
Reaction score
8
Location
Houston
These particular factory Ford spark plugs were made in Japan. Its stamped right into the plug which makes me suspicious that these are made by NGK (for Motorcraft) not Autolite. From what I've read Autolite historically makes spark plugs for Motorcraft. Several forums indicate that Autolite has moved some amount of their manufacturing to China. Not wanting to use Chinese made spark plugs. Rockauto lists PN Motorcraft CYFS12YT3 is the OEM equivalent NGK 97177. Switching gears, I decided to change my Genesis spark plugs a bit early at 93k (instead of the 100k) and after a bunch of research i decided to choose the NGK Ruthenium. They've performed well in the Genesis smoothing out the idle. Granted maybe any spark plug would have done the same. The Genesis spark plugs looked really clean though. So this was just a progression to use them in our Expedition.
 

Knighted_Expy

Member
Joined
Aug 15, 2021
Posts
6
Reaction score
1
Location
Orlando
Sharing my experience...

I stuck w/Motorcraft. I bought my 17 having about 42K miles and I just changed the plugs at about 85K, doubtful the plugs were changed prior to my ownership. Overall, pretty easy job. I'm slow and it took me a little over an hour once I knew what I was doing.

Couple things I did & learned:
1.) Be careful w/the coil plugs, do not break them. You must pull the red slide back and press the latch down, and it should slide out easy. Take your time, they will come out.
2.) I used a 10" extention magnetic 5/8" socked and it worked great except the furthest back passenger plug (not sure what number it its). I used a 6" version of the same tool for this particular one. I twisted slow and they came out pretty easy.
3.) For the cost, I replaced the coil boots. Super easy to change and a no-brainer for the money.
4.) I torqued my plugs to 9ft/lbs and used silver anti-sieze on the treads. Once the plug is put down the tube and making contact, I rotate the plug backwards a couple times to coat the threads on the block, and switch direction and feel by hand for the catch.
6.) Be careful w/the dielectric grease. Only coat the inside walls of the boot and the ceramic bumps of the plug. I used a Q-tip. Do not goop the ends of boots (squeeze blob) as it may introduce a resistive path between the plug and boot contact and cause severe electrical problems. I noticed this was the case when removing the old plugs as the terminal was covered w/grease. Although I didn't have any existing problems, the grease is not intended for application on metal and not designed to pass excessive electrical current. I applied a very thin film of grease on the rubber coil seal to maintain flexiblity and extend life of the seal. I also added a very very thin coat on the coil connector to make removal easier next time. Just my preference.
7.) Torquing down the coil - I tried the recommended 63ft/lbs and broke the aluminum bolt. Not sure what happened. The bolt may have been previously weakened? Interestingly enough, I was able to remove the broken bolt by hand. I was fearful in having to do doing surgery with my vice-grips and PB blaster. There must be some sort of internal fastener clamping the two surfaces vice the traditional threaded hole. I bought a new bolt for ~2.00 at the local dealer and used a calibrated hand to secure the coil packs.
8.) Plug Gaps - When measuring the gaps of the old plugs, they read about 40-42 thousands, almost 10 more than the recommended gap. I can only assume over the course of ~80K miles, they expanded over time which probably negatively impacted performance. I didn't have any issues prior to and I was still getting ~20 MPGs on the highway. The new plugs were gapped at ~ 32 thousands by the factory and used as-is.

Overall, the plugs were due for replacement (see pics below). I should have replaced them sooner. I purchased all of my parts on Rock Auto and I enjoy working on my own vehicles, not to mention it's an opportunity in teaching my kids basic mechanics. If you've maintained cars before, this job is pretty easy and you'll save about ~$200 (labor & taxes) and know the job is done right!

Hopefully folks find this usefull!

(Passenger (left) <--> Driver side (right))
(Front (bottom) - Back (top))
20210821_084659.jpg

Grease on the terminals
20210821_084754.jpg

Passenger side
one side plug.jpg

Driver side
20210821_084708.jpg
 
Top