Banker with tools vs Cylinder Head

Disclaimer: Links on this page pointing to Amazon, eBay and other sites may include affiliate code. If you click them and make a purchase, we may earn a small commission.

stamp11127

Full Access Members
Joined
Mar 10, 2012
Posts
6,207
Reaction score
1,246
Location
Temple, Georgia
Rvanbeers are you originally from Alabama?

Lucky for you your impact isn't one of the "Bad Ass" models or you would be taking the course: Broken Bolt Removal 101

Couldn't resist this....Righty tighty, lefty loosey
 
Last edited:

Thermo

technical advisor
Joined
Apr 18, 2011
Posts
1,404
Reaction score
65
Rvanbeers, I did something very similar to what you are planning. First off, like was mentioned, the back/lower bolt on each head will need to be loosened and then held up as you go to lift the head off of the block. I was able to get my hand on the backside of the head and use my thumb to hold the bolt up. But, the rubber band trick is good too.

As for the exhaust header bolts, just tear into it. If you break off the studs, you break them. In my case, I broke off 3 of them and all 3 broke off at where the nut was. So, removing the rest of the stud was nothing more than taking a pair of vice grips, grabbing what was left of the stud and spinning them out.

Like was said, PB Blaster will be your friend.

As for gotchas, the only one I had was on the passenger side, there is a metal coolant line that runs there and if you are not careful as you are lifting the intake, you can bend this tube (don't ask how I know). The good thing is the tube is only like a $15 part as I recall.

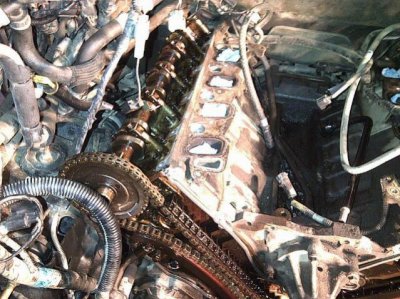
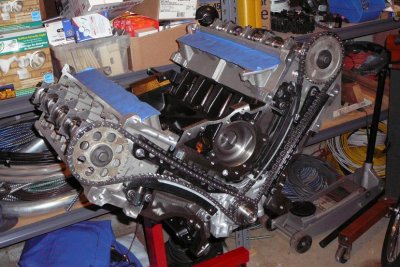
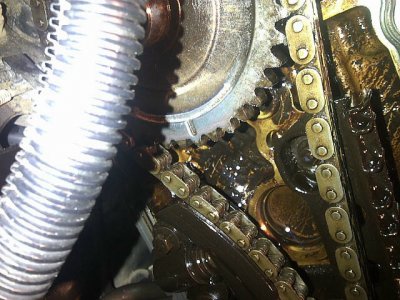
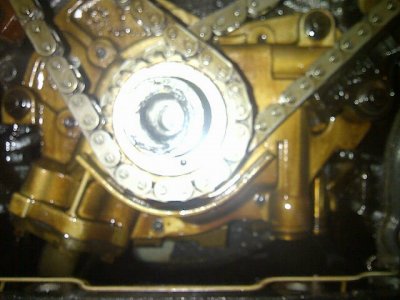
When reassembling the motor, if you read the book on how to do the timing, it will confuse the living snot out of you. This is what I found. You will need the #1 cylinder (front, passenger cylinder) at TDC (top dead center). This should be found by turning the crankshaft so the key is in the 12 o'clock position. From there, assemble the motor. When installing the timing chains, look at the chains. You should see a bunch of light colored (steel) colored links and then 2 links that are dark in color (may be the opposite depending on what chains you have). If you look at the gears that you had to put on the crankshaft, you will see a dot at the 6 o'clock position. IF you look at the camshaft gears, you will see a raised oval (looks like a tic tac). You want to put 1 colored link on the dot and the other colored link on the "tic tac". You may need to rotate the cam gear a little bit to get this alignment. Also note that you need to make sure that you keep the left chain on the left side of the motor and the right chain on the right side of the motor (make a note as to which is which as you are dismantling the engine, personally I would recommend getting a bunch of 1 gallon zip lock baggies to put all of the similar parts together, ie, all your intake bolts, all your front cover bolts, your timing chain/gear/tensioner/rails from the passenger side, etc). Once you get the colored links aligned, the timing will be good and you won't have to worry about any damage on start up.

As for the head, based on what you are talking about doing, it is highly advisable to do both heads. Yes, it is going to cost you a little more, but you would hate to be doing this again in the near future because one side of the motor was pulling more power than the other, leading to it failing. You are looking at about an extra $60 and an hour or so of your time. Cheap insurance if you ask me.

The repair to the head will more than likely involve having a machine shop grind out the valve guide and put in a sleeve. This is making an assumption that you don't find something else as you are tearing down (may find a nice dent in the top of the one piston from where the valve struck the piston).

As for the rocker coming off, I know why. If you have the valve cover off, the rocker is being pressed upwards by a combination of the valve spring (attemping to close the valve) and the tensioner (the round cylinder at the other end of the rocker that is sticking out of the head). In your case, what happened is the cam pushed the valve down, the valve stuck down as the lobe on the cam released its downward push. This allowed the rocker to not be forced into the cam any more. The spinning cam then pushes the rocker out from underneath it and allowing it to float around inside the valve cover. There are 2 dents (1 on each end of the rocker as I recall) that keep the rocker from sliding out since they are pressed on to the valve and the tensioner (hence why when the valve stuck, the rocker could move).

Take a look at the heads. make sure that you have the upgraded heads that fixed the plug thread issue. The bad heads have 3 threads for the spark plug. The new heads have like 6. If you have the heads off, now is the time to Timesert all the plug holes to prevent future issues (hence why I pulled off my heads as I Timeserted all 8 holes). Granted, while I had my heads off, I did a minor port/polish job to get me a little more power too.

If you need to know any more, let me know. Like was mentioned, take it slow, note where things come from and it will all go back together with no issues. Thinking about it, there was 1 other thing that I fought with for awhile and that was removing the harmonic balancer. It seemed all the pullers I was getting were just a titch too small and would not allow me to bolt it up. So, make sure you have a good size puller. If you have questions about installing the tensioners, let me know. A paper clip is your friend with those. Just don't forget to pull the paper clip out before buttoning up the engine.
 
OP
OP
R

rvanbeers

Active Member
Joined
Jan 5, 2013
Posts
34
Reaction score
2
Location
Edmonton
Stuck on the crankcase pulley

So everything was going well and thought I may even have the head off today until....

Crankcase pulley won't come off. Lot's of torque on the puller and it wont budge. I think I may have cracked the timing cover as well as a result of over torquing the harmonized balancer bolts

I took the bolt off yesterday which was a task as the crankcase kept spinning. Am i Missing something? Why wont this fugger budge
 

toms89

technical advisor
Joined
Mar 13, 2011
Posts
5,173
Reaction score
442
Location
MD
So everything was going well and thought I may even have the head off today until....

Crankcase pulley won't come off. Lot's of torque on the puller and it wont budge. I think I may have cracked the timing cover as well as a result of over torquing the harmonized balancer bolts

I took the bolt off yesterday which was a task as the crankcase kept spinning. Am i Missing something? Why wont this fugger budge

If the center bolt is removed from the balancer it should come off.

The outside bolts on the puller should only go in far enough to pass completely through the balancer. All the torque should be applied to the center of the puller.

I had to use a fair amount of torque but mine came off relatively easy.
 
Last edited:
OP
OP
R

rvanbeers

Active Member
Joined
Jan 5, 2013
Posts
34
Reaction score
2
Location
Edmonton
Culprit and next to do

Laugh # 2

Remove the washer from the inside of the crank pulley or she'll never come off even if your superman.

Next task - Power Steering. Ahhh... can a guy just remove the pulley or do i need to go through the process per the book. I.e skid plate, bolts etc
 

Attachments

  • Culprit.jpg
    Culprit.jpg
    80 KB · Views: 79
  • Next.jpg
    Next.jpg
    96.8 KB · Views: 82

stamp11127

Full Access Members
Joined
Mar 10, 2012
Posts
6,207
Reaction score
1,246
Location
Temple, Georgia
In the tone of Frank's Red Hot Sauce....

PB Blaster, I put that #$%^ on everything......

After a good long soak, apply some pressure with the puller, tap the center puller bolt with a hammer - a few good whacks.
 
OP
OP
R

rvanbeers

Active Member
Joined
Jan 5, 2013
Posts
34
Reaction score
2
Location
Edmonton
Milestone

Finally got the timing cover off. Good thing I don't do this for a living!

Steering Pump removal was a real PIA. But it's all in the past. I also decided I'll do both heads once I confirm the one piston isn't mangled.

Thanks for the the help to date.

Need to get the cam holding & crankshaft position tools, position TDC and mark the timing and I'm off to the races....well machine shop.
 

Attachments

  • TimingCoverOff.jpg
    TimingCoverOff.jpg
    83.6 KB · Views: 84

toms89

technical advisor
Joined
Mar 13, 2011
Posts
5,173
Reaction score
442
Location
MD
Laugh # 2

Remove the washer from the inside of the crank pulley or she'll never come off even if your superman.

Next task - Power Steering. Ahhh... can a guy just remove the pulley or do i need to go through the process per the book. I.e skid plate, bolts etc

LOL..... yeah that would help.
 

stamp11127

Full Access Members
Joined
Mar 10, 2012
Posts
6,207
Reaction score
1,246
Location
Temple, Georgia
Post pics of the piston and the cylinder head shot from multiple angles so that we can see the full extent of the damage.
 
OP
OP
R

rvanbeers

Active Member
Joined
Jan 5, 2013
Posts
34
Reaction score
2
Location
Edmonton
Fuggered again

Spent time getting the engine TDC compression stroke without a compression gauge (assumed the paint and l line on the cam sprocket signified Compression stroke with the crankshaft at TDC mark).

I got so flustered trying to pull the crank pulley with the washer in it, it kept moving the crankshaft and I never reset it before removing the pulley.

So....

1. How does one set TDC with the cover off? Is there a mark on the crank sprocket that goes to the 6 o clock position?

I guess I'll have to put the bolt back in to turn it.....mudder fudder or do I have to put the cover back on as well. I dont see the need to get the crankshaft tool (or do I? is there a reason to have this?)

2. Apparently OTC 6477 Camshaft Holding Tool is foreign to Canada LOL and the the two parts stores I went to don't carry it. I guess a guy needs two as well - one for each cam... hello Amazon......

You would think given the top end problems this would be readily available.

So close...but yet so far.
 

stamp11127

Full Access Members
Joined
Mar 10, 2012
Posts
6,207
Reaction score
1,246
Location
Temple, Georgia
Since your pulling the heads off, when the #1 piston is all the way up that is TDC. You can set TDC right before reassembly. Once it is going back together then the cam to crank timing is important. Right now it isn't - the damage has already been done.

FYI, the cams spin at half the crank speed. The piston is at TDC two times per each 4 stroke cycle. Which one doesn't matter as long as the cams are in time with the crank.
 

toms89

technical advisor
Joined
Mar 13, 2011
Posts
5,173
Reaction score
442
Location
MD
The crankshaft holding tool locks it at top dead center so you cannot screw up. With both tools its an much easier process to reassemble and properly set timing.

OTC 6487 Cam Tool Service Set for Ford Modular V-8/V-10 Engines : Amazon.com : Automotive

OTC 6024 Crankshaft Positioning Tool for Ford : Amazon.com : Automotive


It can be done with out them but care must be taken not to rotate crank or camshafts while timing chain is off as there will be piston to valve contact and possible damage. You will also need to rotate cams to correct position before reinstallation because once the heads are installed you cannot rotate them in relation to crank position again because of piston to valve contact.
 
Last edited:
OP
OP
R

rvanbeers

Active Member
Joined
Jan 5, 2013
Posts
34
Reaction score
2
Location
Edmonton
Just so I'm clear

But man I'm confused. WHat is the point of TDC and locking the CAMS in place. How would I know the relationship of cam sprocket to crank for correct timing after words once the cam moves.

Perhaps I'll slip the timing cover, crank and bolt on and move it to TDC. Someone said the keyway goes to 12 oclock but It doesn't look like TDC when compared to pulley mark in relation to the keyway and timing cover. Does that make sense?

This will be my first of many redo's I'm sure.
 

toms89

technical advisor
Joined
Mar 13, 2011
Posts
5,173
Reaction score
442
Location
MD
But man I'm confused. WHat is the point of TDC and locking the CAMS in place. How would I know the relationship of cam sprocket to crank for correct timing after words once the cam moves.

Perhaps I'll slip the timing cover, crank and bolt on and move it to TDC. Someone said the keyway goes to 12 oclock but It doesn't look like TDC when compared to pulley mark in relation to the keyway and timing cover. Does that make sense?

This will be my first of many redo's I'm sure.

Keyway is more like at the 11:00 position. Timing gear on crank has mark that should be at 6:00. Check photo below. Notice the timing marks on the cams gears, crank gear, and chain. The timing marks are lined up with the crankshaft at top dead center.

54builtblock012A_zps80d1a237.jpg
 

Attachments

  • 5.4 built block 012.jpg
    5.4 built block 012.jpg
    104 KB · Views: 347
Last edited:

Thermo

technical advisor
Joined
Apr 18, 2011
Posts
1,404
Reaction score
65
rvanbeers, when I did the head work on my truck, I had to do the timing. I think you are making it more difficult than what it really will turn out to be. If you look at the picture that tom posted, if you look on the far camshaft gear, you can see the raise bubble at the 8 o'clock position on the gear. That is the "tic tac" that I was talking about earlier. Then if you look at the near camshaft gear, if you look at the chain at the 11 o'clock position, you can see the 2 colored links in the chain. In another spot on the chain (about the exact opposition end of the chain), you will find a single colored link. Kinda like if you look at the gears on the crank shaft, you will find a small dot. The colored links and the tic tac/dot will line up with each other when you have the engine properly timed. The big thing to keep in mind is that as I recall, the camshaft gear, the tic tac will fall between the 2 colored links, where the dot will line up with the single colored link. In short the tic tac/dot will fall in the middle of the colored link(s).

The big thing that will have you scratching your head is when you get things lined up properly, 1 camshaft gear will have the tic tac at the 12 o'clock position while the other one will be at the 11 o'clock position.
 

toms89

technical advisor
Joined
Mar 13, 2011
Posts
5,173
Reaction score
442
Location
MD
You may notice as you rotate the crank while everything is still together the timing marks will not line up with the crankshaft at top dead center on the exhaust stroke. This is because the crankshaft turns two revolutions for every single revolution of the camshafts as stamp said. If this is the case you can rotate the crankshaft another 360 degrees and they will line up.

54builtblock005_zpsd3f9466a.jpg

54builtblock003_zps0c0ed151.jpg

54builtblock012B_zps3e3867e2.jpg
 
Last edited:
OP
OP
R

rvanbeers

Active Member
Joined
Jan 5, 2013
Posts
34
Reaction score
2
Location
Edmonton
ok a picture is worth a thousand words

Thanks Tom and Thermo.

See the pictures below. My chains do not have colored links and the cam sprockets have a line vs tic tac

I 'm going to just put the bolt in, rotate 360 + to get the cam sprocket lines face up and timing mark at 6 o clock.

Mark the chain in relation to the line and mark the crank sprocket and chain.

Thermo... It's the BOOK that scares me and BOLD LETTERS about timing and pooching the engine.

Guess I'll wait to get the Cam tools before going further.

Thanks Guys
 

Attachments

  • CamSprocket.jpg
    CamSprocket.jpg
    87.1 KB · Views: 147
  • cranktimingmark.jpg
    cranktimingmark.jpg
    55.9 KB · Views: 142

toms89

technical advisor
Joined
Mar 13, 2011
Posts
5,173
Reaction score
442
Location
MD
Thanks Tom and Thermo.

See the pictures below. My chains do not have colored links and the cam sprockets have a line vs tic tac

I 'm going to just put the bolt in, rotate 360 + to get the cam sprocket lines face up and timing mark at 6 o clock.

Mark the chain in relation to the line and mark the crank sprocket and chain.

Thermo... It's the BOOK that scares me and BOLD LETTERS about timing and pooching the engine.

Guess I'll wait to get the Cam tools before going further.

Thanks Guys

Try rotating crank another 360 degrees and inspect closely for mark on chain that corresponds to mark on sprockets. Cams are 180 degrees off as the photo was taken so crank is likely on exhaust stoke near top dead center.

Well actually closer to 365 degrees base on the photo. Timing mark on crank at 6:00 as you said.
 
Last edited:

toms89

technical advisor
Joined
Mar 13, 2011
Posts
5,173
Reaction score
442
Location
MD
Don't really know if its worth mentioning but ignore the large raised portion drivers side cam sprocket. That is used to signal the camshaft position sensor and has no bearing on setting up your timing.
 
Top