Ellison Brown III
Full Access Members
Ok… just knocked out the job today. First tip I’ll give is to grease the heck out of the new actuator. I went with the “vacuum delete” actuator. Would rather not do this again if I can help it.Ellison, please share any tips when you knock out.
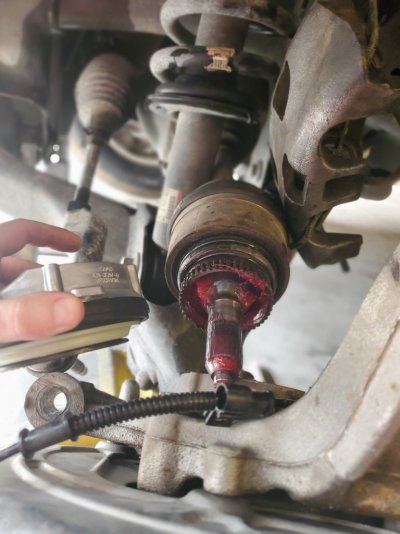
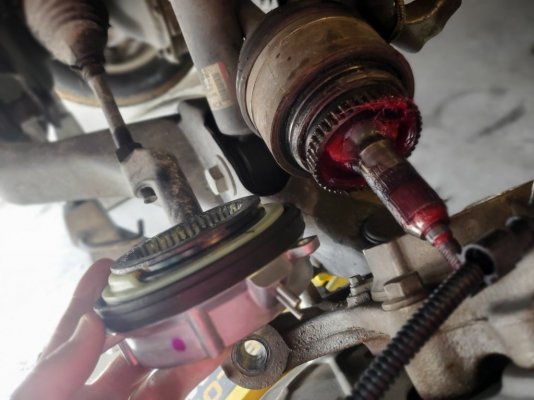
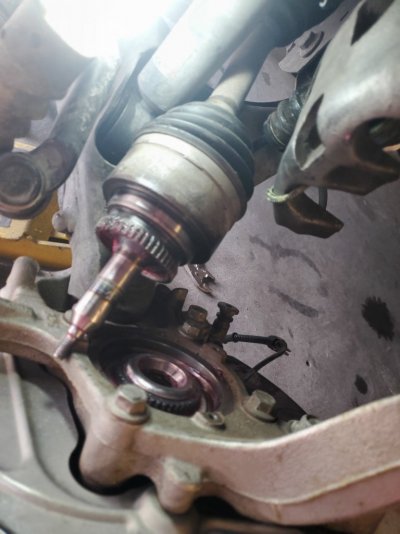
Slather grease all over the actuator. Also, do the same with the wheel hub. By the way, I replaced the hub, too. Lastly, the half-shaft was swapped out as well. From the attached pics you see what little grease that’s present dims filthy. The new “vacuum delete” actuators actually have a grease zerk on them. Love this feature.
Reluctantly went to Ford to get my parts, but they were out. Only got the replacement nuts for the upper control arm & half-shaft spindle. Ended up getting the hubs, and actuators from O’Reilly’s. Did not have time to wait on Ford (had no expected date to give me) as I needed my grinding issue resolved before my drive from Huntsville to Arizona.
Everything was pretty straightforward. Here’s a few tips:
-Use plenty of red wheel bearing grease
-Use a crowbar to put downward pressure on the upper control arm to keep the ball joint from spinning when the nut is too low to use a socket to hold the ball joint. When reinstalling, use the crowbar again for pressure to torque the nut
-Slip the actuator over axle, then slide axle through hub. Secure hub so the splined area is fully pulled through the steering knuckle. Seat actuator in hub/ on axle. Guide axle spindle through hub bearing. Be careful of threaded area. Put nut loosely on axle to hold in place. Fully secure hub to steering knuckle… then, secure actuator to steering knuckle.
-FYI, I did this job on my 2016 Expedition. The YouTube video I watched had an F-150 as the demo vehicle. The guy in the video mentioned the sway bar end link hardware needed to be removed. Not so in my case. I removed it on the driver side (first side I did), but it didn’t offer any extra play. So, when I did the passenger side I didn’t remove the sway hardware. Was just as easy.
OOOOOOHHHHHH… the hub bearing assembly wheel speed sensor harness was interesting. If feel the harness cable was a tad bit shorter than the OEM setup. Also, the “male” side on the new hub assembly wiring harness had two flat pins. Took me a minute of messing around with the connection on the driver side… couldn’t get it!!! Then I remembered something… I think it was about 1-2yrs ago I had an issue hooking up my new A/C blower motor resistor. Tried and tried. Finally was able to track down a Motorcraft piece that slid right in. Then, on my daughter’s ‘04 Expedition the MAF sensor pins didn’t line up. Voila… examined the pins to see which way I needed to coerce them. Got it on the first try. If harness just won’t snap together check pin alignment.
I think that’s it… if I remember something I will add to this. Good luck.
P.S.- if you have access to a lift that would be very helpful. I’m a retired Army veteran, so I have access to the auto craft shops on military installations. For those that don’t know it’s basically a dealership type setup with lifts, alignment machines, tire changing machines, paint booths, welding gear, special tool, and more. Availability of some of the above items will vary depending on location.


