Not so Good Vibrations

Disclaimer: Links on this page pointing to Amazon, eBay and other sites may include affiliate code. If you click them and make a purchase, we may earn a small commission.

OP
OP
whtbronco

whtbronco

Full Access Members
Joined
Nov 13, 2021
Posts
1,151
Reaction score
672
Location
Winchester, VA
Almost done with input and rear output shaft disassembly.
 

Attachments

  • Planetary - front input shaft view.jpg
    Planetary - front input shaft view.jpg
    141.4 KB · Views: 1
  • Output shaft disassembly - front 1.jpg
    Output shaft disassembly - front 1.jpg
    206.7 KB · Views: 1
  • Output shaft disassembly - front 2.jpg
    Output shaft disassembly - front 2.jpg
    133.4 KB · Views: 1
  • Output shaft - front.jpg
    Output shaft - front.jpg
    214.1 KB · Views: 1
  • Case halves - inside empty.jpg
    Case halves - inside empty.jpg
    229.3 KB · Views: 1
OP
OP
whtbronco

whtbronco

Full Access Members
Joined
Nov 13, 2021
Posts
1,151
Reaction score
672
Location
Winchester, VA
Just 9 more pics.
 

Attachments

  • Rear output shaft bearing.jpg
    Rear output shaft bearing.jpg
    127.1 KB · Views: 1
  • Case half - front seals removed.jpg
    Case half - front seals removed.jpg
    290.9 KB · Views: 1
  • Front output shaft bearing removed.jpg
    Front output shaft bearing removed.jpg
    248.1 KB · Views: 2
  • Case half - front bearings removed.jpg
    Case half - front bearings removed.jpg
    248.3 KB · Views: 2
  • Case half - rear with bearing removed.jpg
    Case half - rear with bearing removed.jpg
    267.3 KB · Views: 2
OP
OP
whtbronco

whtbronco

Full Access Members
Joined
Nov 13, 2021
Posts
1,151
Reaction score
672
Location
Winchester, VA
Last one.

I tried to include the tool I used to remove the seals and bearings. For the snap rings I just used snap rings pliers and flat head screwdrivers. The damper requires a 13mm socket, the shift motor requires a 10mm socket. The shift motor connector I needed to depress the retaining clip and then use a flat head screwdriver to gently pry the halves apart. The case bolts are T-40. The nuts for the coil are also 10mm, don't forget to push the coil wire in a bit before separating the case halves.
 

Attachments

  • Shift shaft seal removed.jpg
    Shift shaft seal removed.jpg
    247.2 KB · Views: 3
  • BW4416 parts laid out.jpg
    BW4416 parts laid out.jpg
    239.8 KB · Views: 3
  • Planetary bearings - factory on R - lesser quality replacement on L.jpg
    Planetary bearings - factory on R - lesser quality replacement on L.jpg
    158.9 KB · Views: 3
  • Planetary with bearing removed.jpg
    Planetary with bearing removed.jpg
    167.3 KB · Views: 2
OP
OP
whtbronco

whtbronco

Full Access Members
Joined
Nov 13, 2021
Posts
1,151
Reaction score
672
Location
Winchester, VA
I am wondering about the condition of the clutch pack, but the one clutch plate that's visible looks serviceable. There are still visible, consistent depth grooves. The orange coating is flaking off a bit though. The other thing that concerns me is that the thrust bearing that sits in front of the output shaft chain sprocket only had 1 washer, I'm accustomed to seeing 1 on each side of them and the only replacement I have found shows 2 washers.

My current plan is to reassemble the salvage yard transfer case tomorrow and then swap them next weekend. I'm open the factory transfer case whether I decide to rebuild it now or not, I need to know what's wrong inside.
 
OP
OP
whtbronco

whtbronco

Full Access Members
Joined
Nov 13, 2021
Posts
1,151
Reaction score
672
Location
Winchester, VA
The USA Standard Gear ZTBK4416 bearing and seal kit seems okay, but not great. The front output shaft seal does not match the picture of the kit, the factory seal or the other available aftermarket seals. The input shaft seal and the front output shaft seal in the kit are identical. All others have a lip that sticks out about 5/16" and sits in a channel on the back of the front driveshaft pinion yoke. I'm not sure it's necessary, but it would help some to keep dirt away from the seal and shaft.

In the other attachment there's 2 seals on the left side and an o-ring top right. I cannot figure out where those go. I just went through everything and I don't see a place for them. The seal in the lower right is for the shift shaft. Maybe there are slight differences in the 2005/06 transfer cases that use these I don't know.

As noted in a previous attachment the bearing that goes inside the planetary has fewer roller needles than the factory bearing. At least they are tight, the factory ones are very loose and a few nearly fall out of the cage.

1710019731095.png
1710018997712.png
 
OP
OP
whtbronco

whtbronco

Full Access Members
Joined
Nov 13, 2021
Posts
1,151
Reaction score
672
Location
Winchester, VA
I have finished the reassembly of the salvage yard transfer case. It turns pretty easy, easier now than prior to disassembly. Without much effort I can turn the front output and hold the input still. The input shaft was coated in ATF too. The only noise when turning it by hand I believe is from the chain. It has a new Motorcraft shift motor on it.

It took 7.5hrs to reassemble and clean up, dang I'm slow. Due to the snow squalls I moved my neighbors 20-ton press to my garage and had to put it back of course. I made a run to the parts store for the proper style front output seal and took a break for dinner. I also kept second guessing myself and decided several parts needed to be cleaned before being installed which all took additional time. Oh and on Friday I had used dish detergent and water to clean up the mostly empty case halves. There was still water between the sun gear and the case so it had to come out, turned out to be a good thing as there were a couple spots of light rust that had formed in the teeth. That ~6" snap ring is strong, but using 2 flat head screwdrivers I was able to work my way around with 1 underneath it to keep up ward pressure on it and the other to push in and out of the retention groove.

A couple things I learned. Turning the rear output shaft while installing some parts makes it much easier. For the 4Lo hub it helped, for the pump there's no way to install it without turning the shaft while holding a bit of pressure on it and waiting 'til it lines up just right. Holding the clutch pack and spring down while putting a snap ring back is slightly tricky. I ended up getting the snap ring right above the assembly, then holding it all compressed and tapping the snap right down with a flat head screwdriver. Hands down the most difficult part of the entire thing was getting the shift fork shaft lined up while installing the rear case half. It always leaned over towards the output shaft, the shift forks rest on it and cause this. I test fit the case halves, you need to line up the shift fork spring on the rear case half as you're seating it. It took ~10 more minutes to get the shift fork shaft lined up and the case halves fully seated, but I got it with a long screwdriver. I put some silicone on it to seal the case halves and fought with it for ~20 minutes this time. The chain is in the way to go straight in to the shaft and you can't angle the rear case half at all as both output shafts are in their bearings and the shift motor shaft is also seated a good bit before the shift fork shaft is against the rear case halve.

A 20-ton press is overkill for this. The bearing inside the planetary took the most pressure to seat by far, but it took the most to remove as well. The planetary is steel, the case halves for the other bearing seats are aluminum. The rear bearing for the front output shaft was also pressed in. For the other 3 I ultimately found it was just too hard to use the press and used my hand held bearing/seal installer with my mini sledge. Reconfiguring the press for each bearing is time consuming, but I tried for all 5 bearings. The rear bearing for the rear output shaft I could not find bits and pieces to line it properly so the hand held was the only option here with my available tools.

I poured a 1/3qt of ATF LV in an old plastic food container to soak parts and make it easy to get a few drops of ATF to drip in places needed during assembly. I poured what was left into the clutch assembly before closing it up.

I feel good about the current state of the salvage yard transfer case. I'm gonna have to give my body several days to recover. I plan to swap the transfer cases next Saturday.

EDIT: I never did find where those 3 seals/o-rings could be used.
 
Last edited:
OP
OP
whtbronco

whtbronco

Full Access Members
Joined
Nov 13, 2021
Posts
1,151
Reaction score
672
Location
Winchester, VA
I also found the other thrust washer bearing. 3rd times the charm shall we say. I found it stuck to the chain sprocket, but I didn't see it there previously for some reason.
 
OP
OP
whtbronco

whtbronco

Full Access Members
Joined
Nov 13, 2021
Posts
1,151
Reaction score
672
Location
Winchester, VA
This document was also very helpful during the reassembly.
 

Attachments

  • Exploded view.jpg
    Exploded view.jpg
    191.3 KB · Views: 3
OP
OP
whtbronco

whtbronco

Full Access Members
Joined
Nov 13, 2021
Posts
1,151
Reaction score
672
Location
Winchester, VA
Last night I cleaned the damper that came with my salvage yard transfer case. It was so nasty even if I don’t use it I don’t want to put it away so filthy. This morning I took some measurements preparing for the transfer case swap to see how much clearance I have right now, 11.5” to the frame. I’m trying to decide if I want to try a transmission jack again, or make a wooden platform for my floor jack. I have had truly terrible results with transfer cases on transmission jacks, they just don’t sit flat like a transmission does. Last time I put the transfer case in my wife just bench pressed it and I pushed it on the transmission.

Anyway, I noticed that there was no damper on my transfer case, LOL. Where the heck did it go and when. So I put the now clean damper on and went on a 90 mile trip, it does actually help a bit. It nearly eliminated the vibration under power, but did little for the coasting vibration. I guess since it’s kinda like a wart on the transfer case and not common based on my previous trucks I reckon I just didn’t notice it was missing.

If you’re sitting there laughing and saying “you’re an idiot” it’s all good. I did the same thing, haha.
 
OP
OP
whtbronco

whtbronco

Full Access Members
Joined
Nov 13, 2021
Posts
1,151
Reaction score
672
Location
Winchester, VA
Since it takes me time to do things I got the truck up on ramps front and jack stands rear this evening. The rear driveshaft is out, connector removed, ATF drained, front driveshaft shield removed and damper removed. I made platform for my jack as well and that needed a couple quick mods as well. I'm ready to swap the transfer cases tomorrow with my beautiful wife helping.

The reason for this post though is that I have confirmed my suspicion about the front output shaft bearings being worn out. With the front driveshaft shield removed I was able to grab the output flange firmly and easily move it side to side. I always like to get confirmation that I made the right decision, sometimes I certainly do not.
 
OP
OP
whtbronco

whtbronco

Full Access Members
Joined
Nov 13, 2021
Posts
1,151
Reaction score
672
Location
Winchester, VA
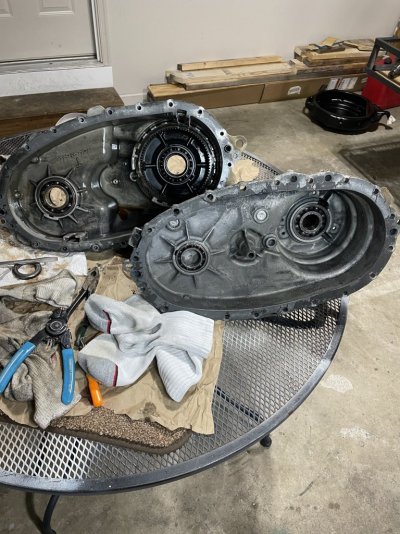
The transfer cases have been swapped, took me 6hrs. Removing the transmission to transfer case bolts was much easier a 13mm ratchet wrench. I replaced the input seal on mine quite a few years back, that was tough with a traditional box wrench. My jack platform needed a few more mods today, but it worked out okay. The transfer cases both stayed in place unless I was trying to move them around. I had a tie down strap front and rear. The front one was just draped over the transfer case input shaft housing and the rear strap was looped over the end of the output shaft housing. There is just barely enough room for the transfer case to slide back and down. I had maybe 1/8" between the input shaft and cross member, the passenger side of the case and the exhaust, the driver side of the case and the fuel tank, the shift motor and connector to the tank as well. Just gotta take your time and keep checking as you lift it back into place.

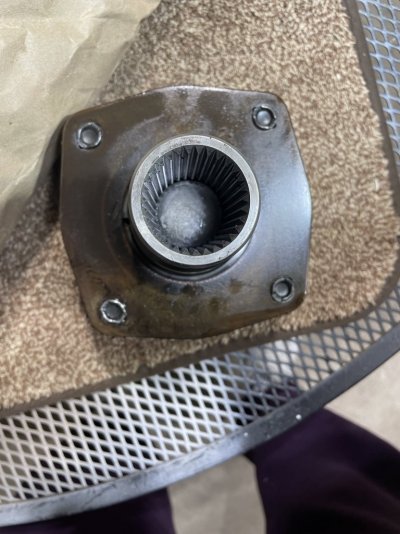
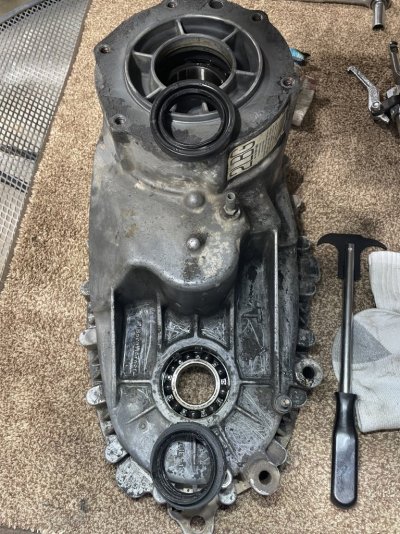
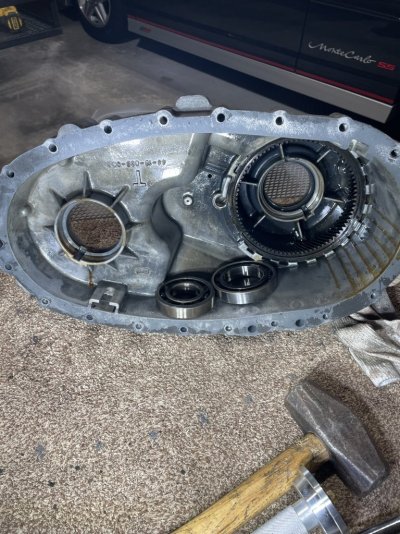
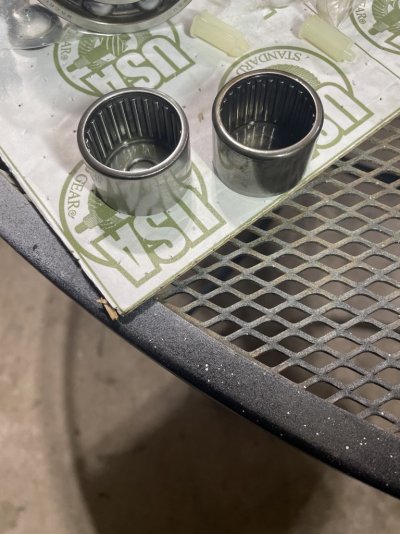
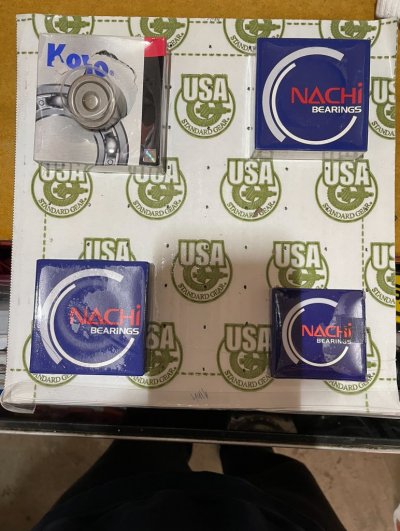
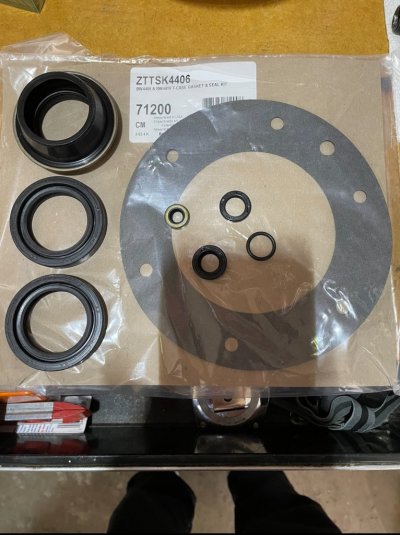
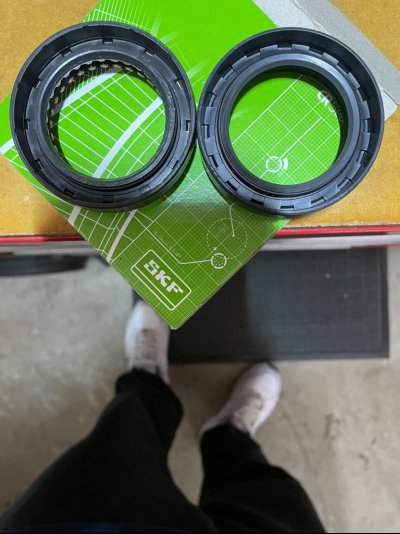
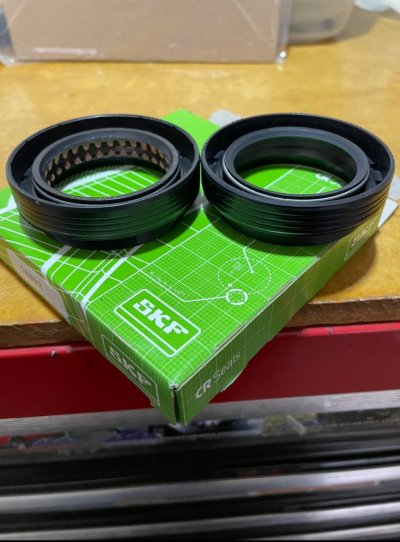
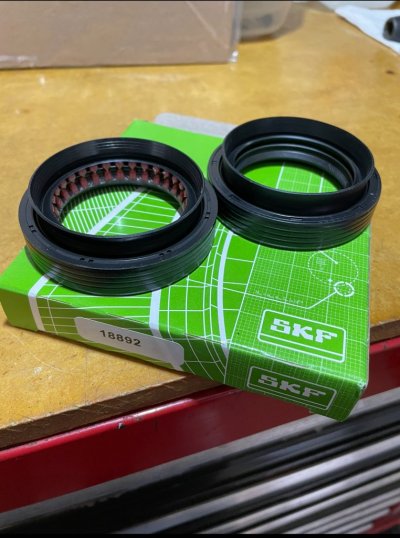
The USA Standard Gear bearing and seal kit proved for a 2nd time to have an improper seal. The transfer case to transmission seal bolt holes did not line up. I could have fixed that of course, but I had a new Dorman seal and it fit perfectly. In general I think Dorman parts are poor quality, but they have some things that are very good. So the mount seal in the kit was not right and the front output shaft seal did not have the lip on the front to help keep dirt out of the actual sealing surface.

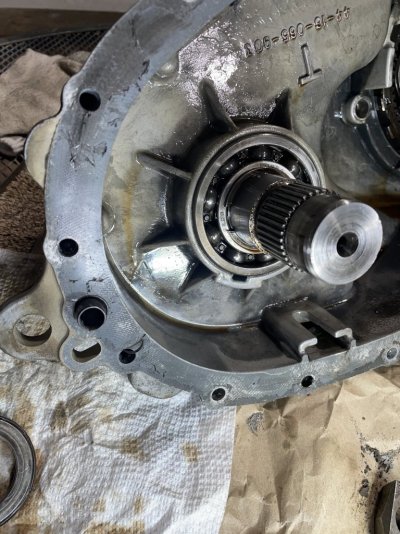
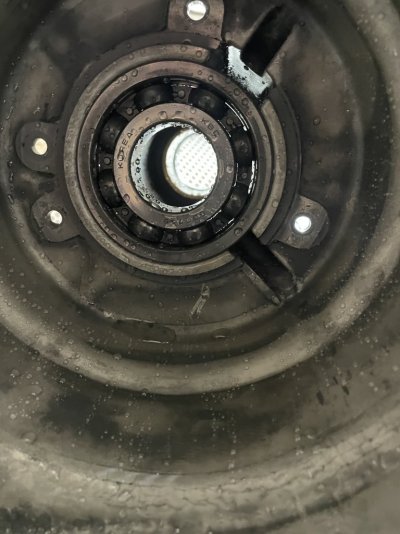
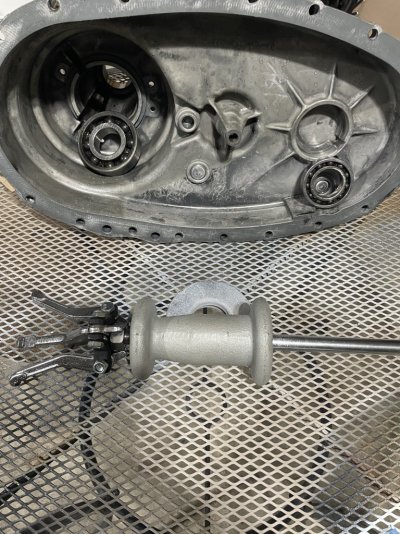
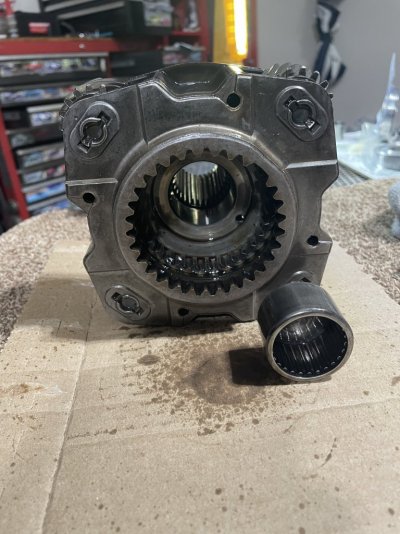
I found with the engine running and in drive, the front output shaft turned, but it was fairly easy to hold it from moving and I could also grab and stop it at will. I only tried this at idle. There was no chance I could hold it still or stop it with the factory installed transfer case. I can now hear the coil engage as well. In drive everything sounds much better now, though the rear bearing for the front output shaft sounds interesting. It doesn't sound bad like the factory installed transfer case, and it may simply be due to sort of like cup it's installed in.

Road test, I only went 8 miles so I'll know more over the next several days. Currently it is smoother and quieter, but seems to still have a very little bit of vibration under power, that cannot be felt at all until the torque converter locks up. Under coast below 55mph I can't feel any vibration. Under coast from 80mph I can't feel it as much, but it's still present in the steering wheel, brake pedal and seat. I can still hear the vibration under coast from higher speeds. I have no reason right now to think it's the transfer case.

Tomorrow I'll see what my scanner thinks of the new parts and test shifting more.
 
OP
OP
whtbronco

whtbronco

Full Access Members
Joined
Nov 13, 2021
Posts
1,151
Reaction score
672
Location
Winchester, VA
The transfer case is shifting fine now and the 4x4 module did not throw any errors after testing. After clearing all codes and shifting the transfer case through all 4 settings 6 times I got no error from the 4x4 module. The scanner also showed the response expected from the switch, clutch coil, contacts and motor rotation direction while monitoring the data streams. The one thing that caught my attention was that the coil showed 1.96% just like the factory coil had. AllData shows 3-8% minimum, maybe that's only when driving and I didn't test that today.

Stored 4x4 module codes were:
P1867 - Transmission transfer case contact plate general circuit fault.
P1891 - Transfer case contact plate ground return open circuit.
U2023 - Receiving error from external node.
The 1st 2 codes may have been from putting the truck in neutral to rotate the rear driveshaft during removal while the shift motor and clutch coil were disconnected.

Still have a couple errors, but that's for another time and thread.
B2320 - Driver's mirror horizontal position sensor circuit fault. Driver Seat Module.
U1262 - SCP data link fault. Hybrid Electronic Cluster.
C1991 - Module Calibration Fault. Vehicle Dynamics Module, basically air suspension.
 
OP
OP
whtbronco

whtbronco

Full Access Members
Joined
Nov 13, 2021
Posts
1,151
Reaction score
672
Location
Winchester, VA
After the 75 mile round trip to work today I can confidently say it is much smoother and quieter at all speeds. The minor vibration under power is just the engine and only felt in the throttle pedal. There is still a bit of vibration under coast, but it's vastly better. The coasting vibration does subside by maybe 50% in neutral. I think I'd need one of the multi-point vibration sensors, also called chassis ear, to figure it out at this point. I may consider buying one as it would help augment my lack of troubleshooting experience.

I can actually hear my tires now at 20-25mph. Seems at that speed range there is just enough speed to hear the tread a bit and almost no wind noise. I thought something seemed louder, but I sure didn't think it was the transfer case.
 
OP
OP
whtbronco

whtbronco

Full Access Members
Joined
Nov 13, 2021
Posts
1,151
Reaction score
672
Location
Winchester, VA
All I can do is laugh. The front output shaft seal is leaking. It's leaking enough that overnight it dropped a 1" spot on the garage floor and peppered the tank and rear suspension today. So I was debating whether to open my factory transfer case and work on it, I have my answer.

I did not like the seal that came with my bearing and seal kit, not did I really like the National brand seal I got at Advance. The front shaft also had a slight groove in it so I can't say I'm too surprised and in hindsight I should have tried to pick up a replacement.
 
OP
OP
whtbronco

whtbronco

Full Access Members
Joined
Nov 13, 2021
Posts
1,151
Reaction score
672
Location
Winchester, VA
Now I remember why I didn't try to pick up a replacement front output shaft. The only 1 I found also had a groove so I thought there was a slim chance it was normal, and maybe it is. It could simply be a crappy single lip seal causing it. This output shaft is $61 plus shipping and tax. I'll try to tear mine open this weekend and take a look at the shaft. Mine did not leak.

1710899253906.png
 
OP
OP
whtbronco

whtbronco

Full Access Members
Joined
Nov 13, 2021
Posts
1,151
Reaction score
672
Location
Winchester, VA
Another bearing and seal kit has been ordered along with a Dorman gasket and an SKF front output shaft seal. Then I found that a Motorcraft front output shaft seal was $20 full retail so I ordered that from the local dealer. I want to compare the SKF and Motorcraft seals, already know the USA Standard Gear and National seals don't look good.

So the fun will begin again soon.
 
OP
OP
whtbronco

whtbronco

Full Access Members
Joined
Nov 13, 2021
Posts
1,151
Reaction score
672
Location
Winchester, VA
The 2nd bearing and seal kit and the SKF front output shaft seal arrived. Both were ordered from Rock Auto, same part # of course. This kit appears to be higher quality and certainly is not the same kit that I received last time. This one shipped from Zumbrota, MN, my guess is it's from Randy's Worldwide. Anyway, same part number nearly totally different contents though. The 1st kit I got was all vacuum sealed on a single card. This one has a vacuum sealed card with the 5 bearings and the 4Lo fork inserts. There is also a bag containing all of the seals.

The seal kit indicates it fits BW4406 and BW4416 which explains why there are 3 seals I don't need, both kits had these. The shift shaft seal is metal clad rubber(I like this better), the other was just rubber. The input seal and included front output shaft seal are identical(both kits), still no dirt shield on the front output shaft seal as pictured. The rear output shaft seal is metal clad with a thick rubber cone and larger seal contact area, just like the picture. The rear output shaft seal in the 1st kit was metal clad also, but with a thin rubber cone and thin seal contact area.

The bearings in the 1st kit were vacuum sealed onto the card. The 2nd kit has plastic wrapped bearings in a box and then vacuum sealed to the card. The 1st kit had 2 identical bearings for the input shaft and forward front output shaft. The 2nd kit has 5 different bearings which matches the listings I have found to buy the bearings separately. We drove more than 100 miles yesterday with a slight increase in vibration again. I can't help, but wonder if the bearings in the 1st kit are the cause partly because the ATF leaking out is red and black and it should be just red. Either the bearing is having issues or the seal is actually deteriorating which may be the case.

Attached are pics of the kit contents.
 

Attachments

  • Bearing Kit 1.jpg
    Bearing Kit 1.jpg
    168.1 KB · Views: 2
  • Bearing Kit 3.jpg
    Bearing Kit 3.jpg
    119.1 KB · Views: 2
  • Bearing Kit 2.jpg
    Bearing Kit 2.jpg
    155.1 KB · Views: 2
  • Seal Kit.jpg
    Seal Kit.jpg
    150.9 KB · Views: 2
OP
OP
whtbronco

whtbronco

Full Access Members
Joined
Nov 13, 2021
Posts
1,151
Reaction score
672
Location
Winchester, VA
Not having been pleased with the front output shaft seal included in my 1st bearing and seal kit I picked up a National brand seal locally, $28. I wasn't pleased with that one either, but it's what was available that day, I should have waited. Anyway, this time I ordered an SKF brand from Rock Auto, $5 +$10 shipping, and picked up a Motorcraft seal from the local dealer, $20. The SKF and MC seals appear very similar, they are not the same though. The molds are certainly different. The MC seal reads USA molded in and has grease inside it. The SKF otherwise is nearly the same. Pics attached, Motorcraft seal on the left, SKF on the right. I'll be using the MC seal when I rebuild my original transfer case.
 

Attachments

  • Motorcraft - SKF 3.jpg
    Motorcraft - SKF 3.jpg
    148.2 KB · Views: 2
  • Motorcraft - SKF 2.jpg
    Motorcraft - SKF 2.jpg
    132.2 KB · Views: 2
  • Motorcraft - SKF 1.jpg
    Motorcraft - SKF 1.jpg
    141.5 KB · Views: 2
Last edited:
OP
OP
whtbronco

whtbronco

Full Access Members
Joined
Nov 13, 2021
Posts
1,151
Reaction score
672
Location
Winchester, VA
After the transfer case swap on the test drive there was a bit of vibration that remained. The next day it was amazingly smooth on my way to work. It has slowly gotten worse yet again under both power and coast. Clearly I am not quite done chasing vibration.

Yesterday I did some testing. Dropping the transmission into neutral reduces the vibration about 50%. It can be felt through the pedals, steering wheel and seat, I think it's coming from mid-vehicle to up front. I feel the same vibration, though reduced, stopped in neutral when I rev the engine to 1000-1200rpm. Put the transmission into any gear, hold the brakes and rev it to 1000-1100rpm and it's worse than under power while cruising at a steady speed and more closely feels like it does when coasting. This also eliminates the rear diff and axles, front diff and axles, transfer case and transmission except for the torque converter(TC) and pump. It kinda reminds me of when I had cracked a flex plate many years ago. I have wondered for a while if I had a TC vibration though and I'm not sure I'd be able to identify the TC or flex plate without inspection/removal. The vibration follows rpm far more than load. Basically under cruise, normal acceleration or full throttle the vibration at a given rpm remains about the same. Under coast as noted it's worse. Since the transmission continues to shift fine both up and down I kinda doubt the pump is the issue. I also checked pump pressure this evening and found 10psi at idle, 24-25psi at idle in gear and rev'd to 1500-2000rpm pressure jumped to 48-50psi.

Using my stethoscope this morning I checked at idle and through cyclic rpm increase/decrease the accessories and pulley's on the engine and all seemed okay. I did the same at various points around the engine that I could reach from the top and I found nothing that seemed abnormal. I'll get the truck up in the air again this weekend and do some more research from underneath. I suppose there's a chance it could be from part of the rotating assembly in the engine.

I did find some misfires this evening from ~1hr of runtime in the garage. My scanner showed 61. I had 54 when I first checked after about 30 minutes and 7 more misfires over the next 30 minutes. It was very rough at start up for maybe 30 seconds which was likely some or most of the 54 misfires I first found. It was also very rough rev'ing to 3000rpm and holding it there one time, this felt like more pronounced vibration than misfires. Kinda like something was out of alignment briefly. The vibration I'm looking for continued throughout the entire time. I found no coolant leaks, no apparent vacuum leaks.

I also hope to get new bearings and seals installed in my original transfer case this weekend.

Maybe all that rambling makes some sense.

EDIT: One thing I failed to mention is the last 2 days I drove it it to work I swear there's a faint humming sound right around the transmission bell housing. It kinda comes and goes and it's hard to hear, generally I can only hear it when coasting at low speed like right as you let off the throttle from 20-25mph. I think maybe I heard on the interstate, but there's so much noise at those speeds it's hard to tell.
 
Last edited:
OP
OP
whtbronco

whtbronco

Full Access Members
Joined
Nov 13, 2021
Posts
1,151
Reaction score
672
Location
Winchester, VA
I was thinking last night that the line pressures in my transmission are awfully low compared to the GM 4T65E trans I have messed with quite a bit. That trans is something like 90-100psi at idle in Neutral and 130psi at idle in 1st gear, mine is just 10psi in Neutral and 25psi in both Drive and 1st gear as I would have expected. AllData shows lower pressure than the 4T65E, but still much higher than I see in mine, which ran 35 miles to work this morning with varying vibration, but no other issues I noticed. I never saw more than 50psi last night, I did not check line pressure at stall nor did I even think to. Between the low line pressures and recently developed hum/whine maybe the transmission pump is actually failing.

Trans line pressures from AllData:
1711625845231.png
 
Top