
AKentPhoto
Full Access Members
This is the first time I have heard that you need extended studs for .25in. One race shop I go to said they use them on racecars all the time. If you plan on driving it like a raptor I wouldn't recommend it but everything I have heard suggests its not that big of a deal if done properly. I'd double check the lugs with a torque wrench a day and a week after install just to be safe.... The shafts are only too long in the back. You might consider only doing the back as the front being pushed out further will make the clearance up front even more cramped. Expect to do some prodding up front to make them fit 100%. Side to side has been ok for me, only the front rubs a bit. I'm also curious if the liners are the same thickness etc. I'm hoping you guys have a bit more space in there.
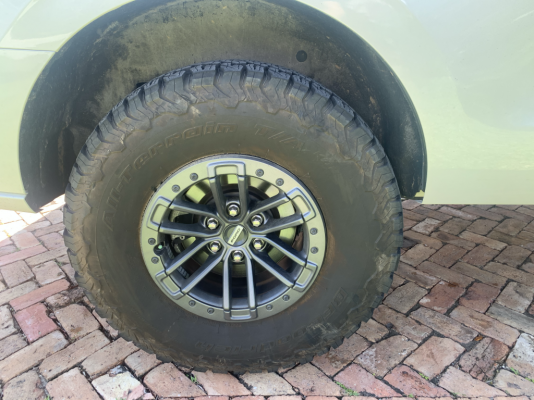
We used a grinder to the threads and it still won't clear my 2nd gen wheels. Could go further but I wouldn't do it without a nut held in place where you want to stop to protect the threads. I never got around to mounting my 1st gen wheels so no idea if the clearance for the cap is different. Pretty sure they are the same backspace but Im having trouble finding the backspace #s on the gen2 Beadlocks. The Gen2 non Beadlocks have the same 34mm BS.

We used a grinder to the threads and it still won't clear my 2nd gen wheels. Could go further but I wouldn't do it without a nut held in place where you want to stop to protect the threads. I never got around to mounting my 1st gen wheels so no idea if the clearance for the cap is different. Pretty sure they are the same backspace but Im having trouble finding the backspace #s on the gen2 Beadlocks. The Gen2 non Beadlocks have the same 34mm BS.


")