Compression test 01 Navigator

Disclaimer: Links on this page pointing to Amazon, eBay and other sites may include affiliate code. If you click them and make a purchase, we may earn a small commission.

Hamfisted

Full Access Members
Joined
Nov 20, 2012
Posts
2,599
Reaction score
1,478
Location
Ft Lauderdale
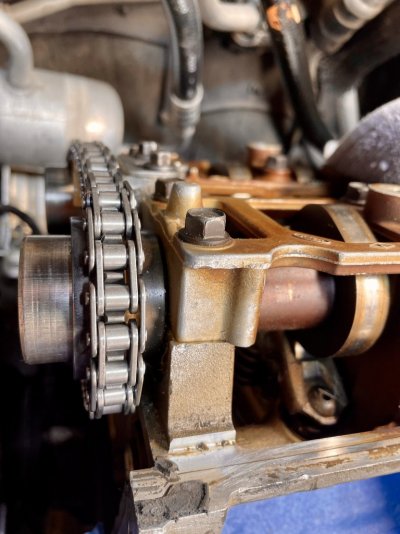
Yeah, I believe the passenger side sprockets need to be flipped, so that the bevel side is on the outside. It's reverse of the driver's side sprockets. Leave your driver's side alone, but just flip the passenger side sprockets around. Make sure timing marks all line up still.


Timing Chain Install Ford 4V


.
 
OP
OP
Fordgirl01

Fordgirl01

Full Access Members
Joined
Aug 1, 2016
Posts
293
Reaction score
57
Location
St Lawrence County
Really? I thought of that but the little “nubs” that go into the notch on the shafts are rounded on one side, so I thought they were supposed to go one way. I will try flipping them over. Thank you and I will report back.
 
OP
OP
Fordgirl01

Fordgirl01

Full Access Members
Joined
Aug 1, 2016
Posts
293
Reaction score
57
Location
St Lawrence County
OP
OP
Fordgirl01

Fordgirl01

Full Access Members
Joined
Aug 1, 2016
Posts
293
Reaction score
57
Location
St Lawrence County
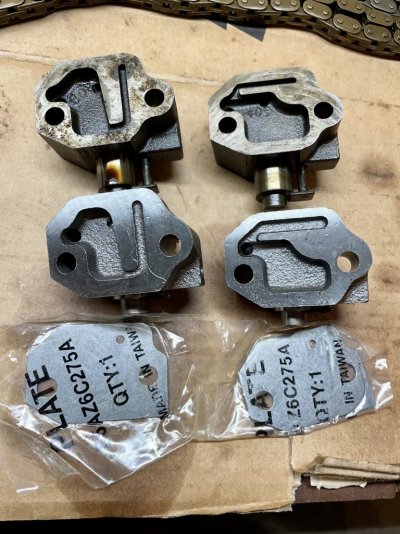
I finally got the cam sprockets and chain on the RH side (it was pretty problematic between the pressure from the rollers still being on and having to put them on backwards). I ultimately prevailed after having to walk away from it several times! I put the 2 big chains on today. Everything was going without too much of a hitch until I opened up the new tensioners. The new ones came with plates-the old ones just bolted on with no plates. What’s with the plates? Should I use them? It seems like they would prevent a lot of oil from getting in there to make them work.
93A1FE81-ED2A-4F91-B543-1E1A4F81706B.jpeg
 

Hamfisted

Full Access Members
Joined
Nov 20, 2012
Posts
2,599
Reaction score
1,478
Location
Ft Lauderdale
If your motor didn't have the steel backflow plates you don't need them. Just bolt the new tensioners on directly. What brand are your new tensioners ?
 
OP
OP
Fordgirl01

Fordgirl01

Full Access Members
Joined
Aug 1, 2016
Posts
293
Reaction score
57
Location
St Lawrence County
Quick update-I haven’t had a lot of time to spend on the old navigator but I did turn it over by hand last weekend several times. Nothing seems to be binding and all marks seem to be in the right spot
I dug out the engine cover and bolts. I cleaned up the cover and the surfaces it will bolt up to. I’ll get that back on this weekend. Slow and steady wins the race, right?!!
 

Ulver

Full Access Members
Joined
Feb 21, 2019
Posts
125
Reaction score
31
Location
Tennessee
Good stuff! Just don't do what I did and keep the old thicker crank reluctor wheel on if you received a new thinner one with a new crank sprocket. Not using the newer reluctor sprocket in combination with the new (thicker) crank sprocket caused the timing cover to crack on torquing down the cover bolts because of the reluctor wheel protruding out more. Caused a load of pressure on the timing cover against the reluctor wheel and cracked the hell out of it. I spent the next couple weeks trying to find one online, and finally had to go to a junkyard to get a new cover. It's looking good as new with the aluminum spray paint job I did. :rocking:
 
OP
OP
Fordgirl01

Fordgirl01

Full Access Members
Joined
Aug 1, 2016
Posts
293
Reaction score
57
Location
St Lawrence County
Yikes-I didn’t read this until after I put the cover back on! I did match up all my new parts to the old ones and nothing was a different size, so luckily that wasn’t an issue. So I did get the engine cover back on-I hate doing things that have a time limit. The service manual said I had 4 minutes after putting the sealant on the spots it
illustrated. I didn’t time myself, but I wasn’t taking it back off.
I got the harmonic balancer out of the vehicle where I have all of its parts stored and cleaned that up (another 4
minute time limit installation job with sealant on the key slot). I read the service instructions again and noticed it mentioned the crankshaft front seal. I wish I would have thought about that more before I put the engine cover back on. So now I am wondering if I should replace that. Is that something I can do without taking the engine cover back off? I feel like I should replace it before going to all of the trouble of putting this buggy back together!
 

Hamfisted

Full Access Members
Joined
Nov 20, 2012
Posts
2,599
Reaction score
1,478
Location
Ft Lauderdale
Didn't a new seal come with the gasket kit ? You "can" replace it without removing the cover again, but the crankshaft sticking out there makes it a lot more work. Wrap some tape around the crankshaft to keep from nicking it up. If the valve covers aren't already on I think I'd just pull the cover off again. You can use Super Glue to hold the cover gaskets or valve cover gaskets in place during installation. You're using Oil Resistant sealant right ?


Lisle Seal Removal Tool on Amazon

Permatex Oil Resistant Sealant on Amazon
 
Last edited:
Top