How to Lift a 2007-2014 Ford Expedition or Navigator Rear Air Suspension

Disclaimer: Links on this page pointing to Amazon, eBay and other sites may include affiliate code. If you click them and make a purchase, we may earn a small commission.

Miekk

Full Access Members
Joined
Jan 9, 2012
Posts
156
Reaction score
32
Location
Madison Lake, MN
I understand that but I bought your adjustable links and was thinking about adding a spacer above the air strut then adjust the links so the bags ride on the natural ride height but I am still lifted
I ran with 2 inches of lift (1") extended for a long time before I put this plastic in. I really only did it so that I could tell people what can be done without stud extensions because it doesn't need it. At 2 inches of lift, the tires already look biased to the front side of the wheel well now, I myself won't go more without some sort of suspension changes to correct the goofy look.
 

gixer2000

Retrofit or Bust
Joined
Oct 13, 2015
Posts
1,467
Reaction score
642
Location
Massachusetts
I ran with 2 inches of lift (1") extended for a long time before I put this plastic in. I really only did it so that I could tell people what can be done without stud extensions because it doesn't need it. At 2 inches of lift, the tires already look biased to the front side of the wheel well now, I myself won't go more without some sort of suspension changes to correct the goofy look.
Yeah I see the rear tires pull forward but is that because the air suspension is pushing it forward? I was thinking if I got a spacer above the air strut and allowed the strut to sit at it's normal fill pressure( no lift by the air strut) it would correct that. I really haven't looked into it at all other than on the internet so I may understand better if I go look at how it's setup on my truck
 

Miekk

Full Access Members
Joined
Jan 9, 2012
Posts
156
Reaction score
32
Location
Madison Lake, MN
Yeah I see the rear tires pull forward but is that because the air suspension is pushing it forward? I was thinking if I got a spacer above the air strut and allowed the strut to sit at it's normal fill pressure( no lift by the air strut) it would correct that. I really haven't looked into it at all other than on the internet so I may understand better if I go look at how it's setup on my truck
The strut only changes height, The A arm suspension is twisted pushing it forward. If you push it down far enough, big tires will hit the front side of the wheel well.
 
OP
OP
JZHOUSE

JZHOUSE

Active Member
Joined
Mar 19, 2016
Posts
30
Reaction score
30
Location
Thousand Oaks, Ca
Updated way to lift rear air suspension if available:

They now make an adjustable rear air shock sensor as a member nicely mentioned. Before when I did this no such thing existed as I searched everywhere. If it is still available then get this rather than all the time consuming drilling.

Also as I mentioned it is best to install a spacer on top of the air shock to help make the air shock operate more normal within its best ride height. The spacer itself does NOT lift the rig. It only acts as as buffer to prevent the air shock from topping out when the air shock leveling sensor is adjusted up.

The name of the sensor on ebay is:
"Ford Expedition rear lift / leveling kit, adjustable ride height sensor link arm"

Link:
http://www.ebay.com/itm/Ford-Expedi...ash=item3f6830a8fc:g:9-UAAOSwuYVWoPTe&vxp=mtr
 
OP
OP
JZHOUSE

JZHOUSE

Active Member
Joined
Mar 19, 2016
Posts
30
Reaction score
30
Location
Thousand Oaks, Ca
How to Lift a 2007-2014 Ford Expedition or Navigator Rear Air Suspension:

How to Lift a 2007-2014 Ford Expedition or Navigator Rear Air Suspension (might be the same too for newer models)

Simple to do. Cheap. Takes about 1 hour with simple tools.


UPDATED JUNE 26TH 2017 **************************************
I cannot find a way to edit my original post, so here is an update.

Updated way to lift rear air suspension if available:

They now make an adjustable rear air shock sensor arm as a member nicely mentioned. Before when I did this no such thing existed as I searched everywhere. If it is still available then get this rather than all the time consuming drilling.

Also as I mentioned it is best to install a spacer on top of the air shock to help make the air shock operate more normal within its best ride height. The spacer itself does NOT lift the rig. It only acts as as buffer to prevent the air shock from topping out when the air shock leveling sensor is adjusted up.

The name of the sensor on ebay is:
"Ford Expedition rear lift / leveling kit, adjustable ride height sensor link arm"

Link:
http://www.ebay.com/itm/Ford-Expedi...ash=item3f6830a8fc:g:9-UAAOSwuYVWoPTe&vxp=mtr


If this adjustable link is not available then below method can work too.

END OF UPDATE ***************************************************


Here is the link to the ongoing post I created earlier on how to lift the rear air suspension.

As there are several ways, this way is the quickest and cheapest. And of course if anyone has better suggestions, please feel free to suggest....

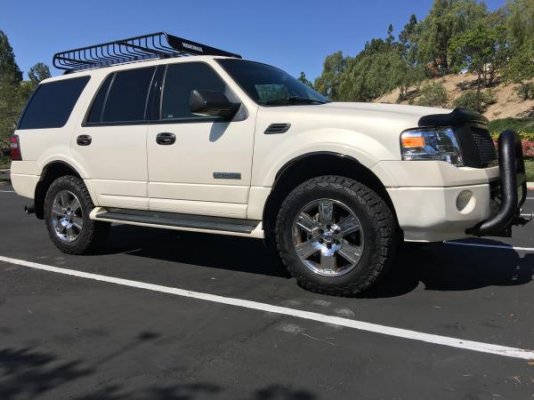
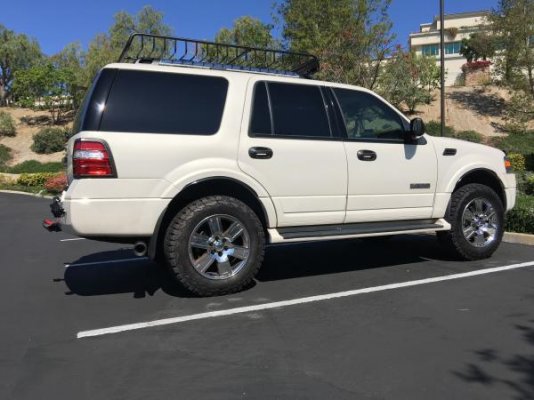
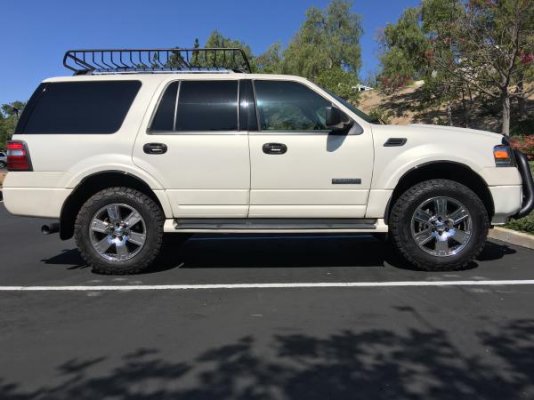
Currently its about a 3.5-4" lift front and rear (about 13" from top of wheel to fender).


picture.jpg


picture.jpg


picture.jpg


Here is my lift with a 2007 Ford Expedition Limited.

I looked at many options but the easiest seemed like making another hole just above the OEM hole.

Steps I did: Before doing anything DISABLE the rear air shocks from inside the cab!!! (turn them off)

NOTE:

1. Before doing anything DISABLE the rear air shocks from inside the cab. Next, before Drilling I removed the rear air shock sensor from the lower mount.

2. To remove: simply take a small flat head screw driver and insert into small grove just below the metal band and barely pry up to disengage the metal band and pull off at the same time.

On the lower part of the lower connection you will see the groove to insert the small flat head screw driver to then gently lift up the band (do NOT remove band) just gently lift it up and at the same time pull the lower connection off the ball joint.
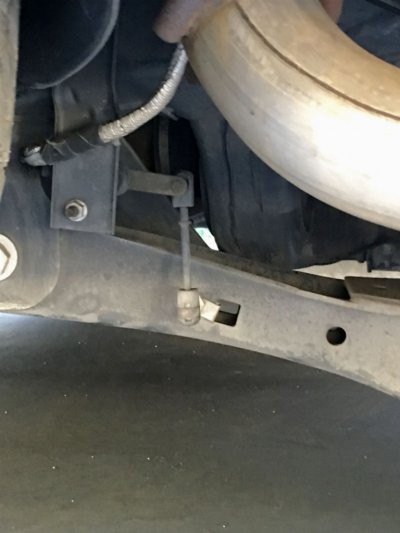
-img_3763_9fb0553299094204fe92721390093cdb1bc60d2d.jpg


3. After popping off the lower mount I then used around a 18mm socket to remove the Ball Joint stud bolt. Use a deep socket to fit over the ball joint.

4. Once the ball joint stud bolt is removed I then used a small flat head screw driver and removed the bolt clip which is what the ball joint stud bolt screws into.

5. The rear air shock sensor is now just hanging there and can easily be moved around. I then tested my location to drill by simply taping the sensor lower mount about 1" above the OEM hole on both sides with Gorilla tape or use any type of tape. There is no pressure on this mount so it barely needs to be held in place to test. (make sure where you tape it that the OEM bolt clip can still be used by placing over the lower suspension arm (see below pic).

6. Once taped you can then go back inside the cab and TURN ON the rear air suspension.

NOTE: the rear air suspension ONLY works if the front doors are closed. If the doors are open it will turn off and not work.

So once you turn on the air suspension, get out of the cab and close the door. The air compressor will then turn on within 10 to 30 minutes and the rear will raise about 2-3 inches and stop once the top of the rear air suspension top leveling arm is level (it is black and about 3" long and it is what is holding up the rear air suspension bar when you disconnect it).

7. If you like the height then go back into the cab and TURN OFF the air suspension.

8. If you do not like the height, go back into the cab and TURN OFF the air suspension and re-adjust the rear taped rear sensor locations. Once readjusted go back to step 6. and test again.

9. Once happy where the rear height is at TURN OFF the rear suspension. DO NOT adjust rear sensors with the air suspension on! It can in fact deflate on you!

10. Once the rear suspension is turned off go back under the car to start drilling the new hole.

Drilling tips:
Notch the drill spot with a punch or whatever you can
Start with a small drill bit and slowly work up to a 5/16" drill bit. Use oil to cool the drill bits down.


11. The new hole eventually needs to be 5/16" large.
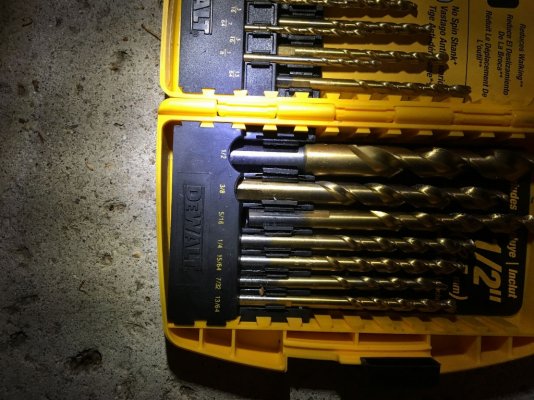
-img_3772_d0ec24553db67328c8195429eca8e8dd4b743ce0.jpg


Here are some pics of the new hole I drilled above the OEM hole.

Drivers side sensor:
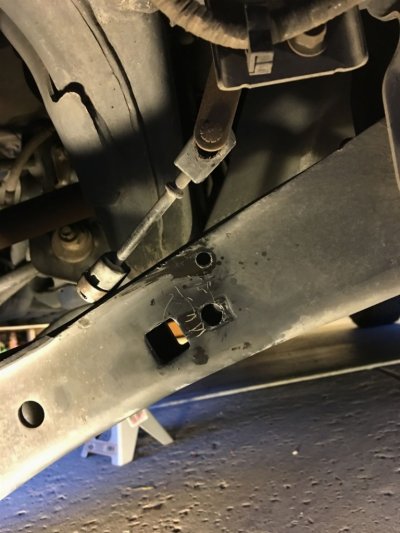
-img_3765_183b9d5ebc4aaba66accb8da5e3fe186446ce58b.jpg


Passenger side sensor (the clip is simply moved out of the way and will later be used on the new hole.
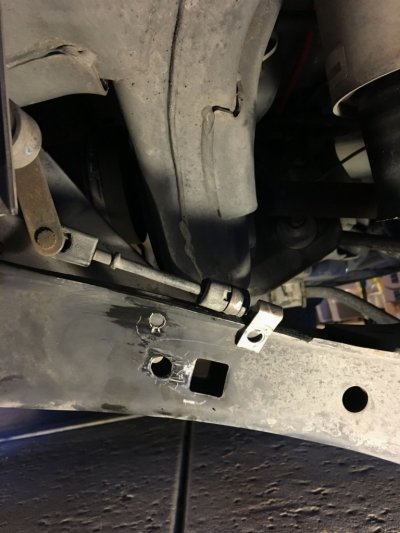
-img_3766_0570623ae19b01d9898e9e21bb3e2a4d3db525dc.jpg


Cont...
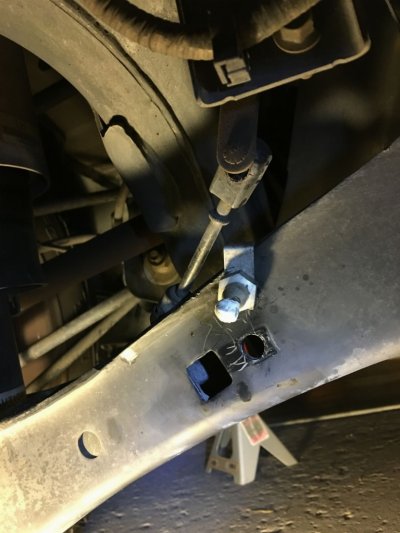
12. Next slide the bolt clip over the top of the suspension arm and over the new drilled hole.

13. Screw in the ball joint mount

14. Lube the ball joint mount with grease (I used white grease as you can see on the ball mount)
-img_3767_7c3f89e46b1de070d98660aacfeedafed3cb5d3d.jpg


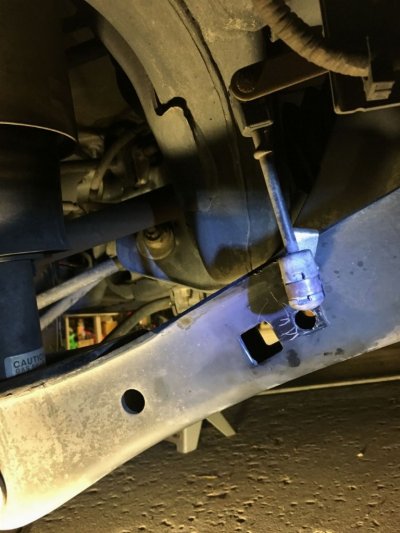
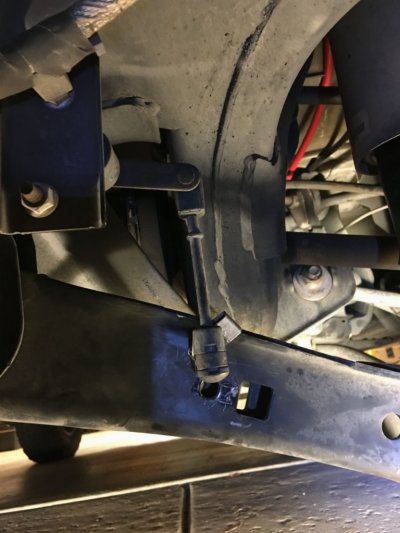
15. Attach the lower sensor mount back onto the ball joint. Use the small flat head screw driver to barely lift the metal band that holds the sensor onto the ball joint and while barely lifted, pop back on. Do it to both sides of course ;-)
-img_3769_d9fc3a38f499cf16c5e6db7db704f0bf60ac9d2c.jpg


-img_3770_7b851d6d346f25845f339499b1ab81b20cc50df3.jpg


16. Turn back on Air Suspension in the cab or you can leave it off.

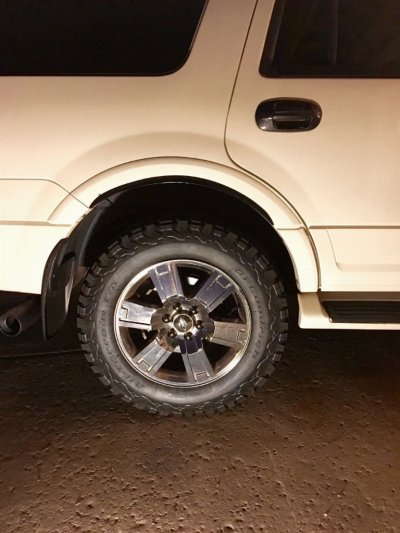
17. My end result of lifting the front and rear was exactly 12" from the top of the chrome wheel to the bottom of the fender well both front and rear, so I was able to balance out the front and back exactly the same.

19. Pics when done at night:
-img_3777_15dd22323bef653144b1948bd15c09199acf1e9c.jpg
12" from top of chrome wheel to bottom of fender well.
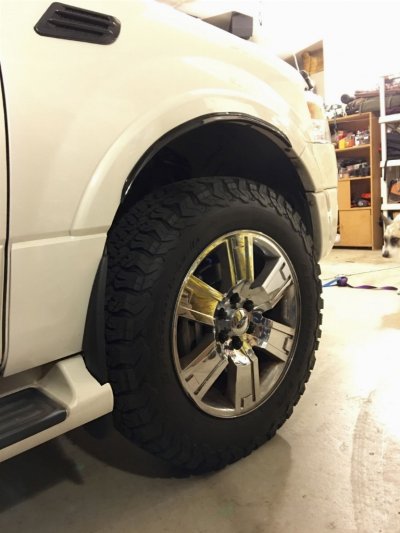


-img_3773_113e67edc39463cf4907f9b72a20ef59d914736f.jpg
12" from top of chrome wheel to bottom of fender well.


Front and back 12" from top of chrome wheel to bottom of fender well.
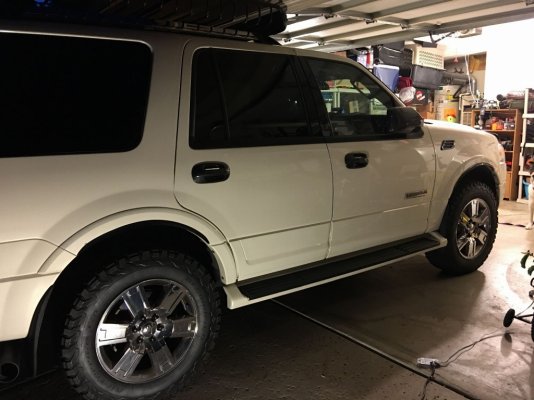
-img_3778_3cce8d98bd562d136b56533a43d37cdb9d12f36c.jpg


UPDATED JUNE 26TH 2017 **************************************
I cannot find a way to edit my original post, so here is an update.

Updated way to lift rear air suspension if available:

They now make an adjustable rear air shock sensor arm as a member nicely mentioned. Before when I did this no such thing existed as I searched everywhere. If it is still available then get this rather than all the time consuming drilling.

Also as I mentioned it is best to install a spacer on top of the air shock to help make the air shock operate more normal within its best ride height. The spacer itself does NOT lift the rig. It only acts as as buffer to prevent the air shock from topping out when the air shock leveling sensor is adjusted up.

The name of the sensor on ebay is:
"Ford Expedition rear lift / leveling kit, adjustable ride height sensor link arm"

Link:
http://www.ebay.com/itm/Ford-Expedi...ash=item3f6830a8fc:g:9-UAAOSwuYVWoPTe&vxp=mtr


If this adjustable link is not available then below method can work too.

END OF UPDATE ***************************************************
 
Last edited:

Miekk

Full Access Members
Joined
Jan 9, 2012
Posts
156
Reaction score
32
Location
Madison Lake, MN
They now make an adjustable rear air shock sensor as a member nicely mentioned. Before when I did this no such thing existed as I searched everywhere. If it is still available then get this rather than all the time consuming drilling.

Also as I mentioned it is best to install a spacer on top of the air shock to help make the air shock operate more normal within its best ride height.

They? That'd be me.
These have been available for 2 1/2 years.
As "you" mentioned?...
Sell a few every month as well as a few for Tahoe's, Yukon's, Escalade's, Dodge Rams, etc..

But hey, Thanks for the plug. :)
 

gixer2000

Retrofit or Bust
Joined
Oct 13, 2015
Posts
1,467
Reaction score
642
Location
Massachusetts
They? That'd be me.
These have been available for 2 1/2 years.
As "you" mentioned?...
Sell a few every month as well as a few for Tahoe's, Yukon's, Escalade's, Dodge Rams, etc..

But hey, Thanks for the plug. :)
I love mine!

Sent from my LG-G6 using Tapatalk
 
OP
OP
JZHOUSE

JZHOUSE

Active Member
Joined
Mar 19, 2016
Posts
30
Reaction score
30
Location
Thousand Oaks, Ca
They? That'd be me.
These have been available for 2 1/2 years.
As "you" mentioned?...
Sell a few every month as well as a few for Tahoe's, Yukon's, Escalade's, Dodge Rams, etc..

But hey, Thanks for the plug. :)


I sure wish I found them when I researched for them.

I am quite good with finding things too and I looked on Amazon and eBay, drove to dealerships, etc and nobody could help me find simple adjustable air shock sensor arms. I researched forums and asked on forums and still nobody knew about these arms and I did all this about 1.5 years back. So I (and a bunch of other guys that also researched) finally gave up and just did the drilling.

Trust me I wish I knew about these things rather than having to drill. So thanks for mentioning it on this thread because that 3rd party little adjustable arm looks very easy to use.

I don't have air shocks anymore as I do heavy off roading now and simply wanted adjustable coilovers instead. But for the guys that do have them then this is a cool product. ;-)
 

Miekk

Full Access Members
Joined
Jan 9, 2012
Posts
156
Reaction score
32
Location
Madison Lake, MN
I love mine!

Sent from my LG-G6 using Tapatalk

That's great to hear! I've been happy with how they have been working as well. Thanks for purchasing "that 3rd party little adjustable arm", I'm sure that guys boys are happy they can buy new batteries for their RC trucks with a little extra money... :D
 

Ronnie_hud

Member
Joined
Dec 26, 2017
Posts
15
Reaction score
10
Location
Columbus
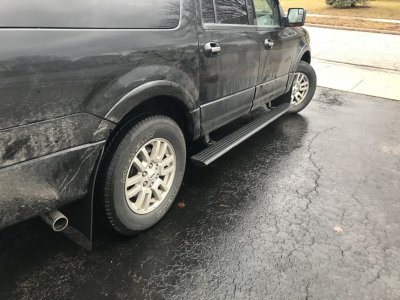
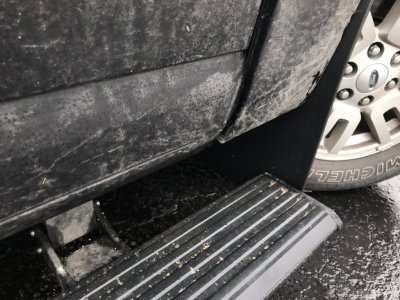
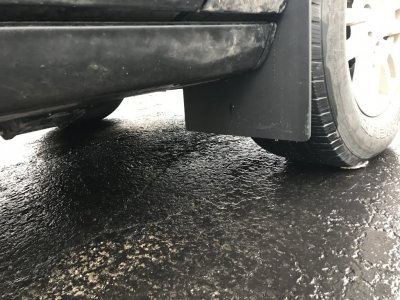
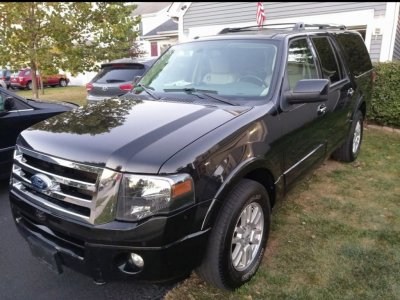
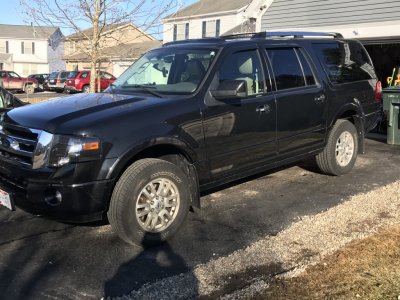
Got my 2 inch front pucks installed and ended up with 1 1/4 lift. Installed the adjustable link arms(thanks Miekk) and got 1 1/4 lift. I also installed DuraFlap mud flaps, wow great products all round. With the mud flaps help keep the electric running boards clean and snow free, while locked out.

The clean(washed) truck is after lift, the dirty pictures is before lift and after installing the mud flap.F89ACD8D-096E-4DF6-ABEF-A1009C4E09EA.jpegA919C50B-C7D1-469B-B774-8E4002DD8A3B.jpeg9691C862-4530-4A05-9FE5-91AEF9D4CEE4.jpeg6756191A-EB39-4D1B-8E59-17503045FDD0.jpeg606E6550-EFB9-4642-A831-9E3B54BD5DEC.jpeg
 
Top