You are using an out of date browser. It may not display this or other websites correctly.
You should upgrade or use an alternative browser.
You should upgrade or use an alternative browser.
Headlight weirdness
- Thread starter Markg2
- Start date
Disclaimer: Links on this page pointing to Amazon, eBay and other sites may include affiliate code. If you click them and make a purchase, we may earn a small commission.
Markg2
Full Access Members
2 trips to the dealer. First time they adjusted the low beams--didn't help. Second time they reset the housings, installed Sylvania bulbs and adjusted--didn't help. Service department acknowledged that the low beam projector is a design defect for the specific condition driving on dark, mountain roads--specifically downgrade.
While I consider alternatives, we set the lights on automatic. The lights did go hi-beam on the secondary, paved road but dropped to low-beam on the dirt road for the final ~2000' to our house (and she almost hit a deer). I checked the manual. One of the criteria for the hi-beam to actuate is speed. The vehicle must be traveling at least 32 MPH. The speed limit on paved road is 30 and on the dirt road 20. So much for 'automatic' lights!
While I consider alternatives, we set the lights on automatic. The lights did go hi-beam on the secondary, paved road but dropped to low-beam on the dirt road for the final ~2000' to our house (and she almost hit a deer). I checked the manual. One of the criteria for the hi-beam to actuate is speed. The vehicle must be traveling at least 32 MPH. The speed limit on paved road is 30 and on the dirt road 20. So much for 'automatic' lights!
The Ford Explorer with the projector headlights w/o HID is even worse. Uses a 9005 bulb (single filament) and a shutter for both low and high beam. With the stock bulb either low or high is abysmal. The Expedition at least has a separate high beam and keeps the low beam on with the high beam. My recommendation is to use the regular Sylvania Silverstar 9005 bulbs for the low beams. There is a significant improvement in the low beams and the regular Silverstars (not the Ultras) have a decent life span as long as you do not touch the bulb with your fingers or other body parts. Unfortunately the only Silverstars that fit the high beams are H11's which are 55w. The called for H9's are 65w. I have a set of Silverstar H11's, have not had a chance to compare them yet. I also have a pair of LED's on order to try out for the high beams. Will report back on my findings.
Markg2
Full Access Members
I suggested switching out the entire XLT housings for the Platinum housings since same uses LED's for the low beam and doesn't have the hard cutoff. The dealer needed technical direction from ford since there are more parts required than just the housing for the LED + such a change would likely require a software change/update.
The dealer was shutdown by Ford.
The dealer was shutdown by Ford.
Markg2
Full Access Members
And another important point. It sounds like you're able to replace bulbs fairly easily. The Expedition requires the removal of the entire front bumper and some parts under the hood. It took the mechanic ~2 hours to replace the bulbs!
Even if I could do the work I wouldn't since the vehicle is only 2 months old.
Even if I could do the work I wouldn't since the vehicle is only 2 months old.
The factory LED's are integral to the housings. My understanding is that the Platinum housings w/LED's require a wiring harness change. The only question that I have not found the answer for (AllData Pro does not have the schematics yet) is just how much of the harness needs to be changed. The two BMW's I have both use automatic leveling for the projector housings. That is the only real solution for projector headlights with their sharp cutoff. I have been extremely happy with the Silverstars as far as light output as a replacement for the low beams to the point that when someone that lives here is hesitant I will put in a spare set I keep to let them try them. Everyone that has tried them here ends up keeping them. It is not the perfect solution, just a big improvement. Unfortunately it still means dealing with the cutoff.
Markg2
Full Access Members
The service department knew that a different harness would be required just not the specifics + another module of sorts that would sit in back of the housing + the questionable software alteration. The service department 'assumed' the software would require work but was relying upon Ford to direct--which was not forthcoming.
No matter how bright the bulb it will only increase the light below the cutoff. When the vehicle goes downslope the horizontal line (depending upon the slope) can get cut in 1/2. I believe the Audi's had automatic levelers when they had projector type lamps. I believe they moved away from the design.
FYI, I had posted images previously in the thread of the diminished light on a downslope.
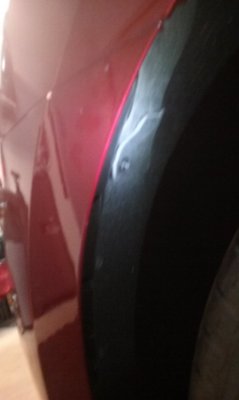
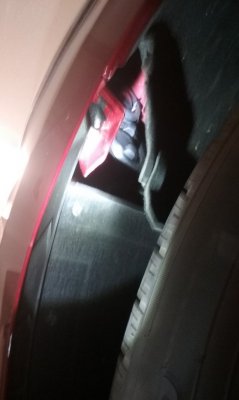
As far as bulb replacement on the Expedition, the bumper does not need to be pulled. I have a 2018 Expedition and can change either side headlight bulb, high or low beam, in fifteen minutes. A lot of mechanics have not figured that out yet. There is a seam in the wheel liner with a fold area on the upper liner right in front of the wheel. Remove the single screw on top of the fold line and fold the upper liner out to the the tire. The headlight bulb assemblies are right there.
Last edited:
I saw your pictures and agree wholeheartedly. The only plus is that the Expedition uses a reflector high beam which is way better than the Explorer. The Expy is not here right now. When it arrives I will try to post a picture of the bulb access area of the liner.
Use a 7/32nds or 5.5mm socket to remove this screw to gain access to the back of the headlight assemblies and change bulbs.

Pull the liner up, remove rubber covers and untwist bulbs. Unclip wire harness from bulb(may require two hands) and remove bulb. Installation is the opposite. Be careful not to touch glass portion of bulbs.


Pull the liner up, remove rubber covers and untwist bulbs. Unclip wire harness from bulb(may require two hands) and remove bulb. Installation is the opposite. Be careful not to touch glass portion of bulbs.
Similar threads
- Replies
- 0
- Views
- 534
- Replies
- 2
- Views
- 2K
- Replies
- 0
- Views
- 349
- Replies
- 1
- Views
- 191

