OP
OP
SkyJumper
Full Access Members


Disclaimer: Links on this page pointing to Amazon, eBay and other sites may include affiliate code. If you click them and make a purchase, we may earn a small commission.


all in all, I dig it. are you going to go bigger?


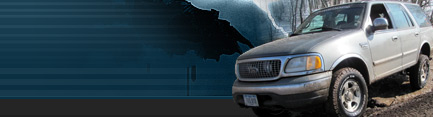
Well I kept looking at the front end and thought there was no definition or contrast for the grille. So I decided to paint the center section black to break it up and give it some separation. I also realigned the bumper to bring it up closer by another 1/2" to the grille. Looks better than the large gap that was there.
View attachment 3625
View attachment 3626
View attachment 3627
Before I start de-badging this Ex, does anyone know if the name plates on the fender and tailgate are just double-sided taped on or are they held on with the plastic pins thru the metal and taped? I do not want to take them off if they are going to be holes remaining after I take them off.
Fender and liftgate badges are all held on with double-sided tape, but have several alignment pins/holes. If you remove the badges, you will have holes showing.
Truck looks great! Thanks for all the pics!
Here are the spacers, I had to trim the original lugs down to prohibit any interference with the rim mounting on the spacer flush, and that was pretty much it.
View attachment 3602
View attachment 3603
quick question on the spacers...
ive heard good and bad things about spacers. ive heard there are a "good kind" and a "bad kind". my buddys mustang went three wheelin when his lugnuts snapped off because of the spacer he had.
are yours the "safer" spacers?
did that make sense? sorry for the poor word choice, lol