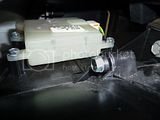
Popping Noise From Rear A/C Blower '03 Expo

Disclaimer: Links on this page pointing to Amazon, eBay and other sites may include affiliate code. If you click them and make a purchase, we may earn a small commission.

2003 Eddie

Member
Joined
Mar 19, 2010
Posts
11
Reaction score
0
Location
Milwaukee, WI
Blower noise

I have the same issue with my 03 5.4 EB, its annoying!.
Thank you for all of your posts, I'm going to work on it this weekend!
 

boozaro

Member
Joined
Mar 22, 2010
Posts
13
Reaction score
2
Location
California
Is this a design defect?

Sorry for being late to this thread, but I finally got around to fixing my rear A/C which has been out for months. Btw - great input and photos from all contributors. It made fixing my A/C pretty easy.

Since I was having the same problem, I opted to skip the $75 dealer part cost. Instead, I found a similar actuator (in a Lincoln Mountaineer) at the junk yard and used it for parts. All the gears inside my old actuator had teeth missing. So I replaced the gear with the new ones. Here's the kicker...I noticed that no matter which position I have the selector on (ceiling or floor vents), the motor in the actuator is always turning. So there is constant pressure exerted against the gears. This seems odd. But when I re-assembled the actuator and put it all together, everything works great. However, I'm thinking it's only a matter of time until that continuous pressure on the gear teeth is going to cause one/some to break off. Considering how many people have had this problem, maybe it's a design flaw...where the motor never actually cuts-out, and this is causing the problems. Or does my system have another problem somewhere else? NOTE: The only way (I know) to tell if your actuator is doing the same thing as mine is to take it apart and plug it in with the top off. This allows the motor and gears to "pop" (not click or grind) letting you know if the motor is constantly engaged.
 

hardrock

Member
Joined
Dec 5, 2009
Posts
18
Reaction score
0
Location
South Carolina
I went to the local junk yard and picked up a used motor for 15.00, swapped the gears and reinstalled it, no more clicking! I loosened the side panael and leaned it out, did not have to completely remove it.
 

ELVATO

Supporting Member
Supporting Member
Joined
Nov 25, 2006
Posts
2,637
Reaction score
30
Location
Orlando, FL
When I went to the junkyard, I just took a bunch of the motors apart and took all the gears. I think I ended with 3 or 4 sets of gears, and only paid a doller for them. If they see just random gears, they just think it's any random piece, instead of the whole actuator, which I'm sure they know about. That way, you can have a bunch of spares for a dollar or so.

As for the motor constantly engaging, I don't think that's what it does. Did you have it "connected" to the blend door, or just open in you hand? I think it keeps on going until it meets resistance (fully closed door).
 

2003 Eddie

Member
Joined
Mar 19, 2010
Posts
11
Reaction score
0
Location
Milwaukee, WI
I had the same issue on my 03.
Removed the cupholder and tray, grabbed an 8MM wrench, removed the 3 screws, put the new one in.
DONE IN 5 MINS...literally.
 

ELVATO

Supporting Member
Supporting Member
Joined
Nov 25, 2006
Posts
2,637
Reaction score
30
Location
Orlando, FL
Just would like to say that I have a couple extra sets of gears I got from the junkyard, in case anyone doesn't feel like going. Just reply here if you need some...
 

exodus125

Member
Joined
Apr 12, 2010
Posts
6
Reaction score
2
Location
Miami, FL
it would be cool to find a matching metal gears that would fit that. Then again, if they don't disengage that might destroy the motor. Very poor engineering if you ask me.
 
Last edited:

exodus125

Member
Joined
Apr 12, 2010
Posts
6
Reaction score
2
Location
Miami, FL
ELVATO was kind enough to mail me 2 sets of plastic gears. To pay it forward, I took a bunch of pictures while replacing the gears in my 2006 Frod Expedition XLT

Here is a small how to, which will hopefully help someone else on here with this problem.


Some of the pictures were taken as I reinstalled everything, so you will see some red fishing reel grease (which is all I had) on some of the pieces.

Begin by removing the cup holder and the tray to the right of the cup holder by prying with a flat screwdriver then pulling out.
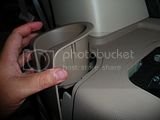
th_P1070142.jpg


Removing the two pieces should give you enough room to acess the screws you need to remove.
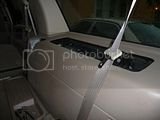
th_P1070123.jpg

The motor assembly containing the faulty gears is located under/behind the cup holder. 3 screws need to be removed, 2 in the front and one on the side. The side screw is easily accessed through the tray hole. I used a 5/16th ratcheting wrench and was able to get to all the screws with little problems. I would imagine using a non ratcheting wrench would take a while. A small ratchet would be fine too, but a wrench just fits better inside the tight space. Also, make sure you don't drop anything in there or you will make a 5 min job a 1 hr job.
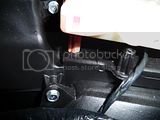
th_P1070128.jpg

After removing the three vertical scews that hold the white motor assembly inplace., the assembly will need to be pulled straight up, so that the gear rod that sticks out of it clears the opening its in.
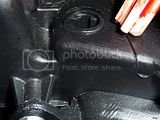
th_P1070131.jpg

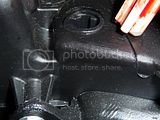
Here you can see the hole the gear rod slides into.
th_P1070127.jpg

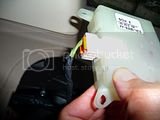
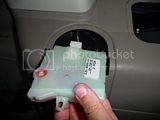
An electrical connection will have to be removed as well. This easily clicks in an out.
th_P1070105.jpg

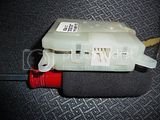
Next, you will need to use a small flat screw driver to GENTLY pry the clips which hold the case together. Take your time doing this, the last thing you want is to crack a clip. The gears are held in palce with the cover, so breaking any clips may have you needing to find a whole motor assembly. Gentle pressure is all that is needed and once the clips barely clear the notch that holds them, you can slowly work your way around the assembly and remove the whole cover.
th_P1070106.jpg

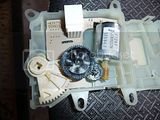
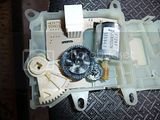
This is the motor assembly with the cover removed. The gears which tend to break are the two black gears (one large and one small). In my 2006 expedition, both gears had missing teeth. Make a mental note (or better yet, take a picture) of the gear positioning for when you re-assemble everything. I forgot how it went, but I used a picture I took before I touched anything. Make special note on the position of the beige gear because in order to re-install the motor, that will have to roughly match up to the hole in which it goes into. The rod has grooves which only fit inside the hole a certain way.
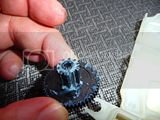
th_P1070110.jpg

Here is a close up of some of the missing teeth.
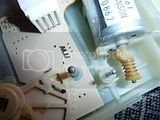
th_P1070114.jpg

Both gears removed. The gears just slide out of the metal pins they go mounted on.

th_P1070118.jpg

I re-greased everything with the only grease I had, high end fishing reel grease. I really don't think it will be any problem. Any grease will do. Make sure you smear a little on any moving parts, including under the beige gear. This will extend the life of all the parts.


Reassembly is in the reverse order.

(picture limit reached, continued on next post)
 
Last edited:

exodus125

Member
Joined
Apr 12, 2010
Posts
6
Reaction score
2
Location
Miami, FL
When I went to reinstall mine, the beige gear wasn't lining up to the hole it needed to go in, seen here:

th_P1070131.jpg

I ended up taking the cover off again and using the first picture I took of the motor assembly, I eyeballed what position it needed to be in. Then it fit well enough for me to scew it in place.

th_P1070106.jpg

I am not sure if you could just force the gears to turn so that the piece matches up, but it wasnt moving with gentle pressure, so I didn't want to damage the motor.

Test the A/C before you snap the covers on the cup holder and tray too.

Here are some more pictures I wasn't able to fit to the first post due to the 10 pic limit:

Electrical connector:
th_P1070126.jpg


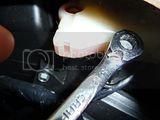
location of front screws There is one where the wrench is at and one to the right of the wrench on the opposite corner of the motor assembly.
th_P1070139.jpg

location of side screw, view is from tray opening to the right of the cup holder. You can see all three screws that need to be removed. Two are on the left of the picture and one is to the right of the picture, all vertical positioned screws.
th_P1070140.jpg


Hope this helps someone else.

THANKS AGAIN TO ELVATO for his generosity.
 
Last edited:

rptr00

Full Access Members
Joined
Jul 8, 2009
Posts
242
Reaction score
1
Location
Las Vegas
great writeup.

I recently had to replace this on my 04. The info shared on this forum has been a big help!
 
Top