MISTERgadget
Full Access Members
Now, a little bit more exciting stuff. In keeping with the idea of doing this right from the start, with a clear goal and the whole package in mind, next step was to make sure the rear was up to *****.
Our starting point is a 9.75" rear axle with the OEM limited slip and 3.73 gears. Very nice place to start, same as an 01-04 Lightning, so the plan was to replace the OEM diff with a TrueTrac, as the original units are known to wear out the clutches pretty easily, throw a prettier cover on, and take advantage while it's all apart to freshen up the bearings and put new seals on, fixing a leak the driver's side axle seal had.
With a TCE big-brake kit in the future plans (only available with 14mm studs), the idea was to put 14mm studs in the rear axles as well at this point, so in the future it has the 14mm studs all around.
Danny Fernandez at South Florida Muscle Cars handled the wrenching, fabrication, photography and put up with the smell of gear oil that was probably nearly 20 years old, so a heartfelt thanks for the attention to detail and passion that went into this.
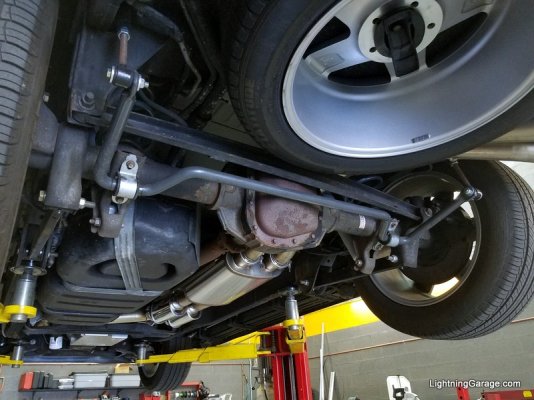
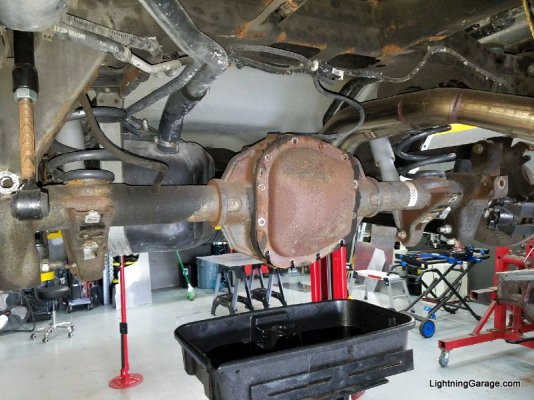
So, the first hiccup was evident right away - the rear axle bearings at some point had been worn out or damaged, and axle saver bearings installed. On an NPI 5.4 probably making a blistering 165rwhp, it's not an issue. For a performance setup, this needed to be addressed.
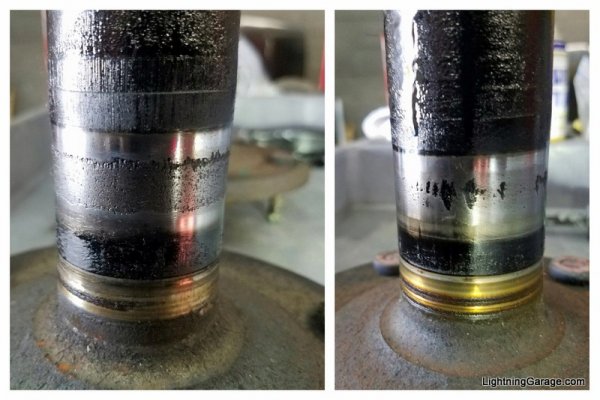
The solution was to go with new Yukon axles for a 2002 Expedition - this killed 2 birds with one stone. Fixed the axle problem and simplifies the 14mm stud upgrade, as the 02 axles are already setup and there wouldn't be any drilling required.
One thing to note, the diameter at the outer edge of the axles is smaller on the early 12mm stud axles compared to the later 14mm stud ones, so the outer bearing has to be for a 2002 model as well.
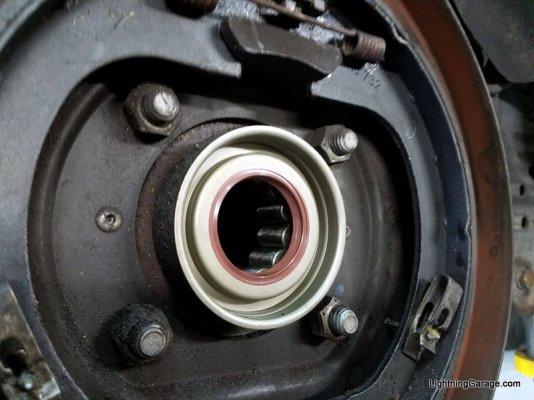
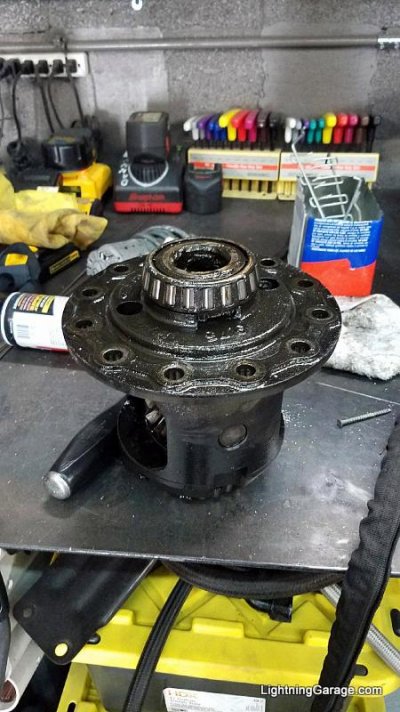
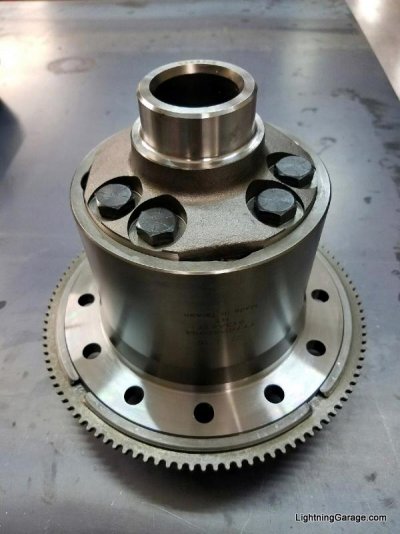
Truetrac diff went in along with the new axles, bearings and seals. Thank you Trac Loc, it's been a good 19 years!
Now, all buttoned up with the TA Girdle and a full-size spare (31.2" tire diameter), real estate is getting tight in the rear. No room for the OEM panhard bar, which can be seen is very tight to the diff cover looking carefully at the first picture of the rearend.
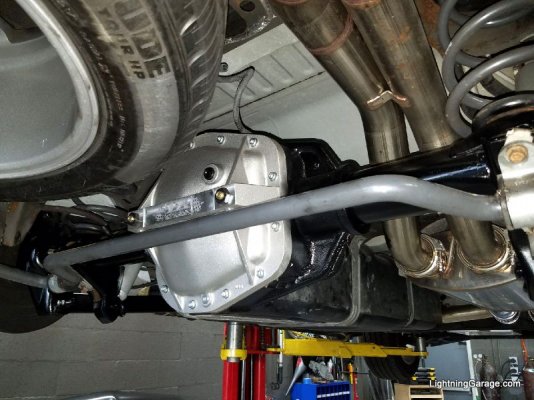
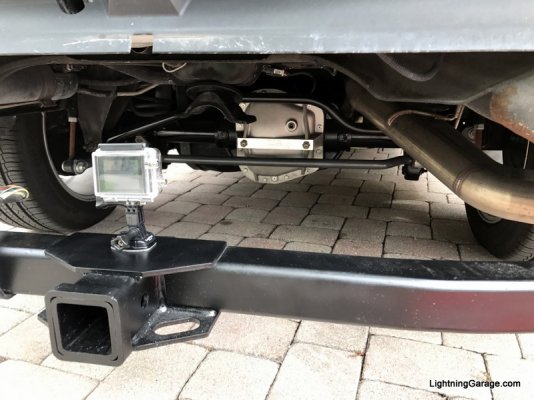
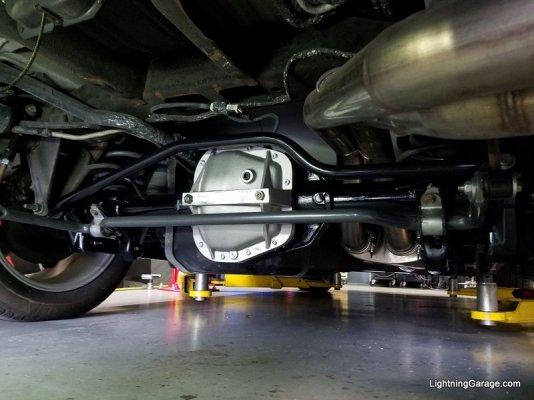
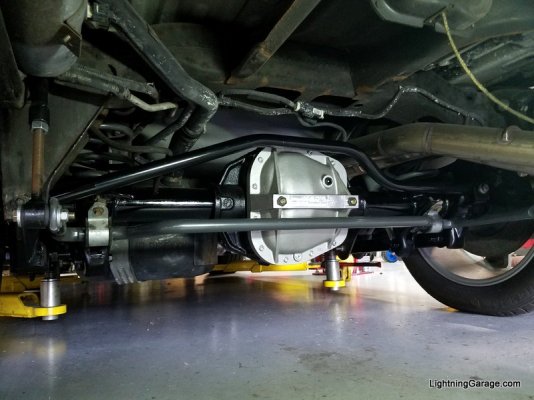
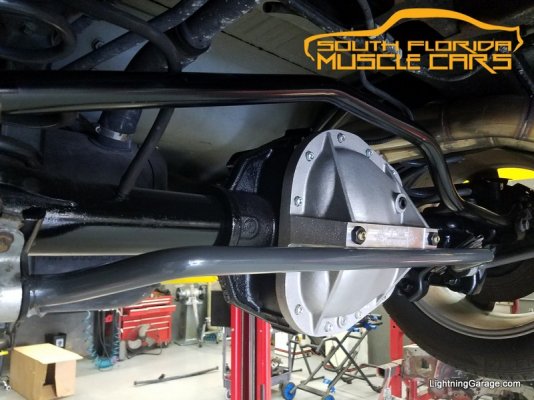
Danny to the rescue! A new custom chromoly panhard bar gracefully routed around the differential fixes the issue and makes everything cleaner and easier to work on.
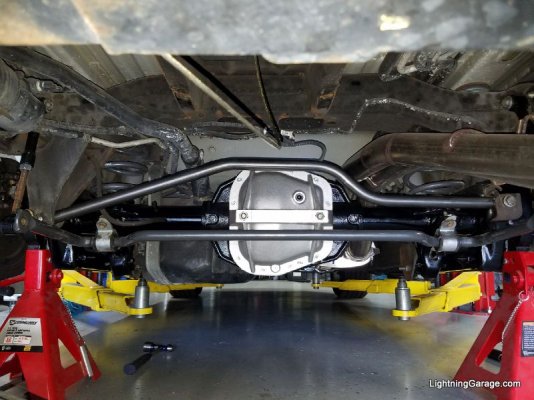
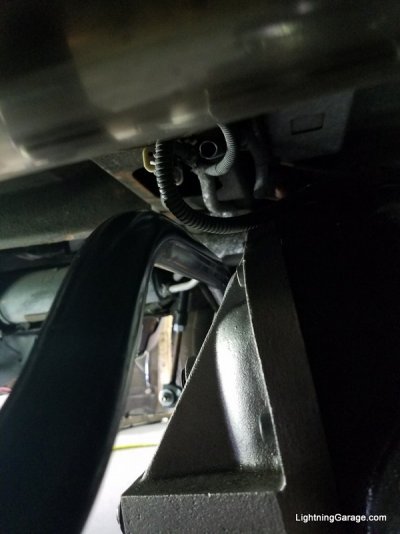
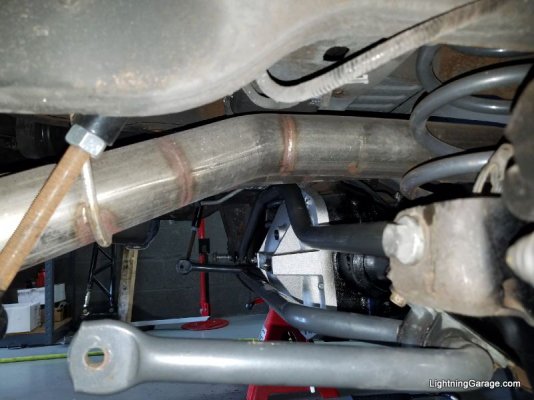
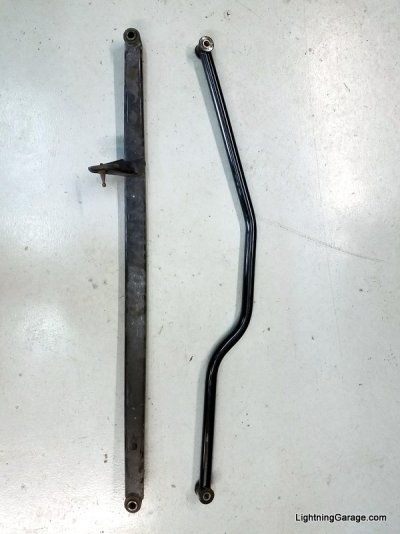
The custom panhard not only fixes the clearance issue, but also looks downright fantastic and the rearend looks sweet with the whole package and painted axle, TA cover and Belltech swaybar.
Our starting point is a 9.75" rear axle with the OEM limited slip and 3.73 gears. Very nice place to start, same as an 01-04 Lightning, so the plan was to replace the OEM diff with a TrueTrac, as the original units are known to wear out the clutches pretty easily, throw a prettier cover on, and take advantage while it's all apart to freshen up the bearings and put new seals on, fixing a leak the driver's side axle seal had.
With a TCE big-brake kit in the future plans (only available with 14mm studs), the idea was to put 14mm studs in the rear axles as well at this point, so in the future it has the 14mm studs all around.
Danny Fernandez at South Florida Muscle Cars handled the wrenching, fabrication, photography and put up with the smell of gear oil that was probably nearly 20 years old, so a heartfelt thanks for the attention to detail and passion that went into this.


So, the first hiccup was evident right away - the rear axle bearings at some point had been worn out or damaged, and axle saver bearings installed. On an NPI 5.4 probably making a blistering 165rwhp, it's not an issue. For a performance setup, this needed to be addressed.

The solution was to go with new Yukon axles for a 2002 Expedition - this killed 2 birds with one stone. Fixed the axle problem and simplifies the 14mm stud upgrade, as the 02 axles are already setup and there wouldn't be any drilling required.
One thing to note, the diameter at the outer edge of the axles is smaller on the early 12mm stud axles compared to the later 14mm stud ones, so the outer bearing has to be for a 2002 model as well.

Truetrac diff went in along with the new axles, bearings and seals. Thank you Trac Loc, it's been a good 19 years!


Now, all buttoned up with the TA Girdle and a full-size spare (31.2" tire diameter), real estate is getting tight in the rear. No room for the OEM panhard bar, which can be seen is very tight to the diff cover looking carefully at the first picture of the rearend.

Danny to the rescue! A new custom chromoly panhard bar gracefully routed around the differential fixes the issue and makes everything cleaner and easier to work on.


The custom panhard not only fixes the clearance issue, but also looks downright fantastic and the rearend looks sweet with the whole package and painted axle, TA cover and Belltech swaybar.


